Elevate your telescope images with easy smartphone edits
24 Jan. 2025
Astrophotography is one of the most rewarding ways to connect with the cosmos, capturing breathtaking views of distant galaxies, nebulae, and star clusters. With our range of smart telescopes, stargazing has become more accessible and user-friendly than ever. But what if we told you that the journey doesn’t end with capturing an image?
With just a few tweaks using your smartphone’s built-in photo app, you can enhance your telescope images in minutes, transforming them into stunning works of art.
This guide will walk you through step-by-step techniques to refine your celestial images without requiring advanced editing software.
Why edit telescope images?
While Vaonis smart telescopes like Vespera and Stellina capture stunning high-quality images, enhancing them on your smartphone can take them to the next level—perfect for sharing on social media or showcasing your work. Subtle details often benefit from adjustments to bring out their full beauty, especially when contending with light pollution or atmospheric conditions.
Editing allows you to:
-
Highlight faint features of nebulae and galaxies.
-
Adjust colors to match the natural beauty of celestial objects.
-
Correct minor imperfections caused by noise or gradients.

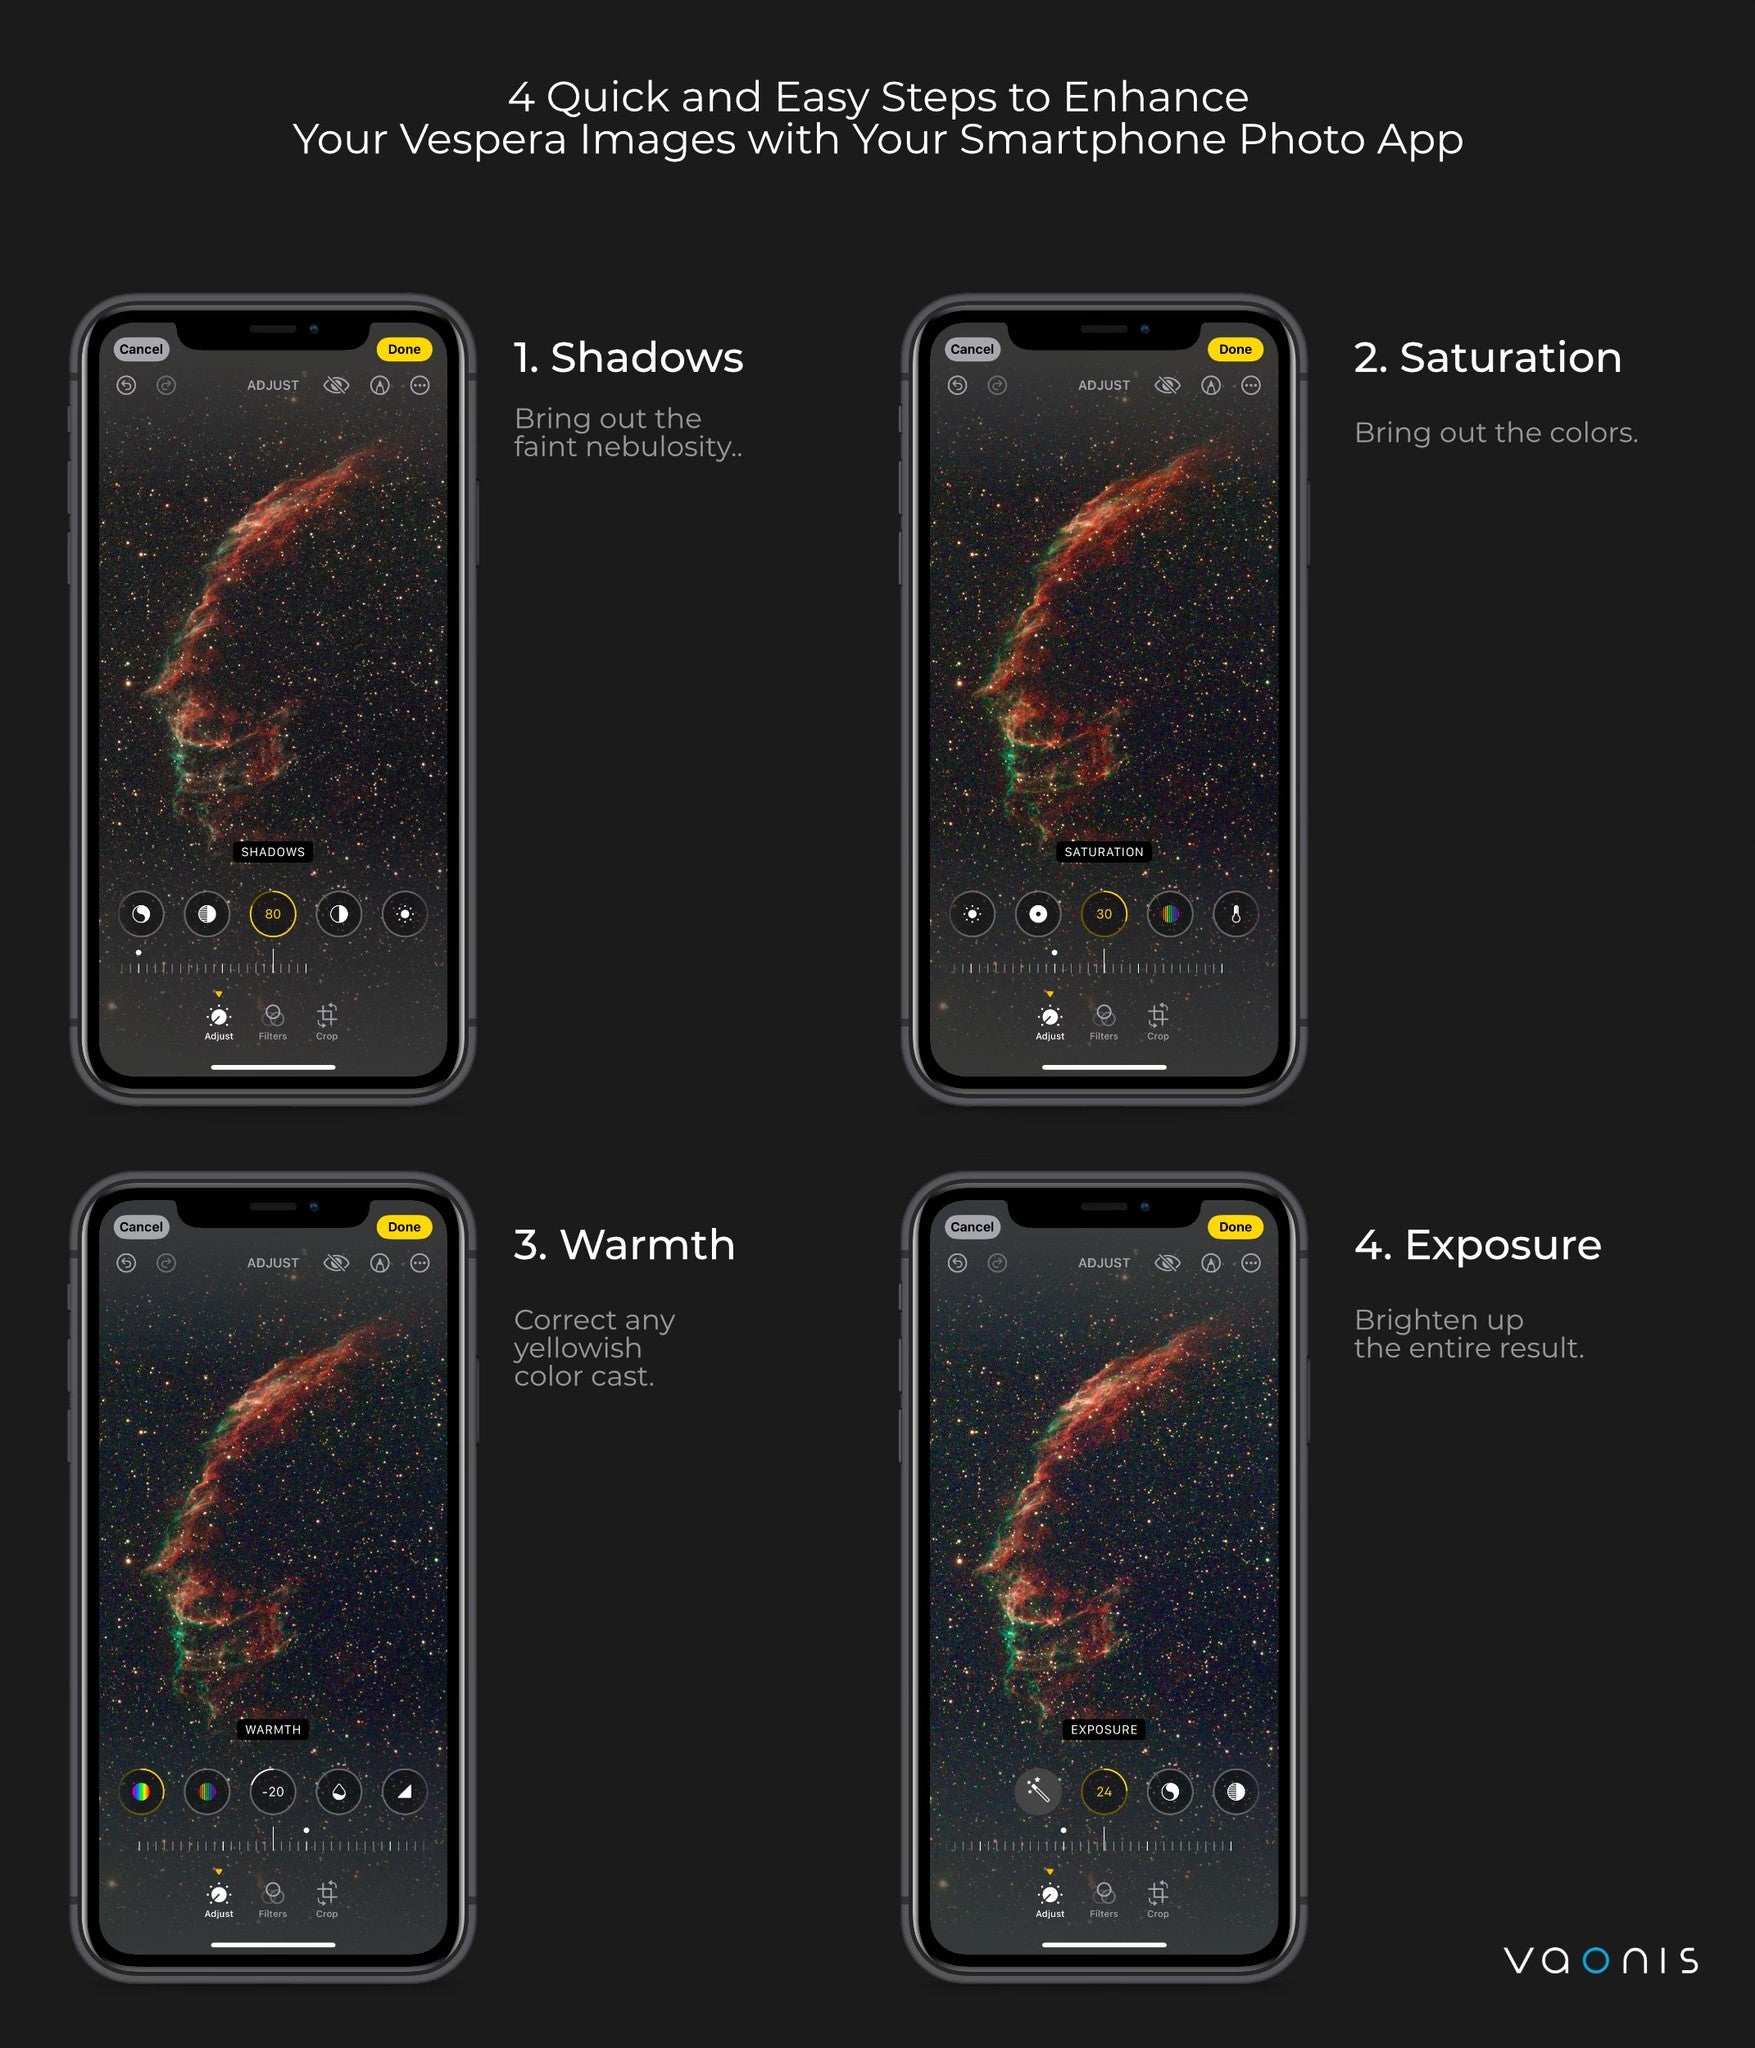
Step 1: Bring out the shadows
Nebulae and galaxies often have delicate, faint structures that are hidden in the shadows of your image. Increasing the shadows using your photo app will make these details more prominent, revealing intricate textures and shapes.
How to do it
-
Open your image in your phone’s photo app.
-
Look for the Shadows adjustment slider (often located under Edit or Light).
-
Gradually increase the shadows until faint regions of the nebula or galaxy become more visible.
Pro Tip
Avoid making the background completely black. A slightly brighter sky helps your celestial object blend naturally, creating a softer and more balanced appearance.
Step 2: Boost the colors (but keep it subtle)
Color is one of the most striking elements of astrophotography. Nebulae often exhibit brilliant reds, blues, and greens due to ionized gases, while galaxies can range from golden hues to faint bluish tones. Enhancing the saturation gently can make these colors pop without losing their natural charm.
How to do it
-
Locate the Saturation tool in your photo app.
-
Slowly increase the saturation to bring out the hues of stars and nebulae.
-
Focus on maintaining a natural look—avoid overly vibrant or unrealistic tones.
Pro Tip
Over-saturation can lead to unnatural results. If your nebula starts looking like a neon sign, scale back the saturation for a more authentic appearance.
Step 3: Correct the color cast
Light pollution and sensor limitations can sometimes give your astrophotography images a yellowish or greenish tint. Correcting this color cast can make your image look cleaner and more realistic.
How to do it
-
Open the Warmth or Color Balance tool in your app.
-
Adjust the slider to remove the yellow or green tint.
-
Aim for a neutral or slightly cool tone, depending on the celestial object.
Pro Tip
If you’re unsure about the correct color balance, compare your image to reference photos of the same object. This can help guide your adjustments.
Step 4: Brighten up with exposure
Even with a good capture, some images might appear dim or lack contrast. Increasing the exposure slightly can enhance the brightness of your subject and bring out more detail.
How to do it
-
Open the Exposure adjustment tool in your app.
-
Gradually increase the exposure until your subject becomes more vivid.
-
Avoid overexposure, as this can wash out details and create a flat-looking image.
Pro Tip
Brighten your image just enough to reveal hidden details without losing the subtle gradients in your subject.

What about noise?
Adjusting shadows and saturation often introduces noise—grainy artifacts that can detract from the overall quality of your image. While most smartphone apps include denoise options, they tend to blur fine details, which is less than ideal for astrophotography.
Recommended Tools for Noise Reduction
To achieve better results, consider using beginner-friendly software designed for astrophotography, such as:
-
GraXpert : a free astrophotography software for removing noise and also background gradients
-
Topaz Denoise AI: Known for preserving fine details while reducing noise.
-
Siril : A free specialized astrophotography software.
-
PixInsight: A powerfu tool for processing telescope images.
Stay tuned for an upcoming blog post where we’ll dive deeper into these tools and how to use them effectively.
Why Smartphone Edits Are Perfect for Beginners
Editing with your smartphone photo app offers an easy and accessible way to start enhancing your astrophotography images. You don’t need expensive software or steep learning curves—just a few minutes of tweaking can make a noticeable difference.
Plus, using your smartphone allows you to quickly share your enhanced images with friends, family, or your online community, spreading the awe and inspiration of stargazing.
Bonus Tips for Stunning Edits
-
Experiment with Contrast: Slightly increasing contrast can make your image look more dynamic by emphasizing the difference between bright stars and dark regions.
-
Try Vignette Effects: Adding a subtle vignette (darkening the edges) can draw attention to the central object.
-
Work on Composition: Cropping your image to center the subject can enhance its visual impact.
Conclusion: Bringing the Universe to Your Fingertips
Astrophotography doesn’t have to be complicated. With a Vaonis smart telescope and a few simple adjustments in your smartphone’s photo app, you can create incredible images that capture the beauty of the universe.
From unveiling faint nebulae details to correcting color casts, these easy steps empower anyone to transform raw telescope captures into polished masterpieces.
So why wait? Start exploring these techniques today, and let your creativity shine as brightly as the stars.
Do you have any tips for enhancing astrophotography images? Share them with us in the comments or join our Vaonis Community to exchange ideas and inspiration.
Clear skies and happy editing!


