

Saving, sharing and editing Vaonis smart telescope images
09 Jun. 2020
Three methods are available to save, share, and edit the results of your observations.
ABSTRACT

The HorseHead Nebula captured with Vespera. Image processed from the exported file in 16-bit TIFF. Image credit: Sébastien Aubry
For a better understanding
STELLINA and VESPERA run a real-time image stacking process. While you are observing a celestial body, the smart telescope keeps capturing new images and adds them to a “stack” to build up the final image you are visualizing. This is a commonly used process in astrophotography. Its goal is to improve the quality of the final rendering by reducing noise (a spurious signal generated by the electronics of any sensor that is randomly distributed over the image) and by highlighting the faint areas. For this reason, the longer you observe, the more the image quality improves, as shown in the video below.
fig.1: As your observation keeps progressing, STELLINA improves the image quality in real-time.
In this article, we will call each individual image that is captured and stacked together a “frame”.
Other than the very first image displayed when the observation station starts capturing, you can’t see the unstacked single frames, but only the image built up from all the pictures that have been added to the previous stack. However, it is possible to retrieve all the single frames for a specific use, as you will see later.
Each single frame refers to an exposure of ten seconds (unless you specify another setting). When the Singularity App recommends an observation time of 30 minutes (1800 seconds), this means you will have to collect 180 ten-seconds exposures (1800 divided by 10).
Note: The Moon, the planets, and the stars available via the Stellinapp object index are displayed live. There is no stacking done on these objects.
1. JPEG for instant results: save or share what you see on your screen
Overview
The image displayed on your smartphone or tablet is the result of the stacking process carried out by the smart telescope software in real-time. Our image processing algorithms automatically improves image quality and help enhance the details.
How to save the file?
Click on the “Image” icon on the top right corner of the Capture tab. You will get several options (figure 2).
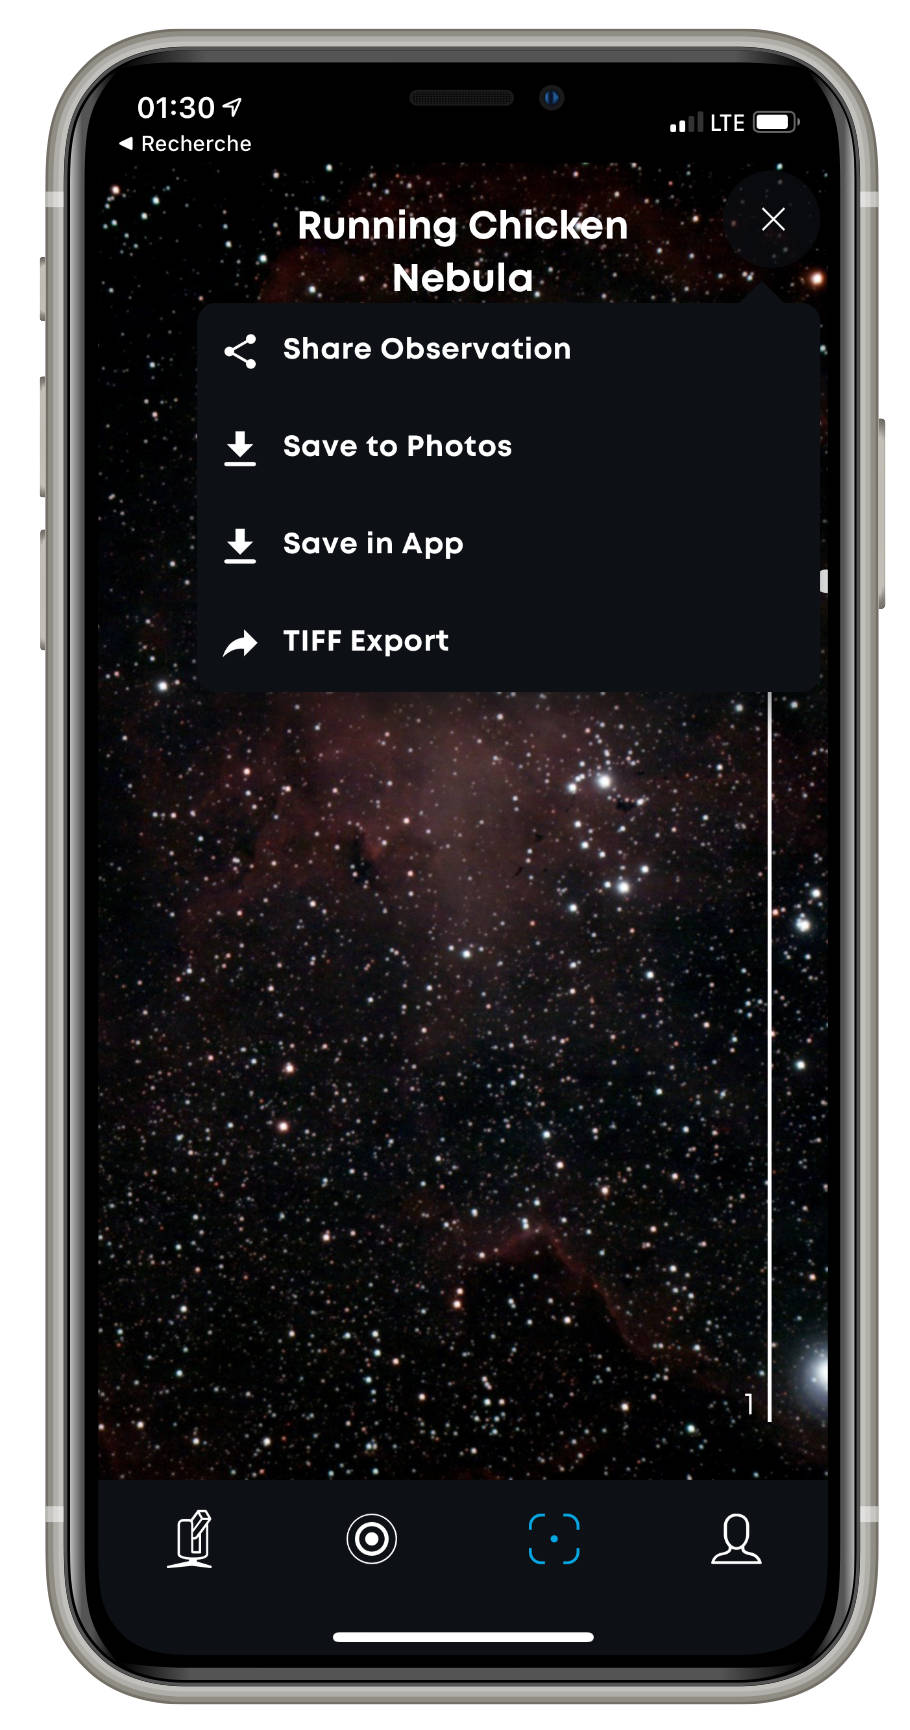
fig. 2: The Image menu and its export options
You can:
- Share Vespera and Stellina images currently displayed right on social networks,
- Save the image in Singularity,
- Save the image into your mobile device’s photo album.
If you plan to edit or share the image later, we recommend that you save your photo in your device.
You can save your smart telescope images at any time during your observation. You can also automatically save all generated images by plugging a USB memory stick into the battery compartment (for Stellina) or into the telescope internal memory ( Vespera).
How to use the file?
After your observation, you may be tempted to edit your image to improve the colors or try to bring out more details.
In case you want to edit the image in a graphics software, please note that the actions you can perform are limited and may degrade the image quality. There are several reasons for this:
- Jpeg images have already been processed.
- Images are saved in JPEG format: in order to reduce the weight of this well-known format, a digital digital compression is applied. This compression leads to barely perceptible changes to the pixels of the image. Running a deep processing on a JPEG image will bring out those imperfections (sometimes called “compression artifacts”) and eventually degrade the image quality (Figure 4).
In order to get a better image than what you see on the screen, Singularity offers a second format you can use to pursue manual image processing: TIFF files.

Fig. 4: Zooming in on the detail of an image. On the left: raw image – On the right: JPEG compression where artifacts appear (for example, around the stars).
2. TIFF for manual image processing: raw images you can edit by yourself
Overview
While you are observing, STELLINA automatically processes the captured images to provide you with bright, high-contrast, and detailed rendering.
However, the celestial objects you can observe, whether they are star clusters, galaxies or nebulae, have different features: they are more or less bright, more or less contrasted, with variable colors and show fields more or less dense with stars.
As Vespera and Stellina applies automatic processing on the images, it is not possible to handle each object’s specific feature. However, it is often possible to get better quality images by running out the image processing by yourself. This requires some learning and time, but the experience is fun, and the results can be very satisfying.
Figure 5 – Comparison between the image displayed on the screen and the result of TIF export processing.
As stated above, the images saved with the previous method can only be slightly improved. Stellinapp offers you an alternative option: the ability to export the image of your observation in a format suitable for advanced image processing: the 16-bit TIFF.
Note: This format is not available for the Moon, planets and stars available via the Stellinapp object’s index.
How to save the file?
To activate this option, you must first enable it in the app. Go to Profile > Gear icon > Settings > Enable TIFF export (figure 6).
You’ll now see the TIFF export option when clicking on the Image icon in your Capture tab during an observation.
The TIFF files will be saved on the internal memory or USB stick each time you click on “TIFF export” during the observation. Alternatively, you can save it in the photo album or a folder of your mobile device, transfer it directly to your computer or send it via email if you have an Internet connection. When you stop your observation, the smart telescope save a TIFF file as well.
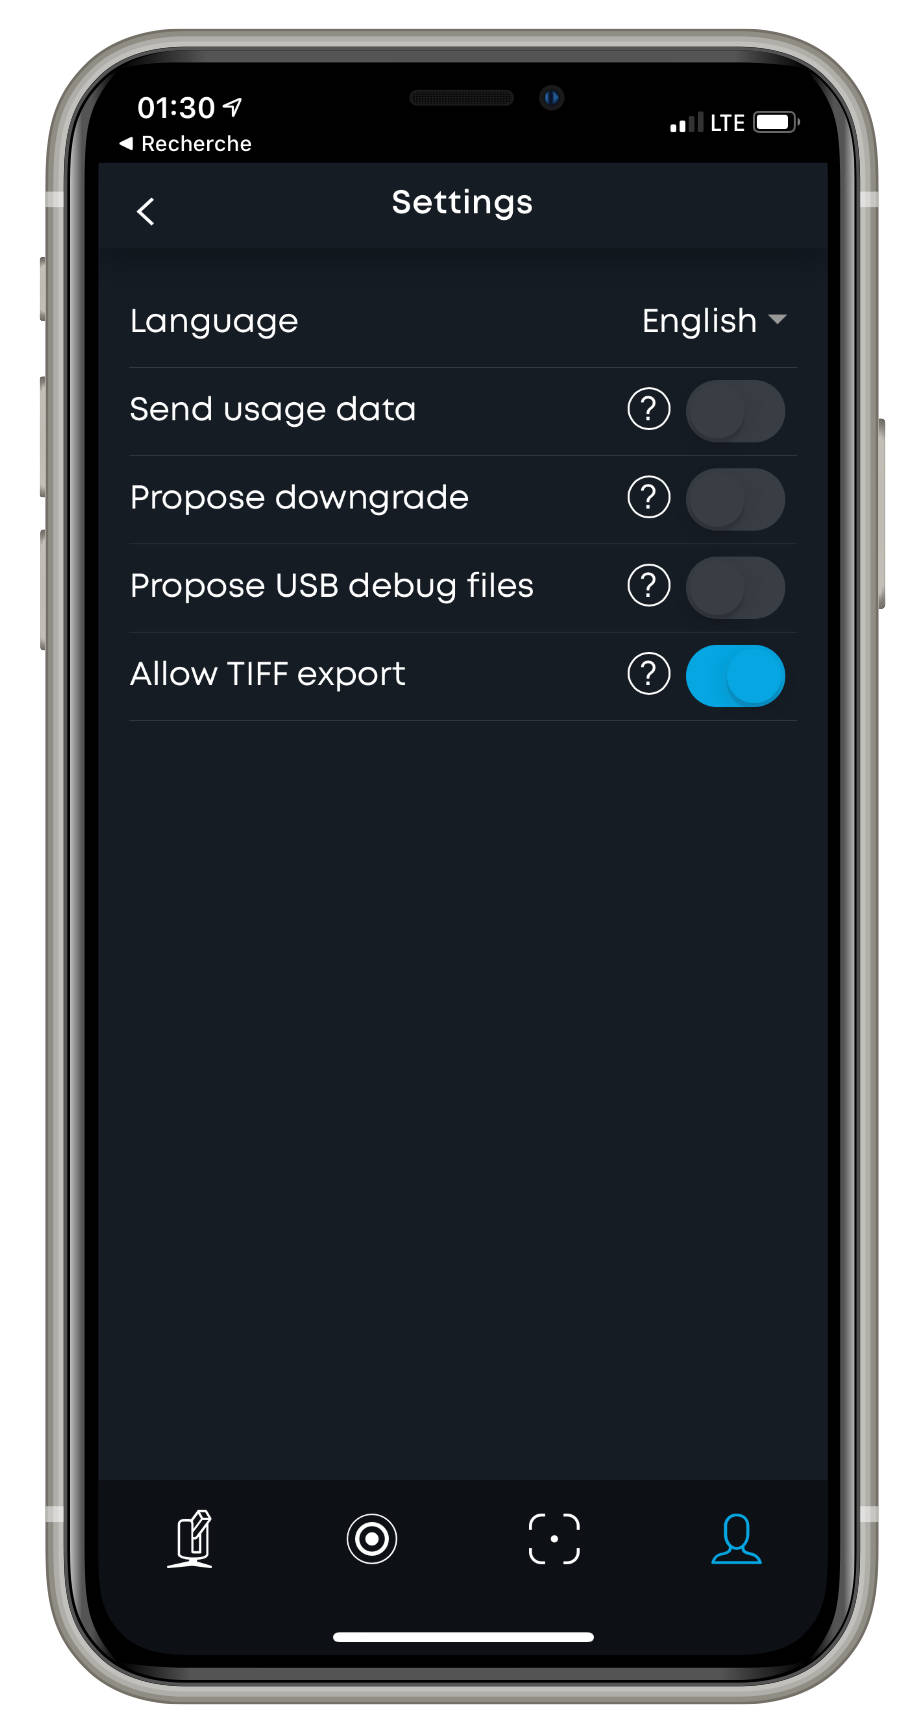
fig. 6 : TIFF export options in STELLINA settings.
How to use the file?
The TIFF export allows you to retrieve an image which is the equivalent of a RAW file for a DSLR camera. The telescope will automatically stack the single frames, but its image processing algorithm won’t apply and the image will remain untouched. It is raw data. The image is not compressed; therefore, the file size is more significant. It also has a higher dynamic range (number of different shades that can be rendered): 16 bits versus 8 bits for a JPEG file.
The TIFF file can be edited with any graphic design softwares such as Photoshop, Gimp, Affinity Photo, Luminar. You can also use this type of file with astrophotography dedicated software such as PixInsight.
3. FITS for astrophotography experts: stack and process raw images yourself
Overview
The images retrieved with the previous methods are a result from the automatic stacking process performed by the smart telescope in real-time during an observation.
It is possible to automatically save each single frame that builds up the stack. The purpose of this method is to manually stack the unit images by yourself to have better control over the process. This action can be performed with software dedicated to astronomical image processing such as Deep Sky Stacker.
The automatic stacking is elaborated. For example, it rejects single frames which do not comply with the required quality (tracking issues, wind, vibrations…). When it comes to saving the FITS files, the rejected frames will also be saved, allowing the users the option of using them or not.
Yet, processing the FITS files manually requires much experience and good knowledge of astrophotography. If the manual stacking is not correctly done, the final image may have a lower quality than the TIFF export made by STELLINA. Besides, it takes several hours to process.
How to save the file?
The FITS files are saved on a USB drive (Stellina) or in the internal memory (Vespera). Go to the instrument widget and choose “file format”. Then select “RAW images ( FITS)”.
The automatic saving of FITS unit images can generate a huge amount of data. If you plan to capture several celestial objects in one night or to make very long exposures, we recommend you purchase a USB drive with at least 32 GB.
Note: This format is not available for the Moon, planets and stars available via the Stellinapp object’s index.
How to use the file?
The FITS format is widely used in amateur astronomy, as well as in the scientific field in general. Its distinctive feature is to be able to store “visual” as well as other information. However, this type of file is not usually supported by standard graphic design software and can only be opened with specific astrophotography software.
About “dark files”
During the manual stacking process, astrophotographers commonly generate images called “darks” in addition to images of the star itself. Darks are pictures taken while the telescope aperture is obstructed so that no light can reach the sensor. One would expect to get a completely black image (hence the name “dark”). Actually, this type of image contains a weak signal generated by defects of the sensor. For example, it can be hot pixels. The signal of the “darks” is subtracted from the images of the celestial body. Proceeding this way removes the glitches generated by the sensor on the final image.
Does Vaonis smart telescope take darks?
During your observation, Vespera and Stellina does not generate darks by default. When the telescope automatically applies its algorithms, it uses a predefined dark pattern that characterizes the sensor’s spurious signals and does other corrections through various processes.
If you wish to use “dark” images in your manual stacking process, you will have to capture them by yourself by activating the “expert mode”.
In a nutshell:
| JPEG | TIFF | FITS | |
|---|---|---|---|
| Audience | All | Intermediate | Expert |
| Processing | Automatic | Manual, to be done | Manual, to be done |
| Stacking | Automatic | Automatic by STELLINA | Manual, to be done |
| Compression | Yes (destructive) | No | No |
| File size | About 1 Mb | from 20 Mb to 150 Mo (CovalENS) | from 13 to 24 Mo |
| Backup | Smartphone, tablet, internal memory, USB stick | Smartphone, tablet, computer, internal memory, USB stick | internal memory, USB drive |
| Softwares | Any photo editing software | Photoshop, Affinity Photo, Luminar … | DeepSkyStacker, Registax, PixInsight, SIRIL, IRIS … |


