In the past two years, comets like Neowise, Atlas or the current C/2022 E3 ZTF have caught the attention of amateur astronomers. The Stellina and Vespera smart telescopes work well for imaging these objects, but it needs some preparation in the planning and some effort in processing the images to get the best result.
We have broken down this How to article in three steps to cover the basics of how to image a comet or an asteroid and create a good and correct image of it.
1. How to find the comet
2. How to set up the Manual Mode in Singularity App
3. How to process the images
1. How to find the comet
The first step is to know where in the sky the comet is located at the moment. Comets and asteroids are objects that change their position in the sky as they roam through our solar system. Stellar objects such as nebulae or galaxies are always at the same place on the star map, even if they are not always at the same place from our observing position on earth.
In order to enter the right spot to launch an observation into the Singularity App, we need the so-called J2000 coordinates of an object. An easy way to find them is to use online tools such as The Sky Live. The website provides an overview of comets (along with other objects) that are currently observable. Click on a comet to get details.
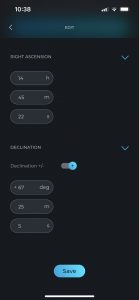
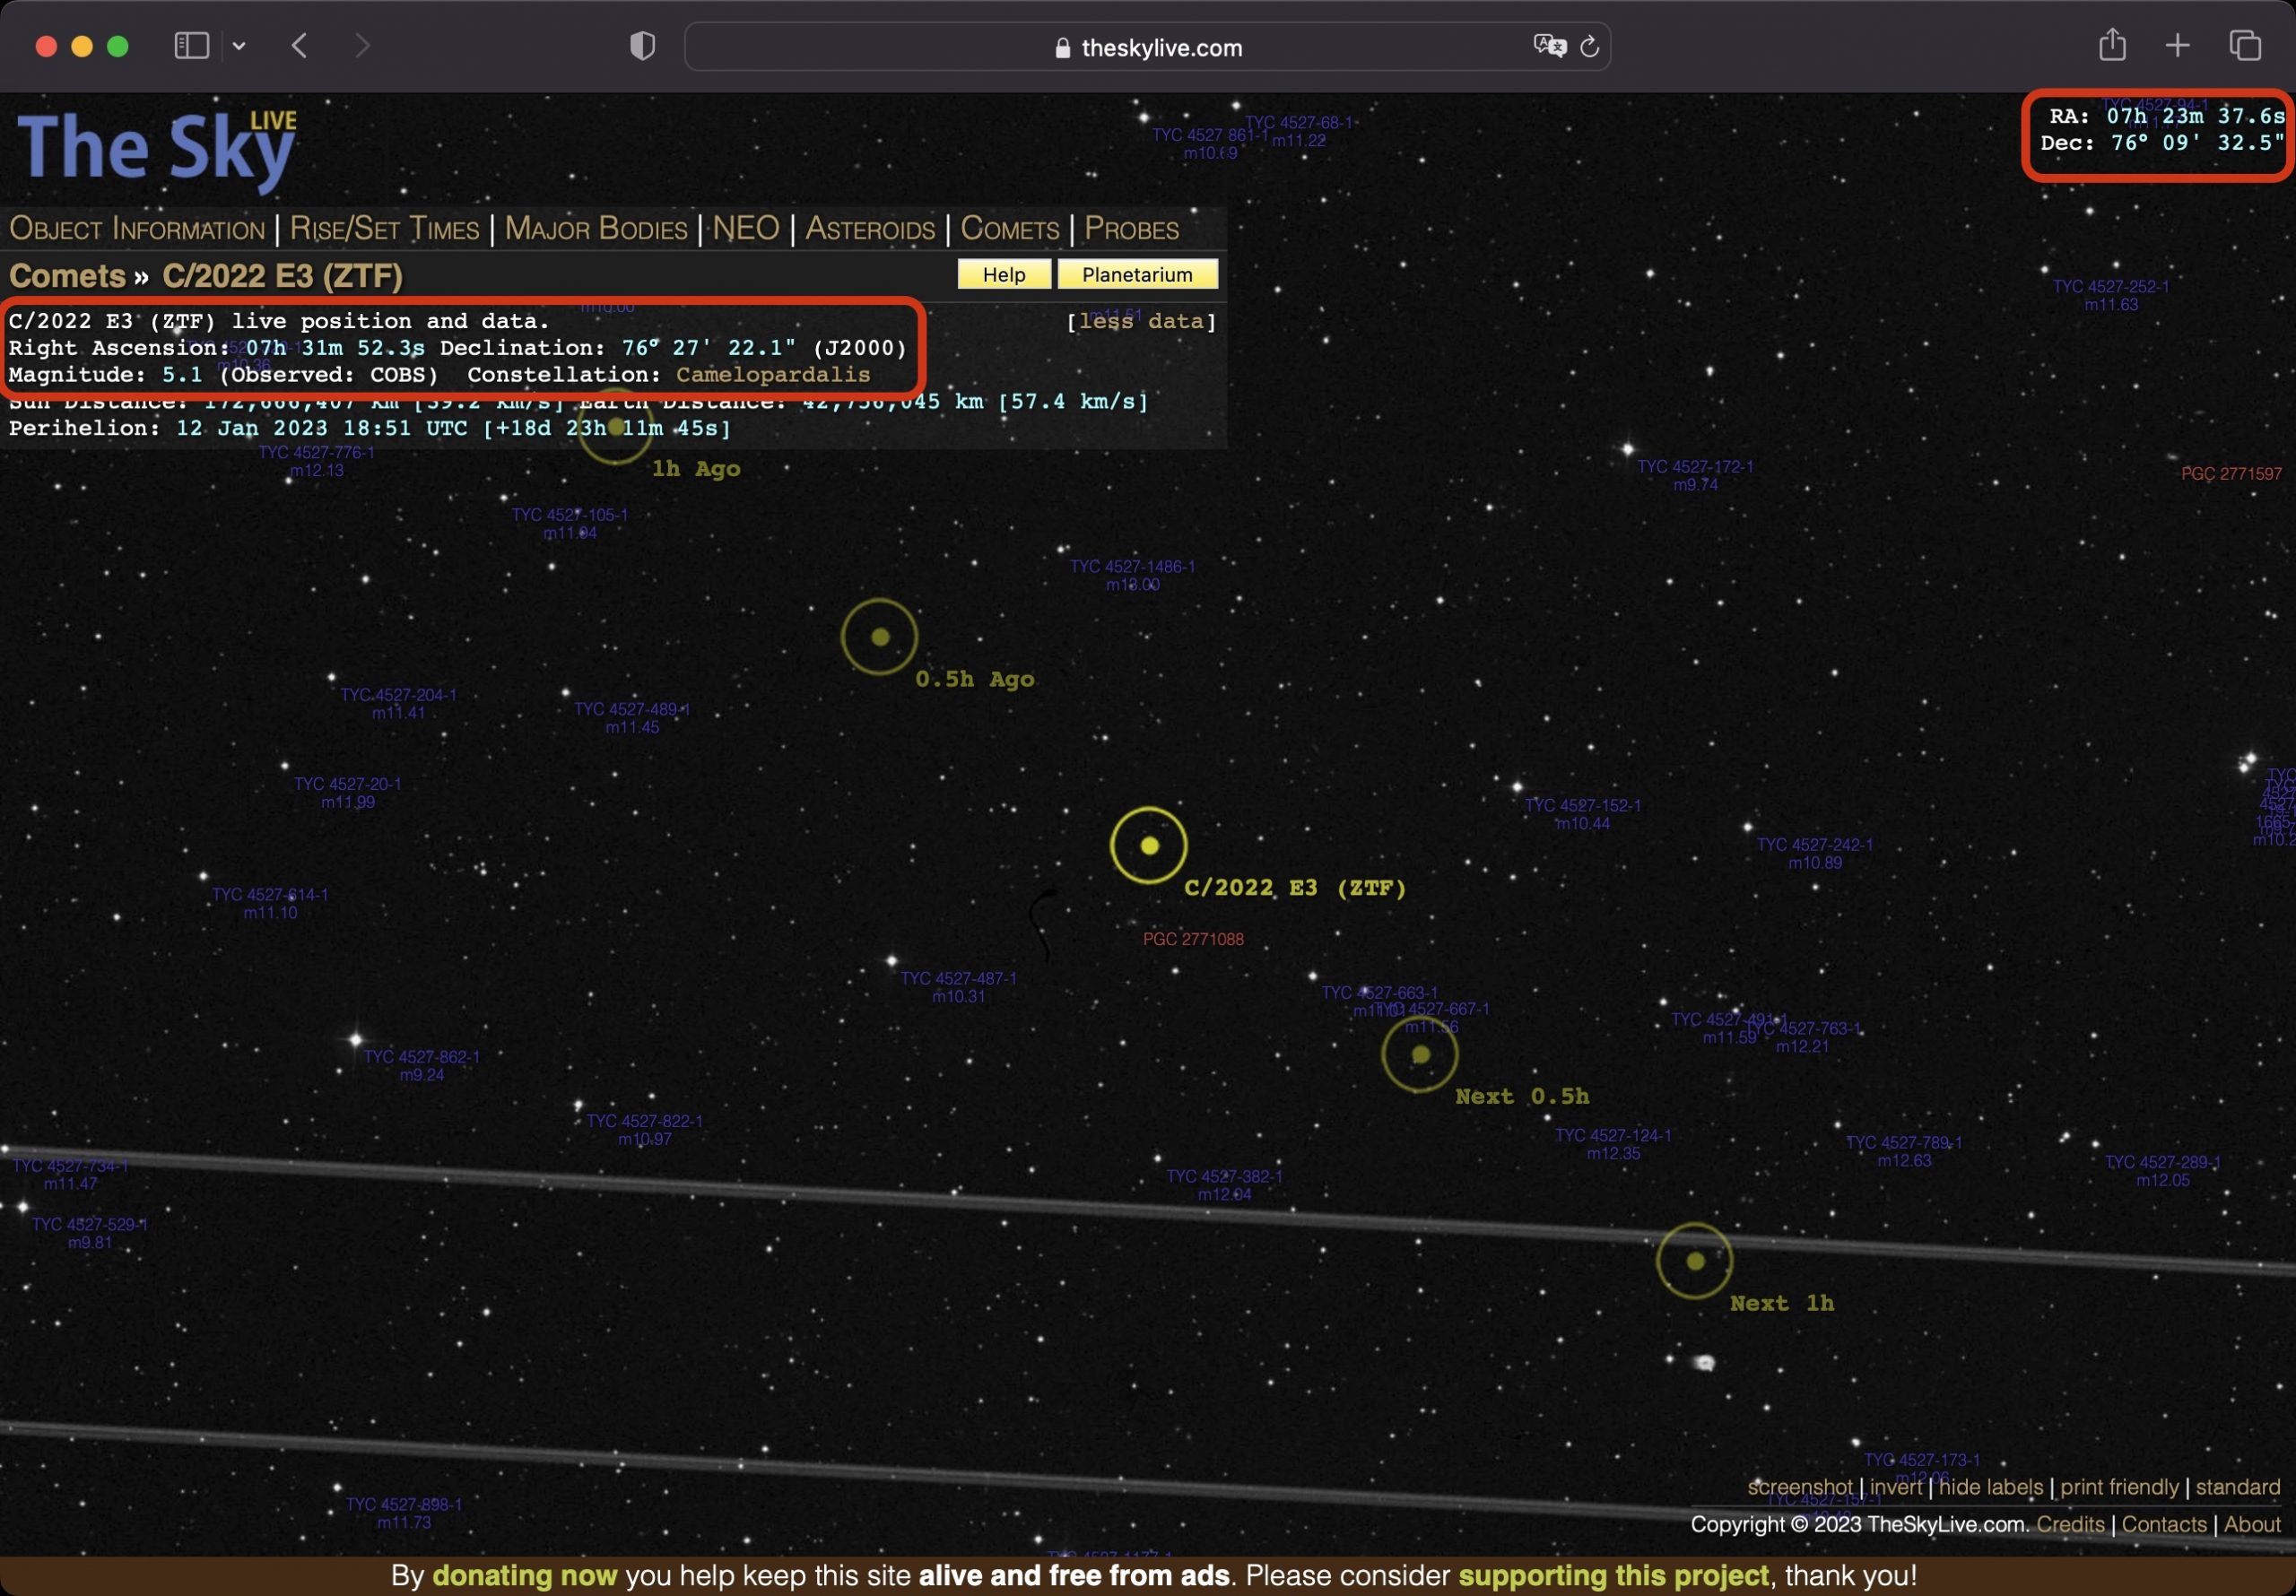 For us, the information of “Right Ascension” and “Declination” is important:
Right Ascension: 14h 45m 22.4s
Declination: 67° 25′ 05.9″ (J2000)
You will see that the values change slowly over time as the comet moves through the sky. So it is important to check the coordinates when you start your imaging session.
A second way to plan your nights is to use the free software Stellarium.

It is available as Desktop App for Windows, MacOS, and Linux as well as a mobile version for Android and iOS. The benefit for this app is
that you can set the focal length of your telescope (Vespera 200mm, Stellina: 400mm) and the sensor data to get a preview of the field of view of your telescope.
You then need to add the data of the comet to Stellarium as shown in the image. Once this is done you can search for the comet’s name to get it shown on the star map. On the left side of the screen, you will see a lot of information about the object, including the J2000 coordinates that we need.
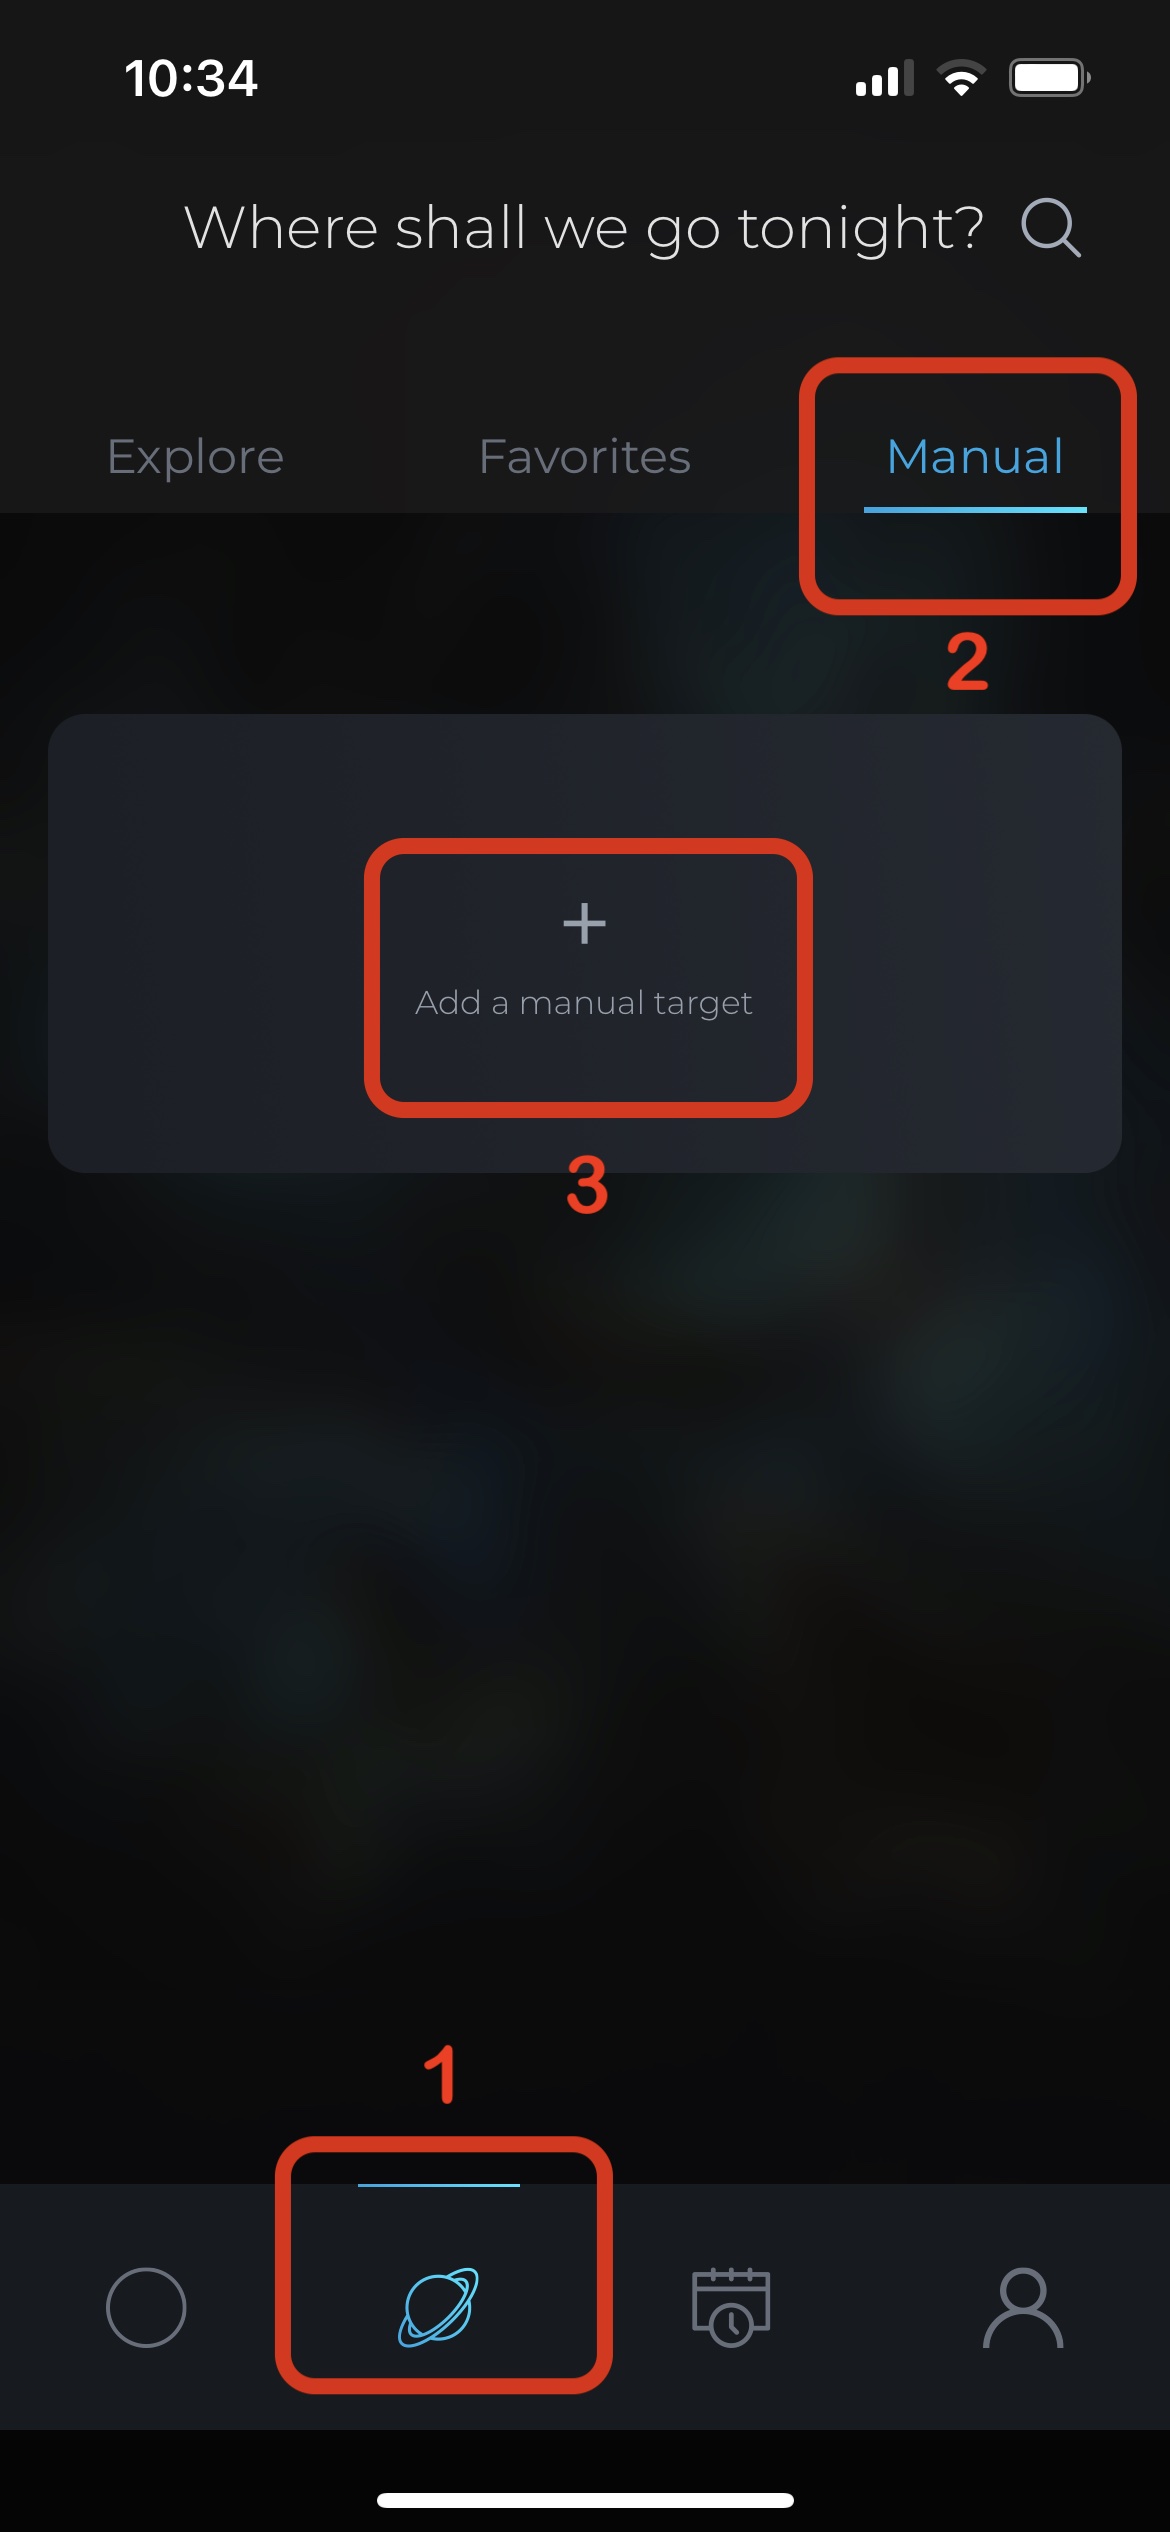
2. How to set up the Manual Mode in Singularity App
The next step is to actually take images of the comet. As comets are not yet part of Singularity’s database, we need to use the manual mode.
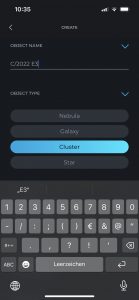
Go to the Catalog tab at the bottom of the app and select Manual.

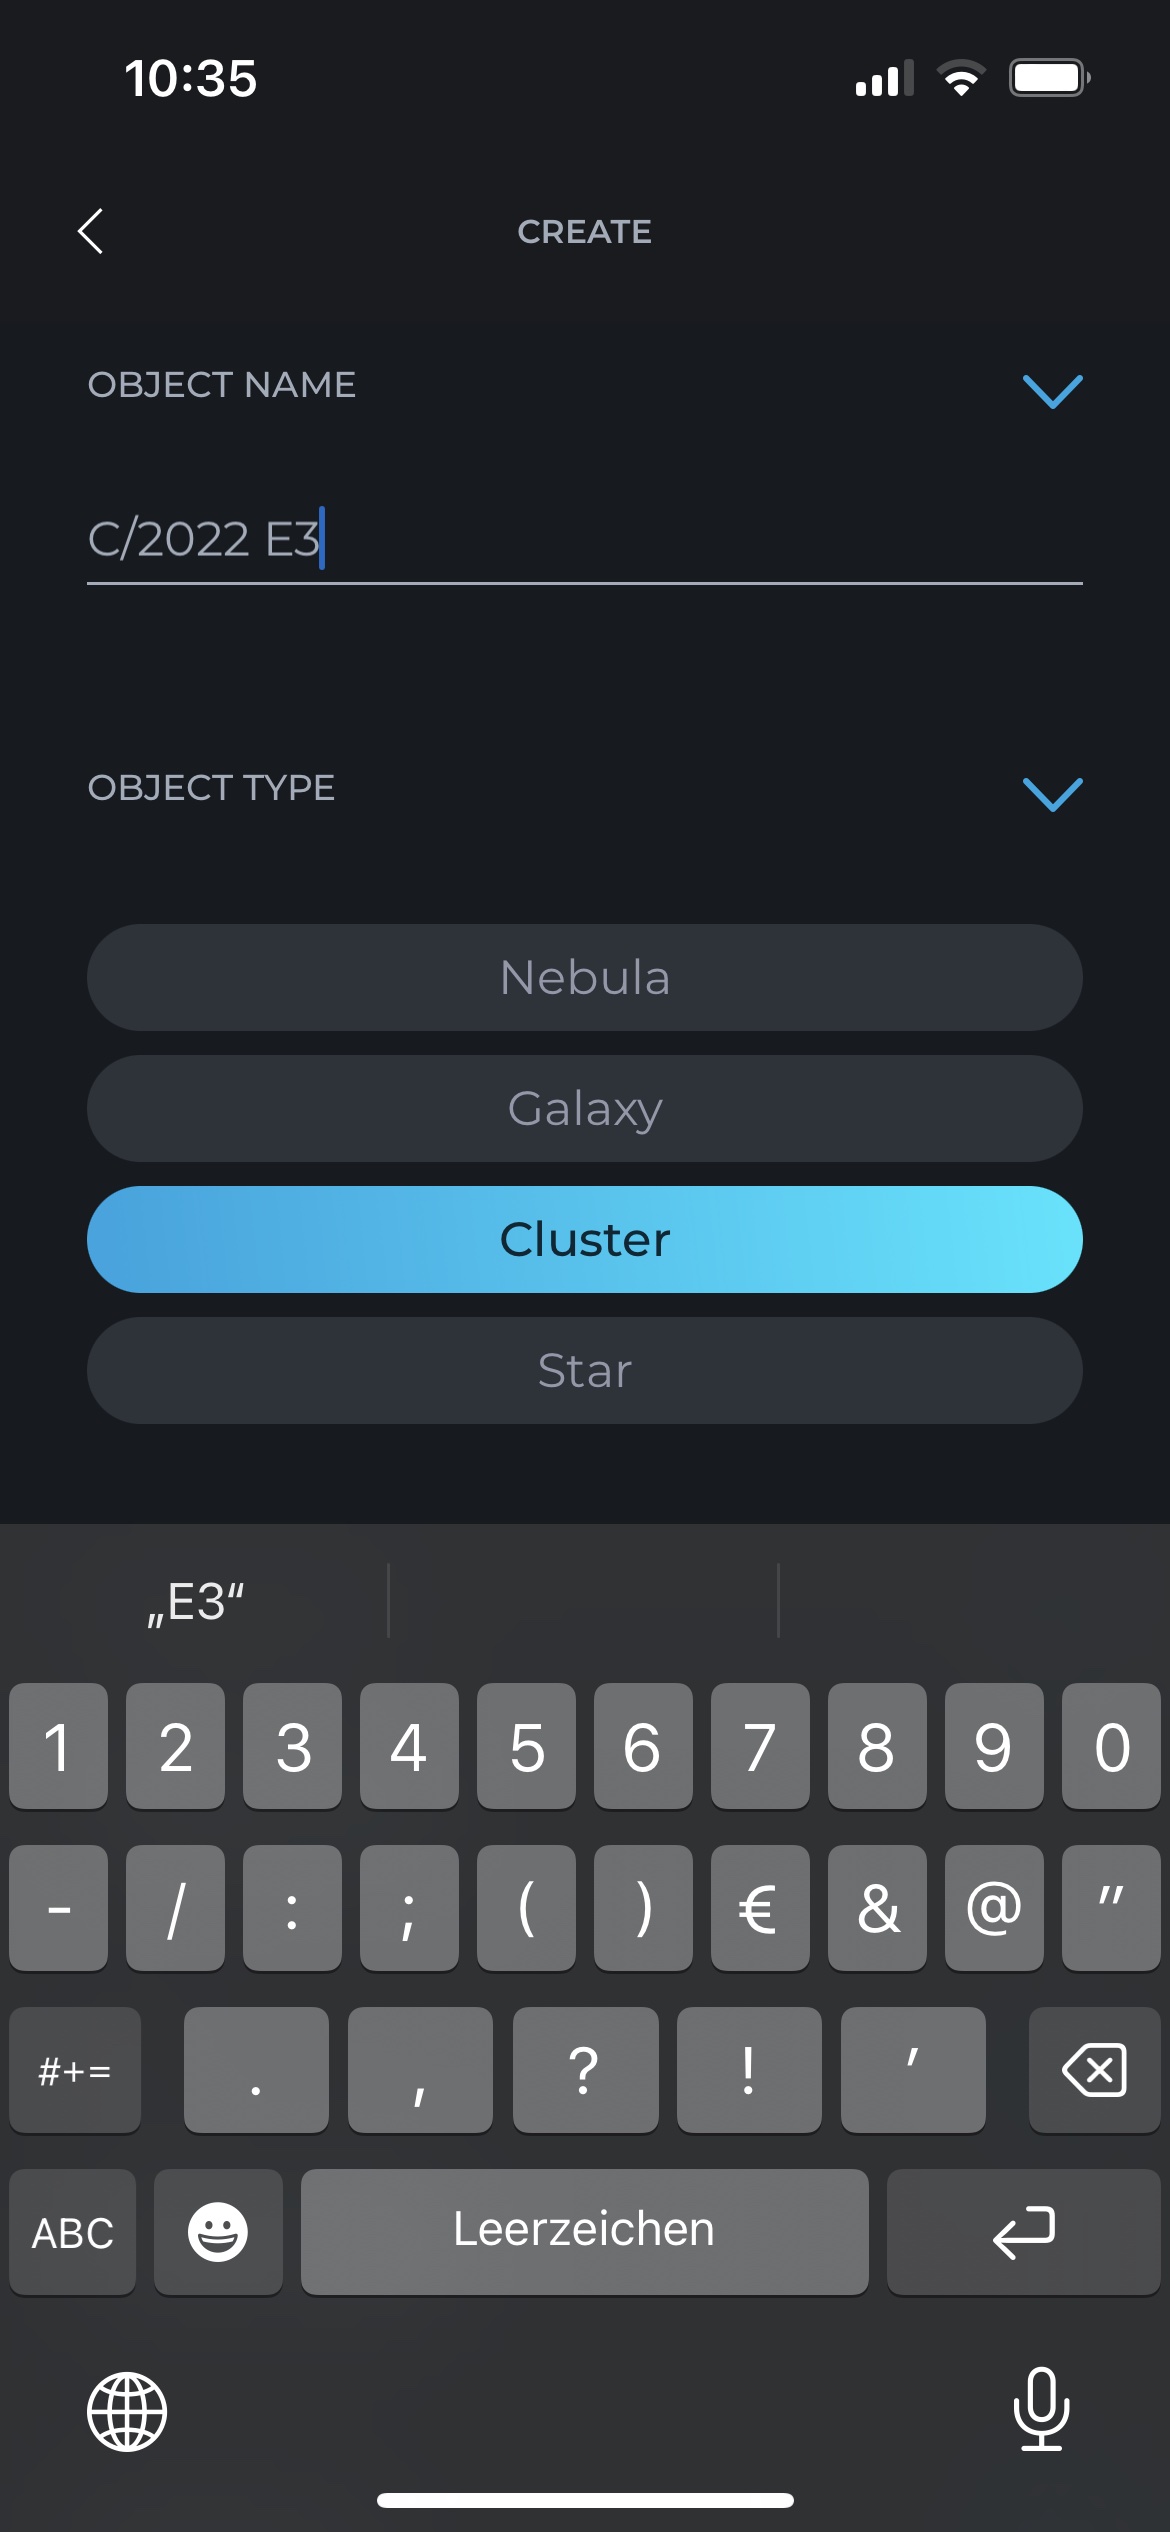
Enter the name of the object (e.g.: C/2022 E3).
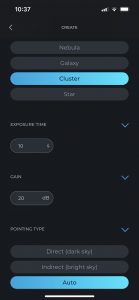
As comets are quite bright compared to nebulae or galaxies, choose Cluster as the object type. Don’t select “Star” as this will use the live tracking mode like with sun observations and you don’t get a stacked image and also only JPEG exposures saved instead of the FITS files that we need later.
You can leave the default exposure time at 10 seconds or change it up to 15 seconds. Leave the Gain setting untouched (20 dB) and the Pointing Type as well (Auto).
Enter the coordinates found on Stellarium or The Sky Live website as shown in the picture and hit the Save button at the end. You can prepare this already before you connect to your Stellina and Vespera.
Before you start, you should also check that FIT files are enabled in the settings of Singularity’s app.
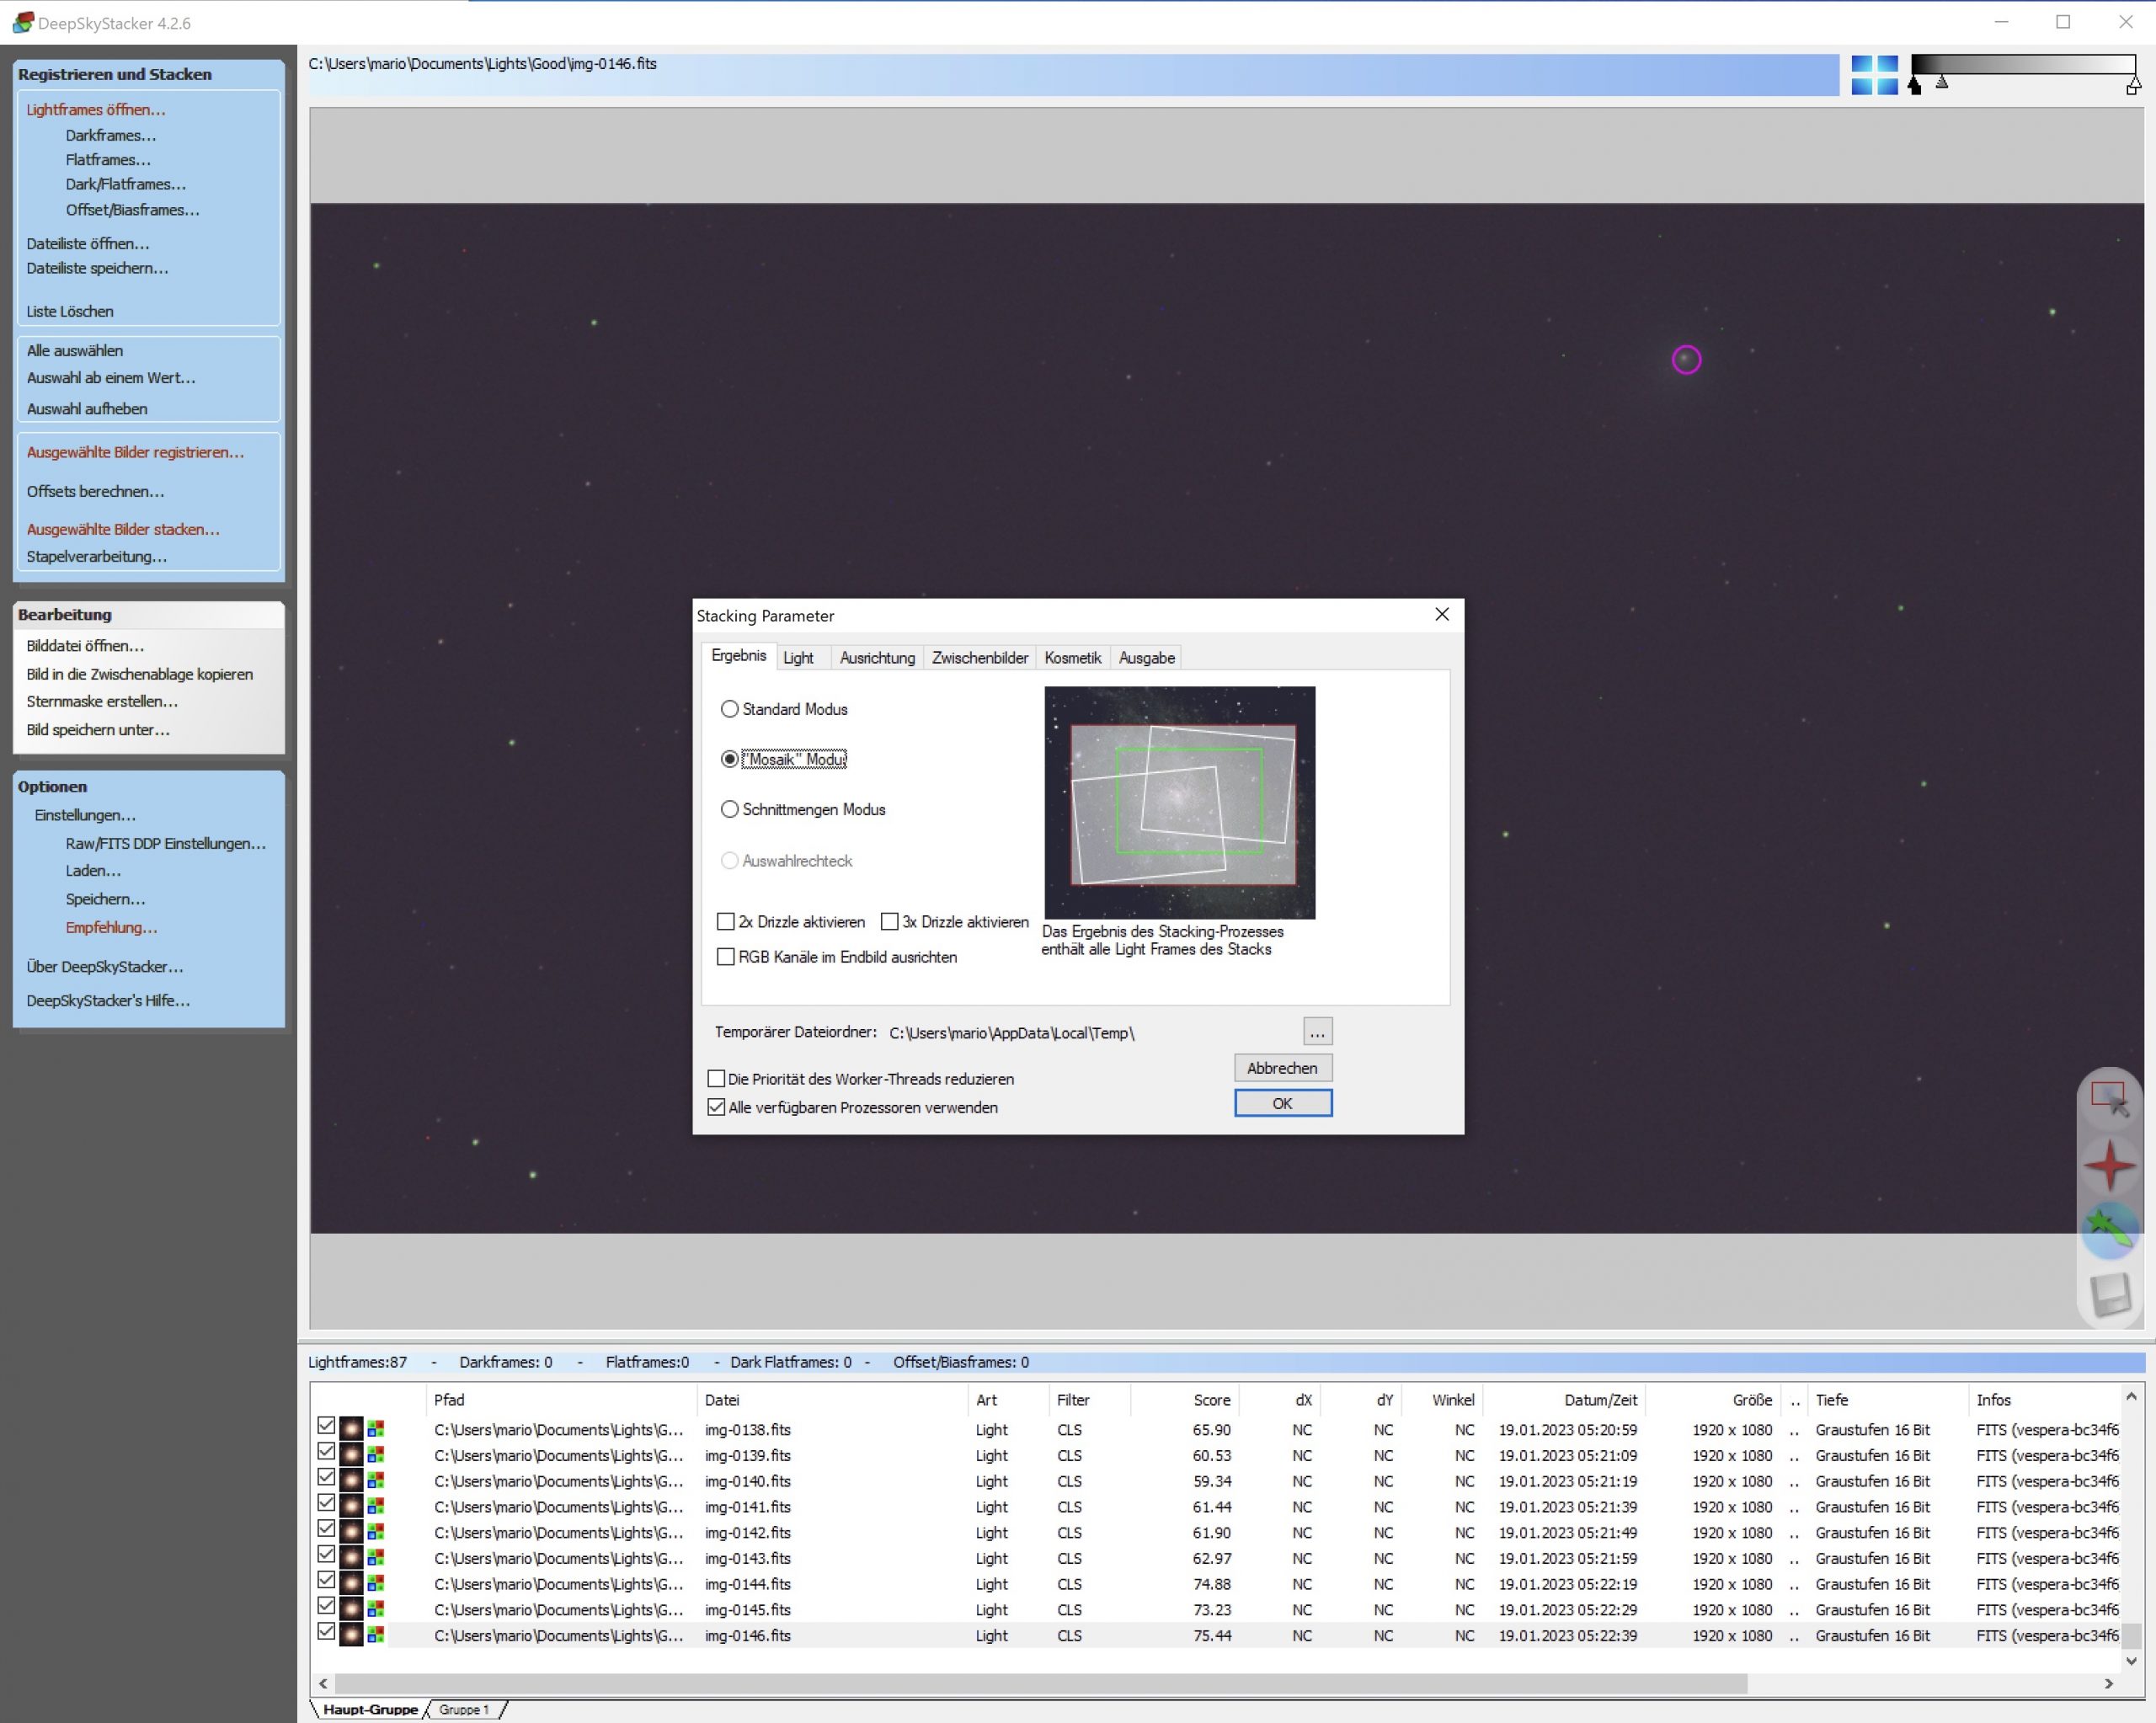
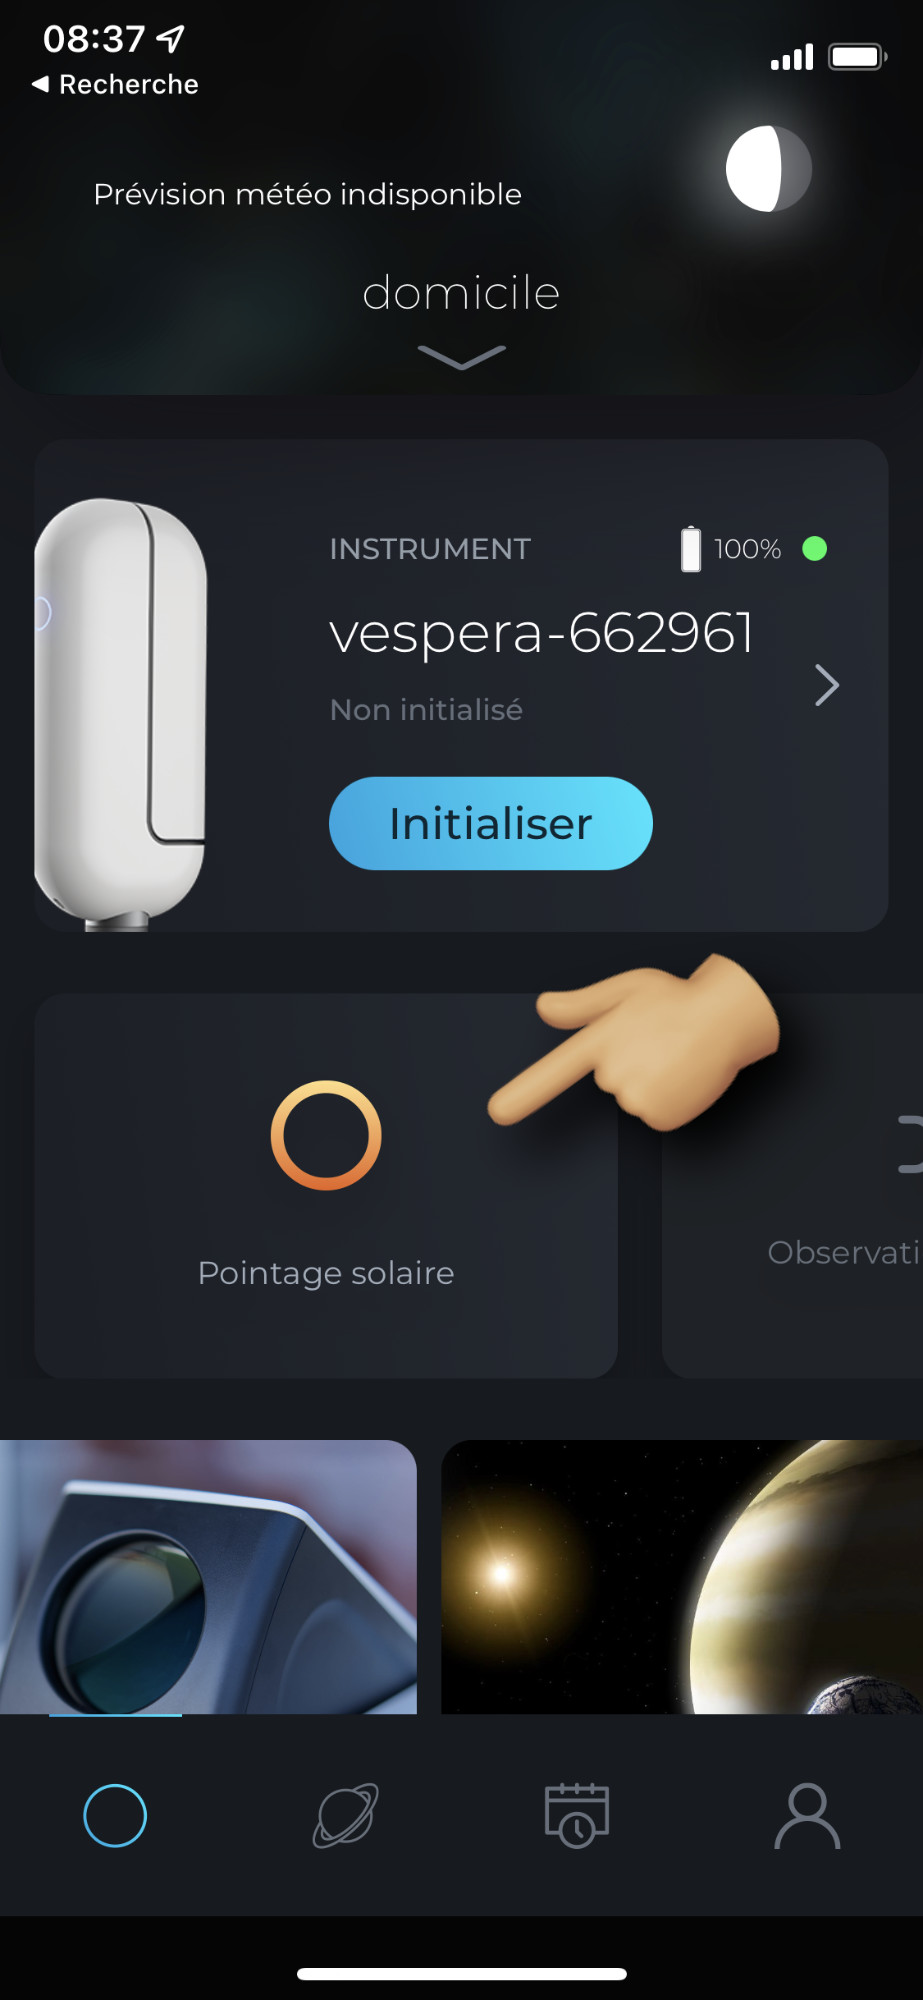
To start your session, initialize your telescope as usual and select the manual mode for the objects after the telescope is initialized. You can directly start the observation or choose the mosaic mode for a wider field of view. Especially if the comet has a bright and long tail, it might be worth taking the extra time for a mosaic, but it will create some additional effort in the processing steps.
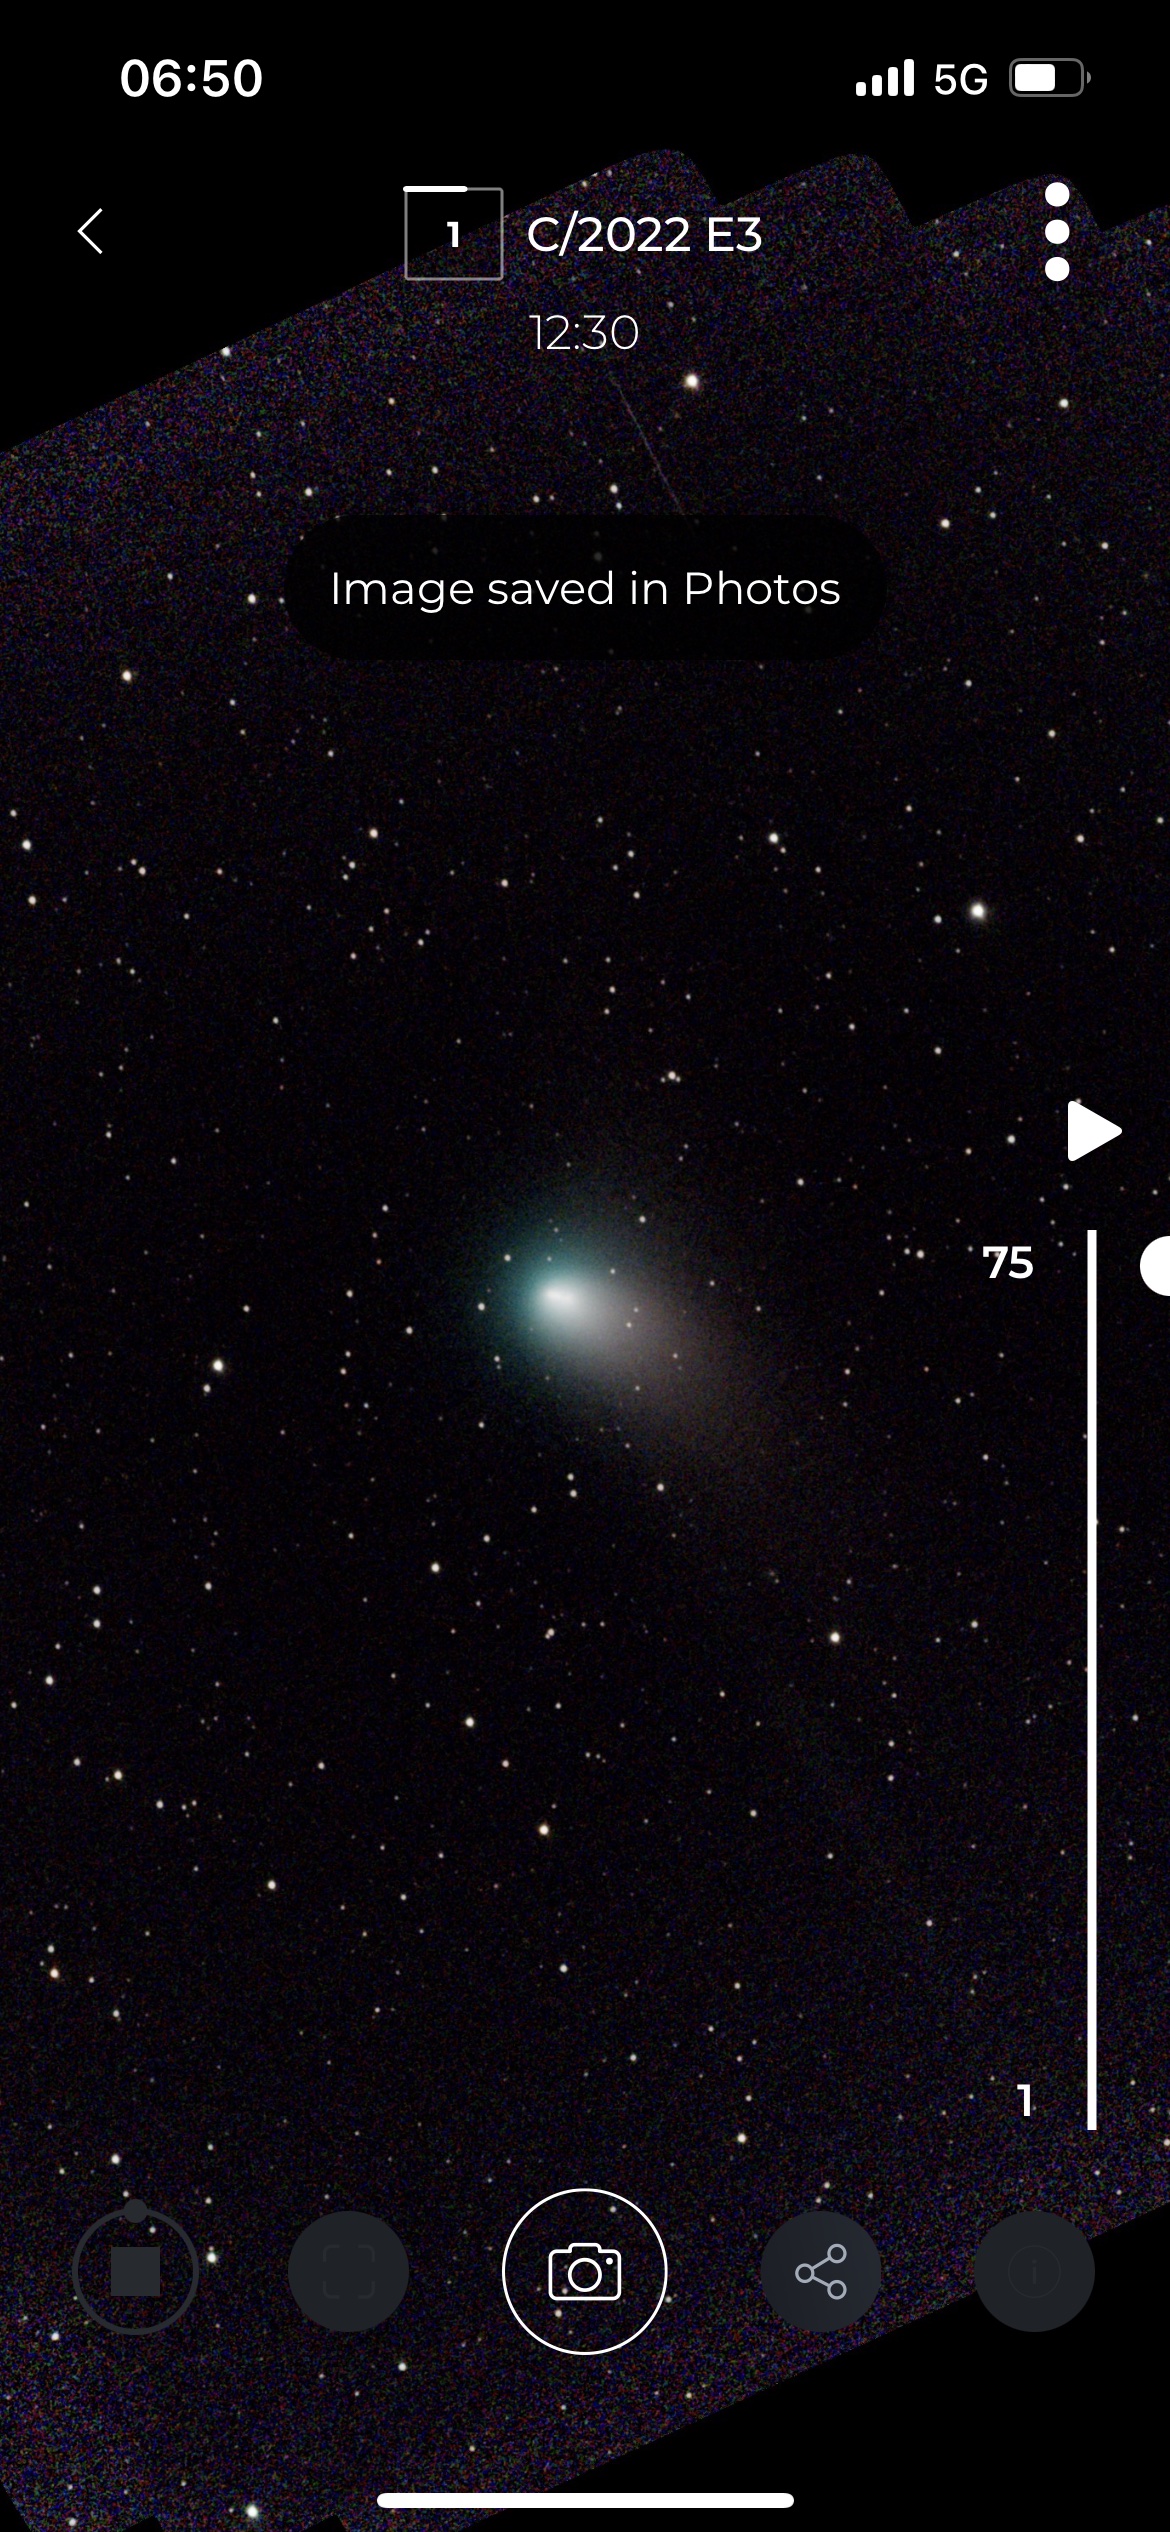
Once the session is running you should see the comet appear right away in your images.
If you take only a few minutes of imaging you can use the exported TIFF file from the observation and tweak it a little with any photo editing software. If you let the session run for longer you will see that the comet gets more and more elongated and stretched in the picture. That happens because the Vespera or Stelina are tracking the sky in a way to keep the stars fixed in your image. But the comet moves slowly insight the image causing the elongation in the stacked image.
3. How to process the images
There are various ways of processing the image.
The most simple approach is to take only short observation times like 5 to 10 minutes. In this short time, the comet should not move too much so you can just keep your stacked TIFF file from the telescope and edit the image in any photo editing software like Photoshop, Affinity Photo, or GIMP.
A more advanced option for processing is to use a free tool like Deep Sky Stacker or Siril to create an additional stacked image of the single exposures of the imaging session. This is the reason why we need to enable the saving of FIT files for the telescope. Deep Sky Stacker is only available for Windows, but Siril works on Mac, Windows and Linux.
Both free tools have a comet registration mode, that helps to get a clear and correct image of the comet.
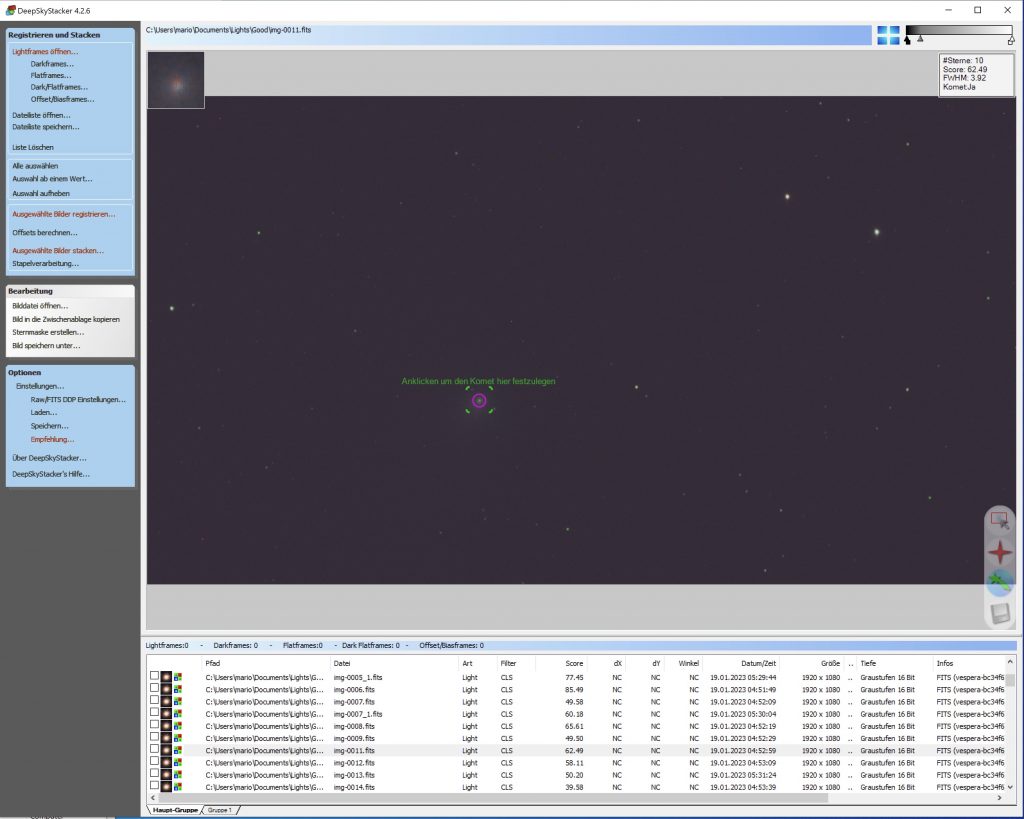
Deep Sky Stacker

Deep Sky Stacker
Read tutorials on Siril and Deep Sky Stacker.
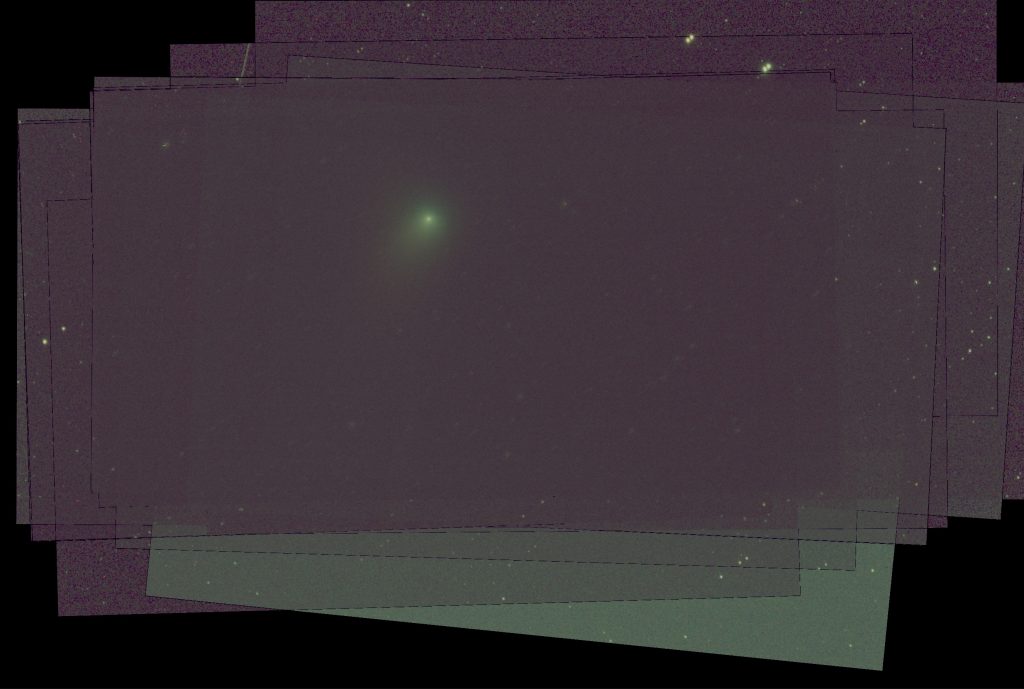
Once we have a stacked image of the comet, we can open both images as layers in a photo editing software.

The image with the stars should be the bottom layer and the image with the comet the top layer. Both images are edited (stretched, color adjusted, de-noised etc.) separately and then with a mask we can blend in the image of the comet over the image.
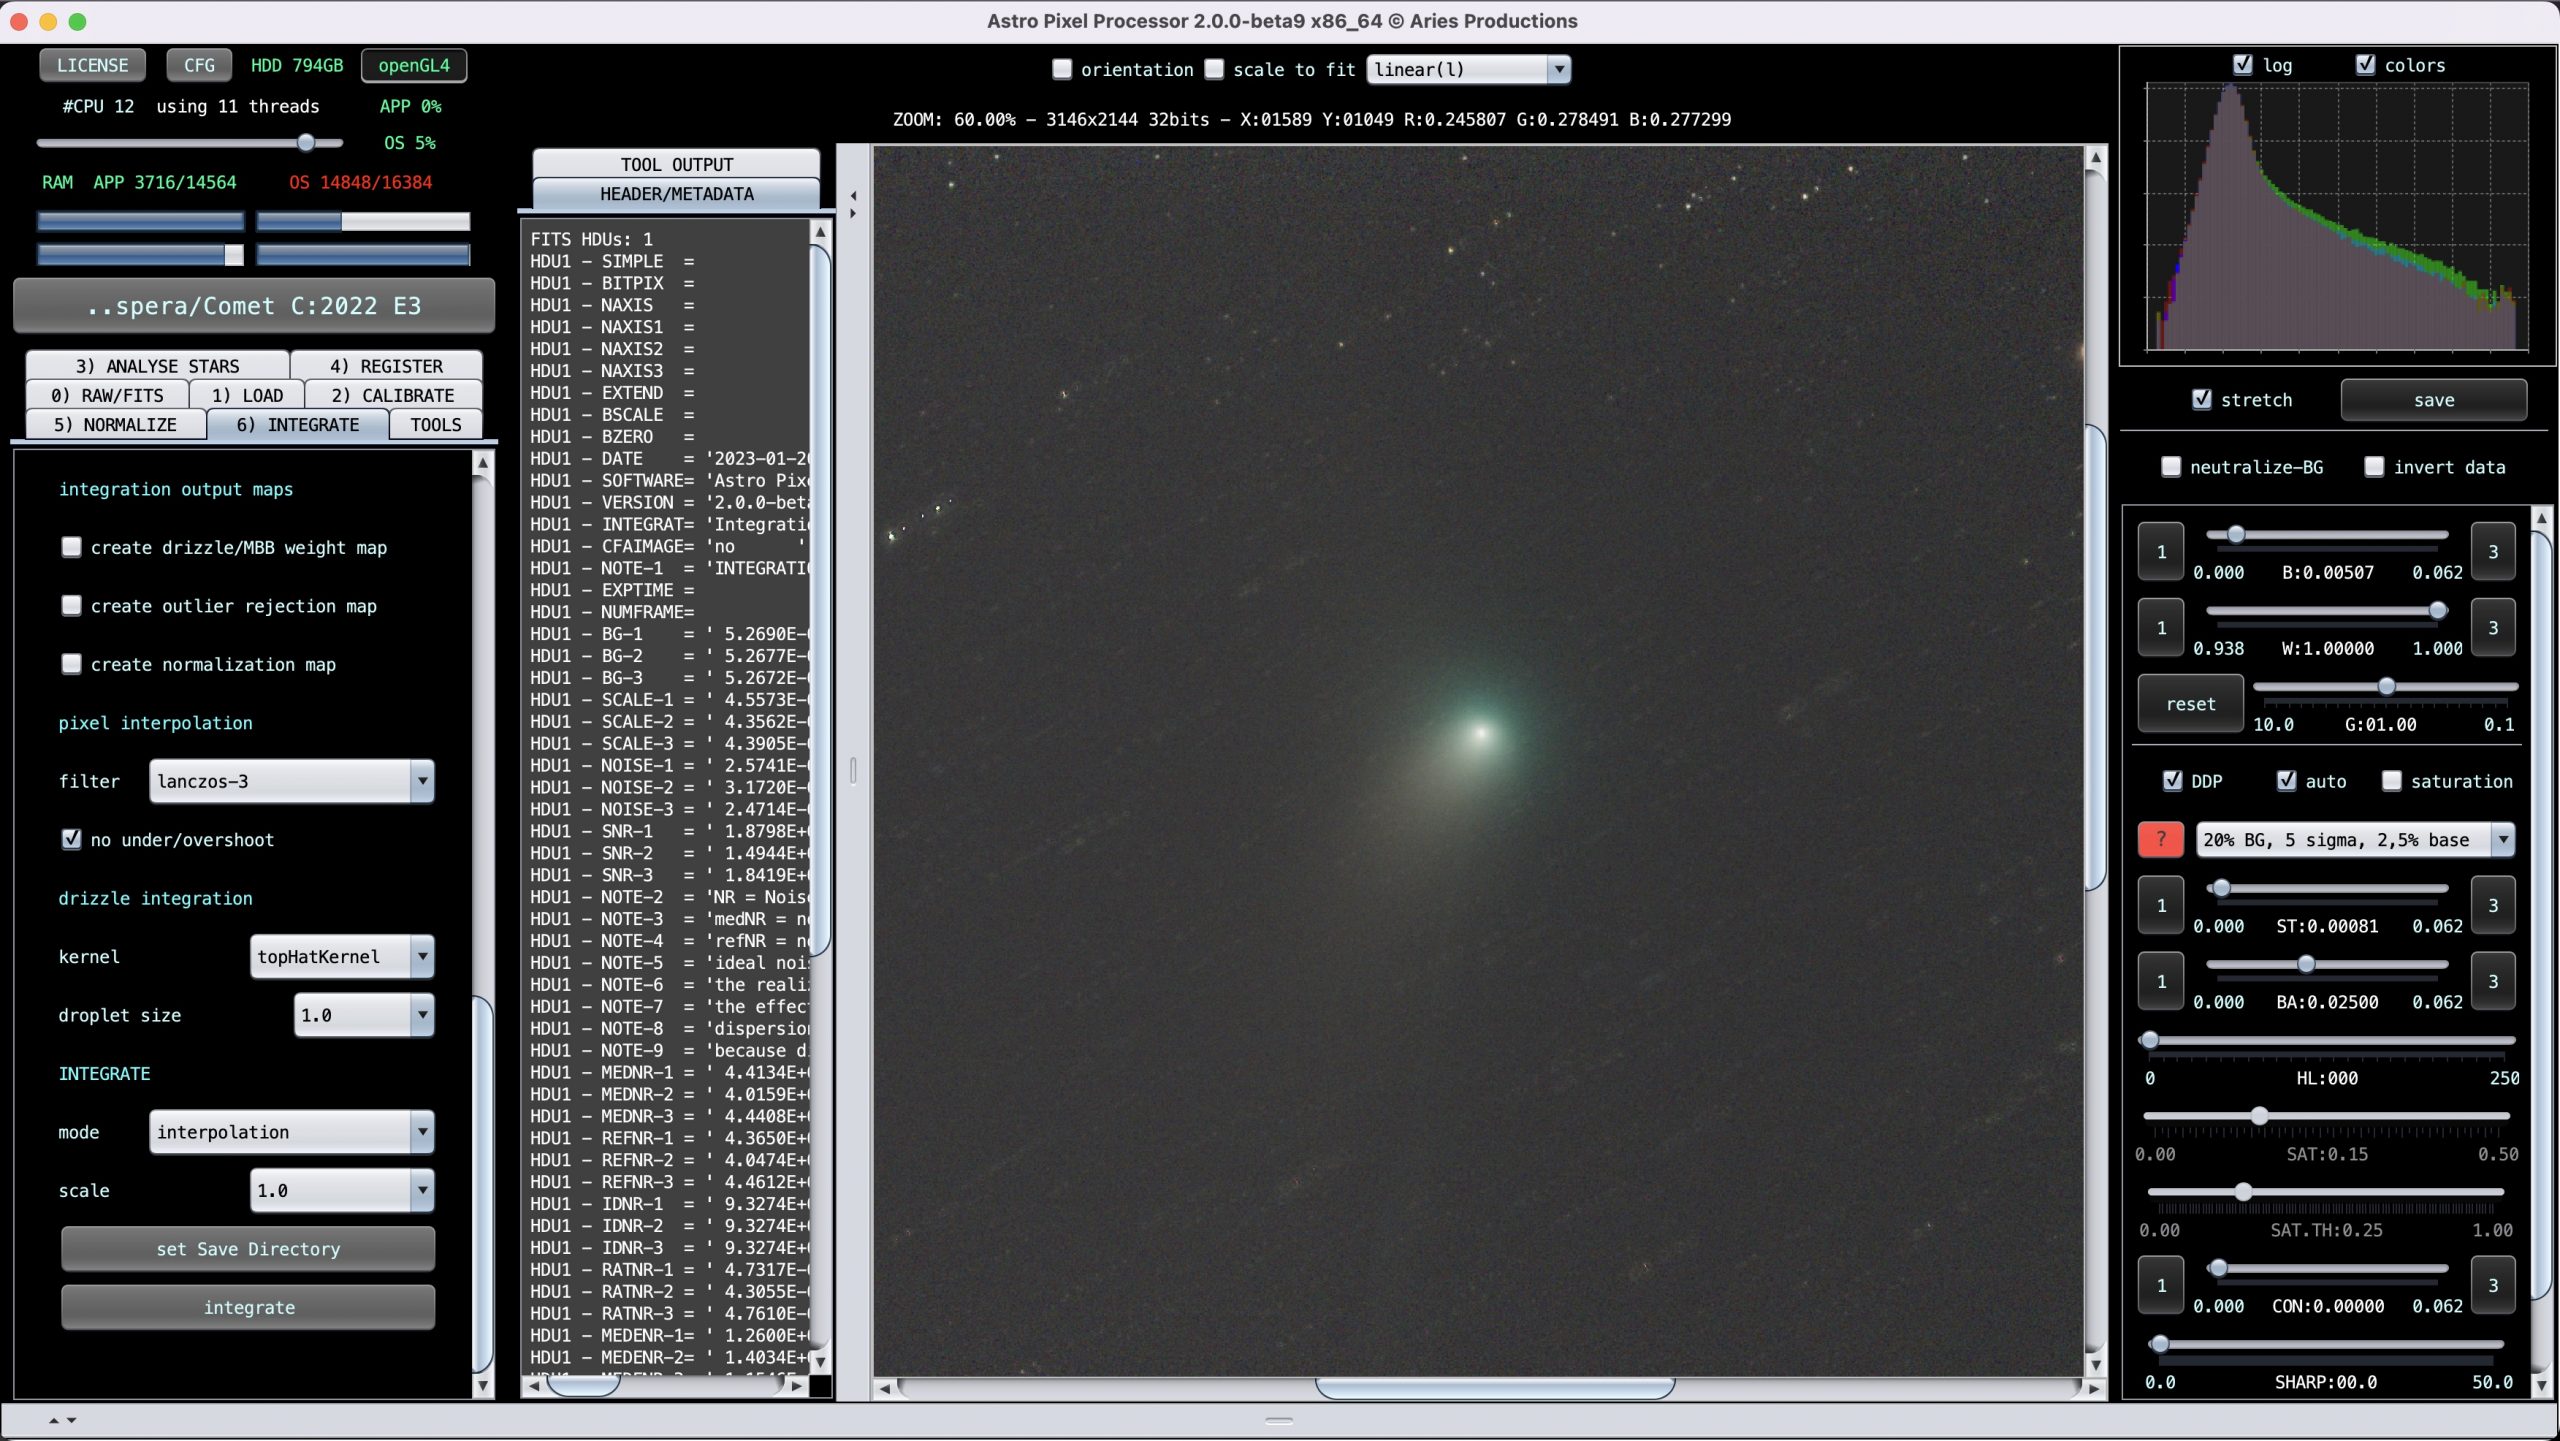
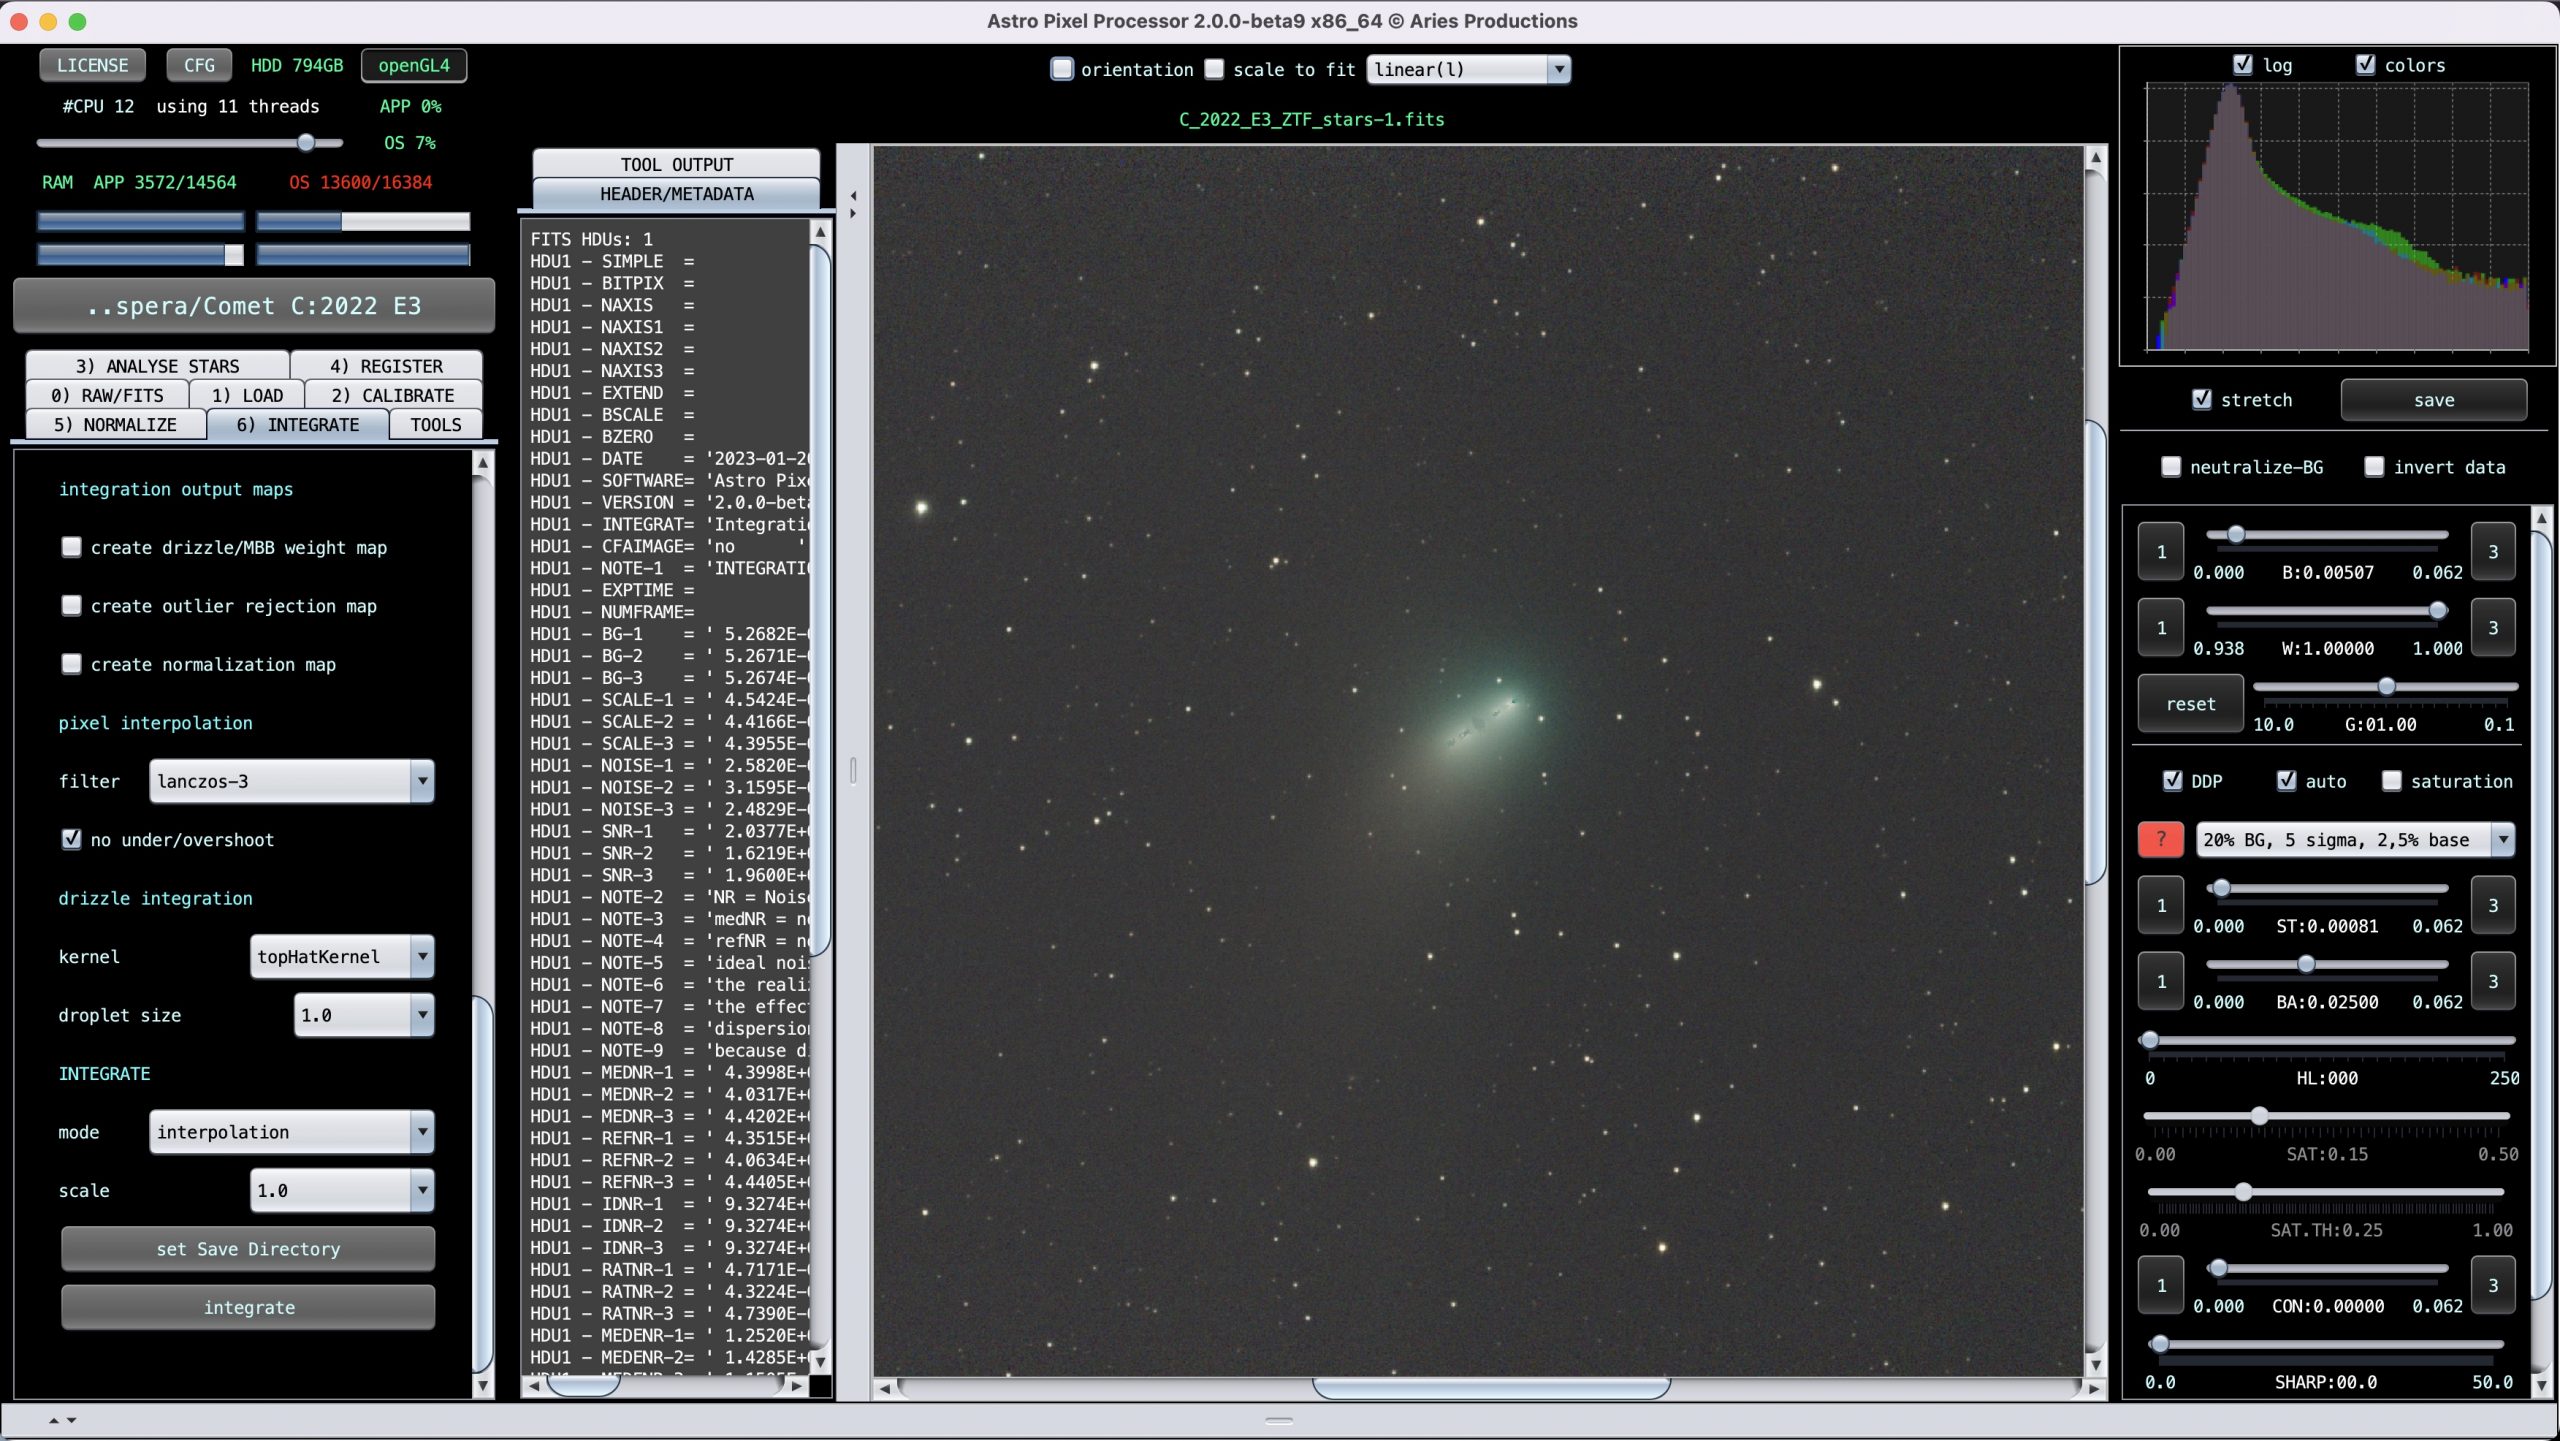
 If you have access to professional tools like AstroPixelProcessor or PixInsight you can create better-stacked images with more options for tweaking details.
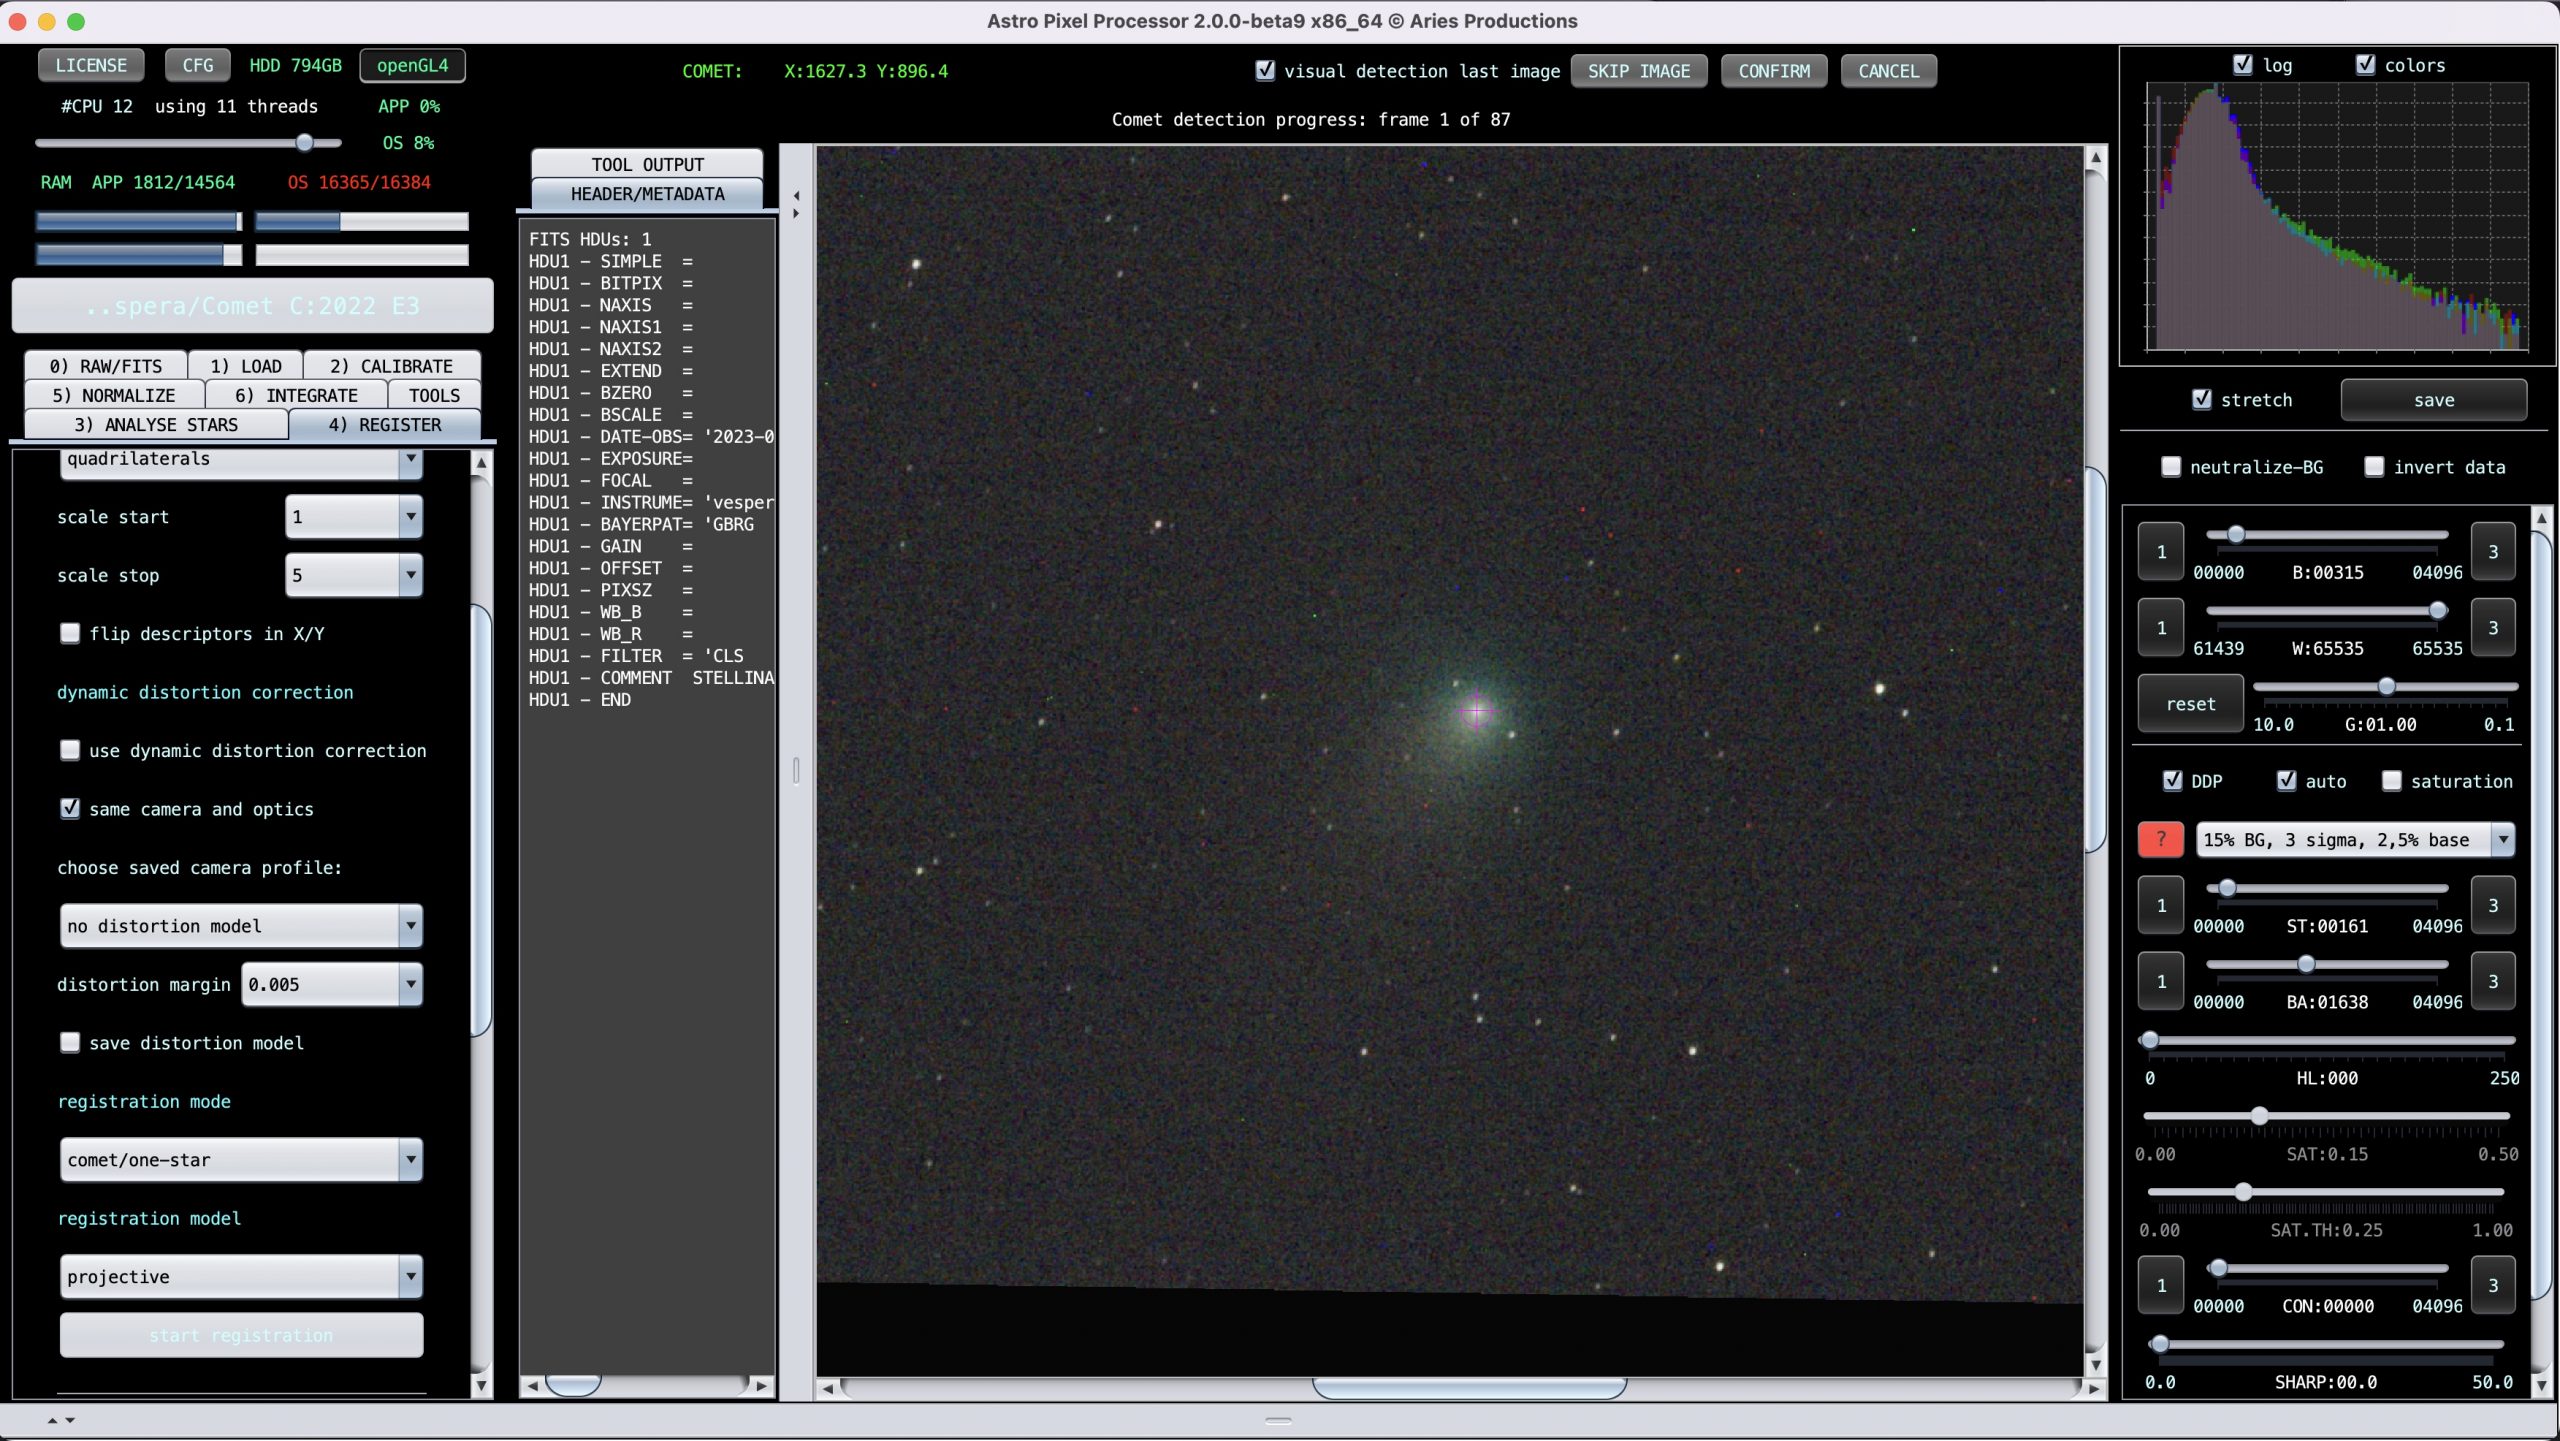
With the help of starnet++, a tool that is able to split an astro image into an image with only the stars and a second image with only the rest, we can create an image with the stars only and the comet only.
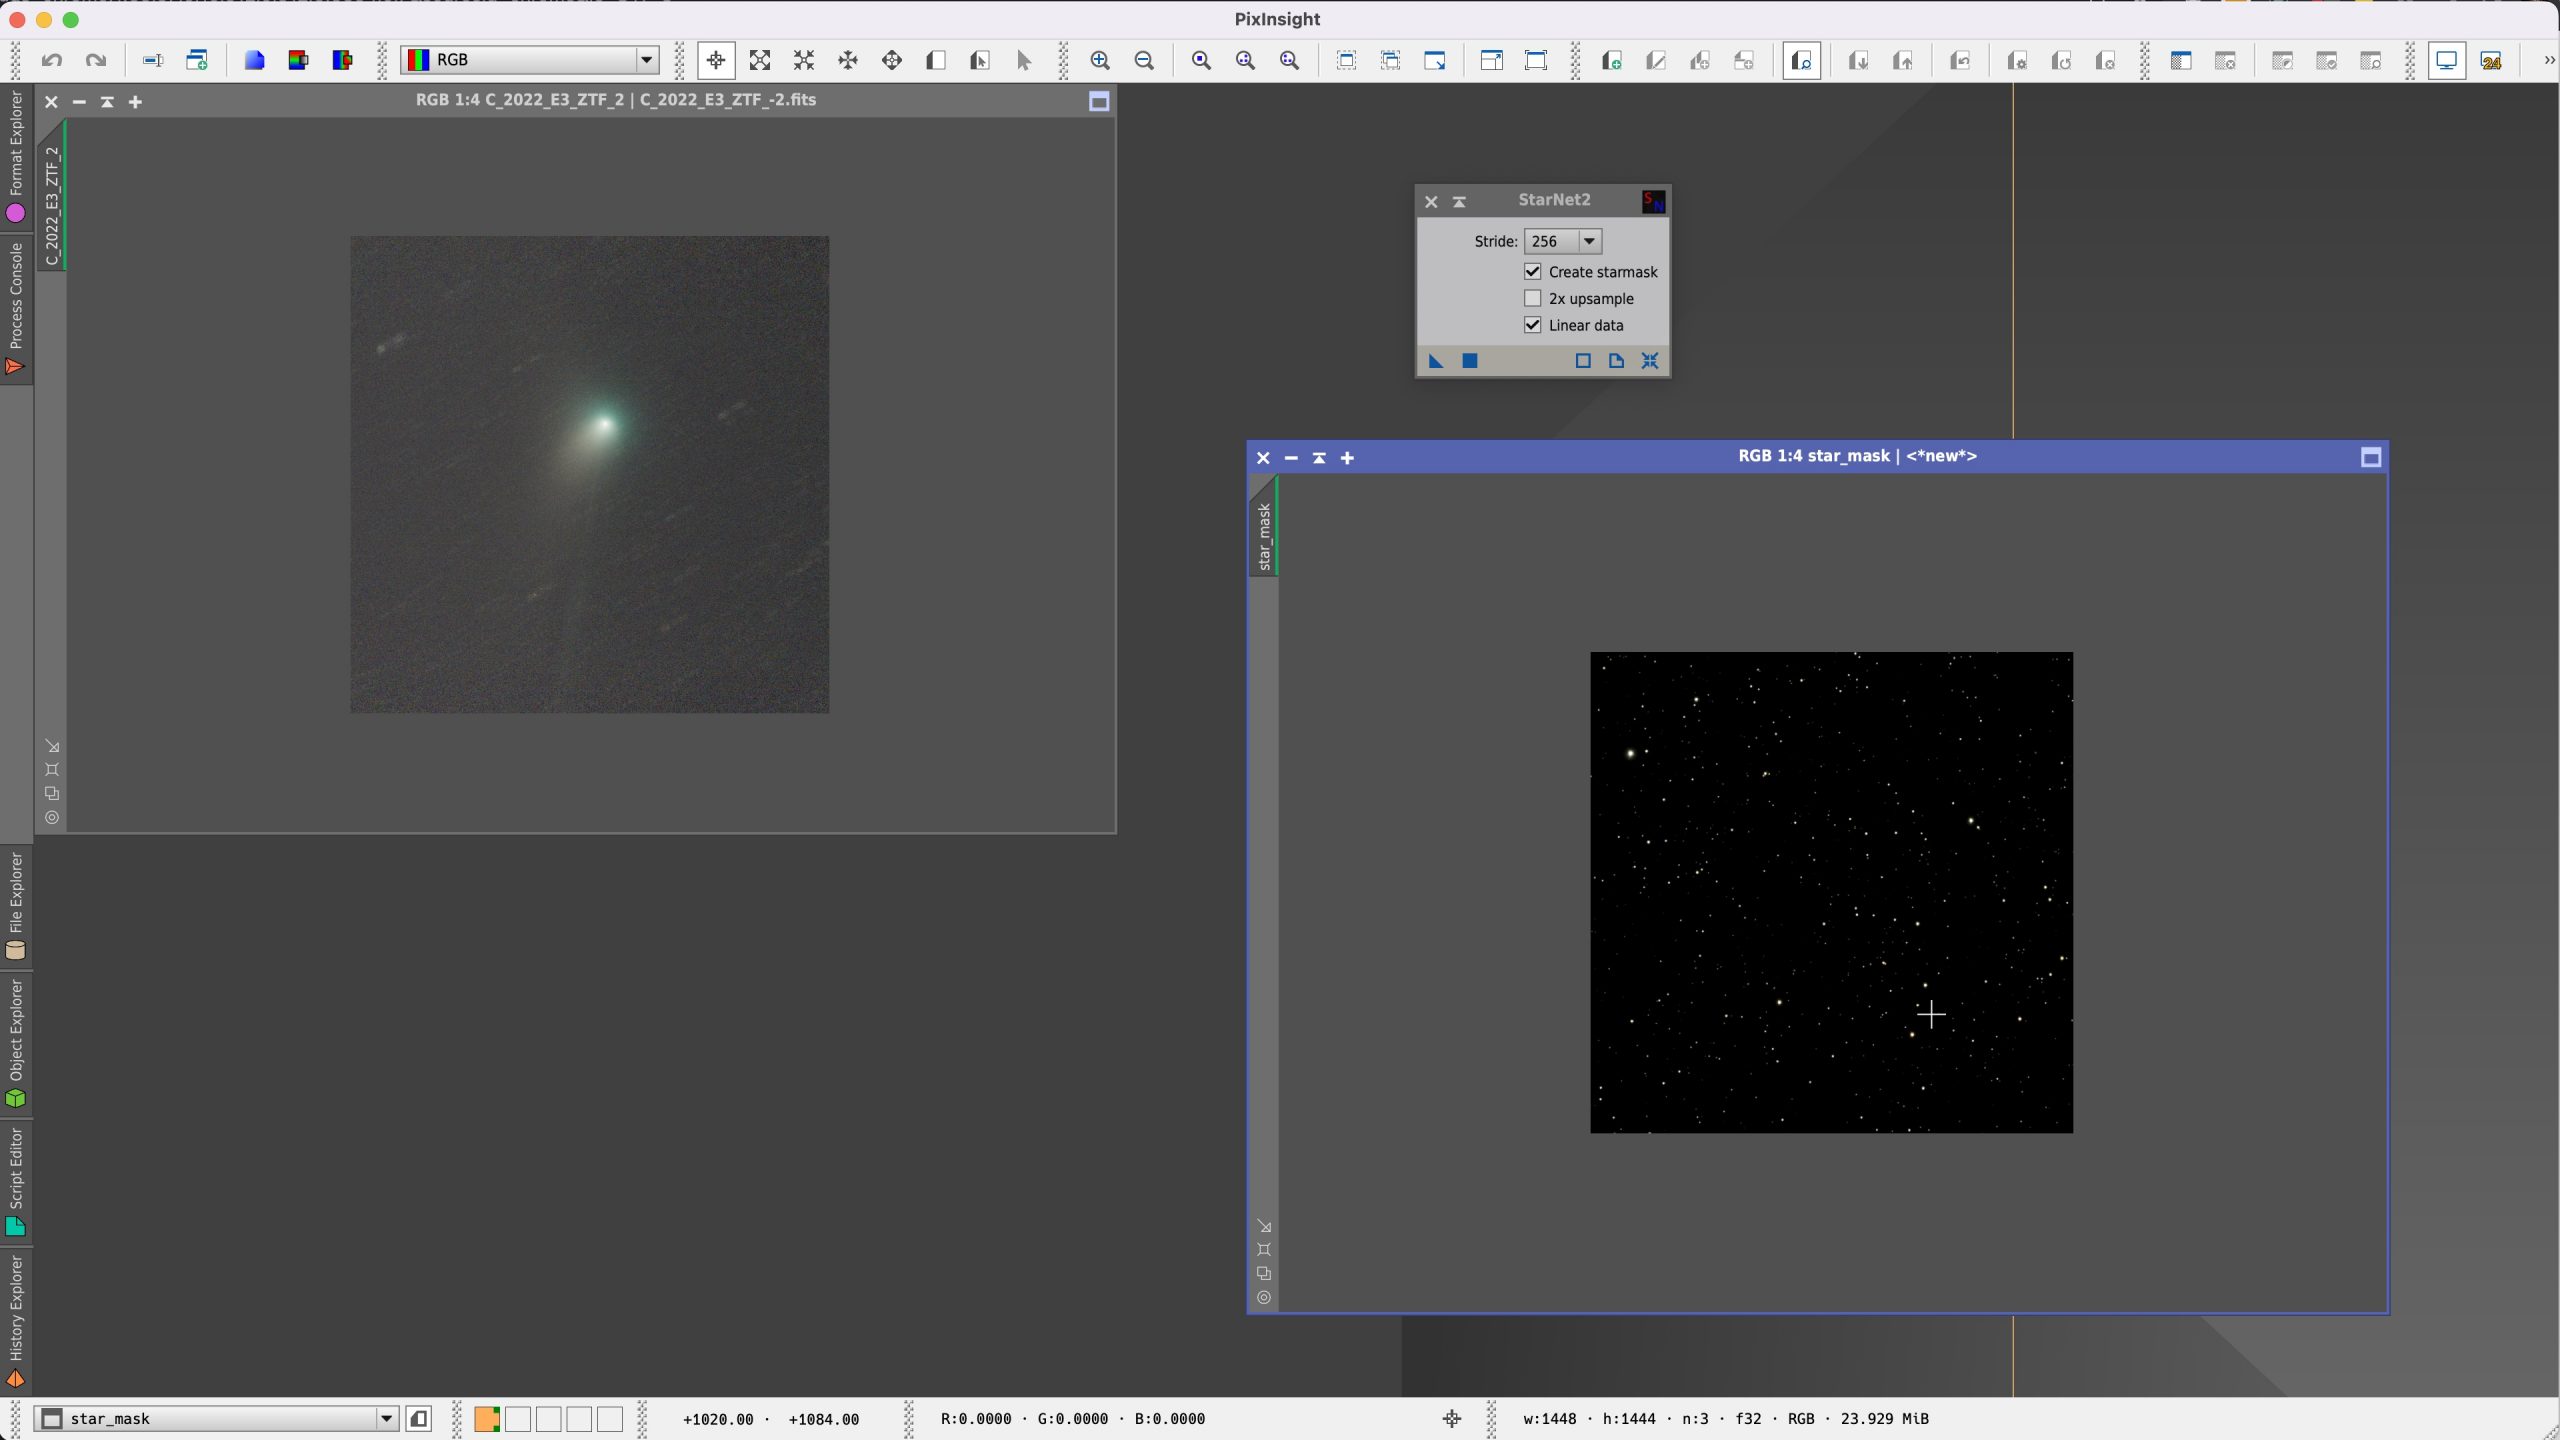
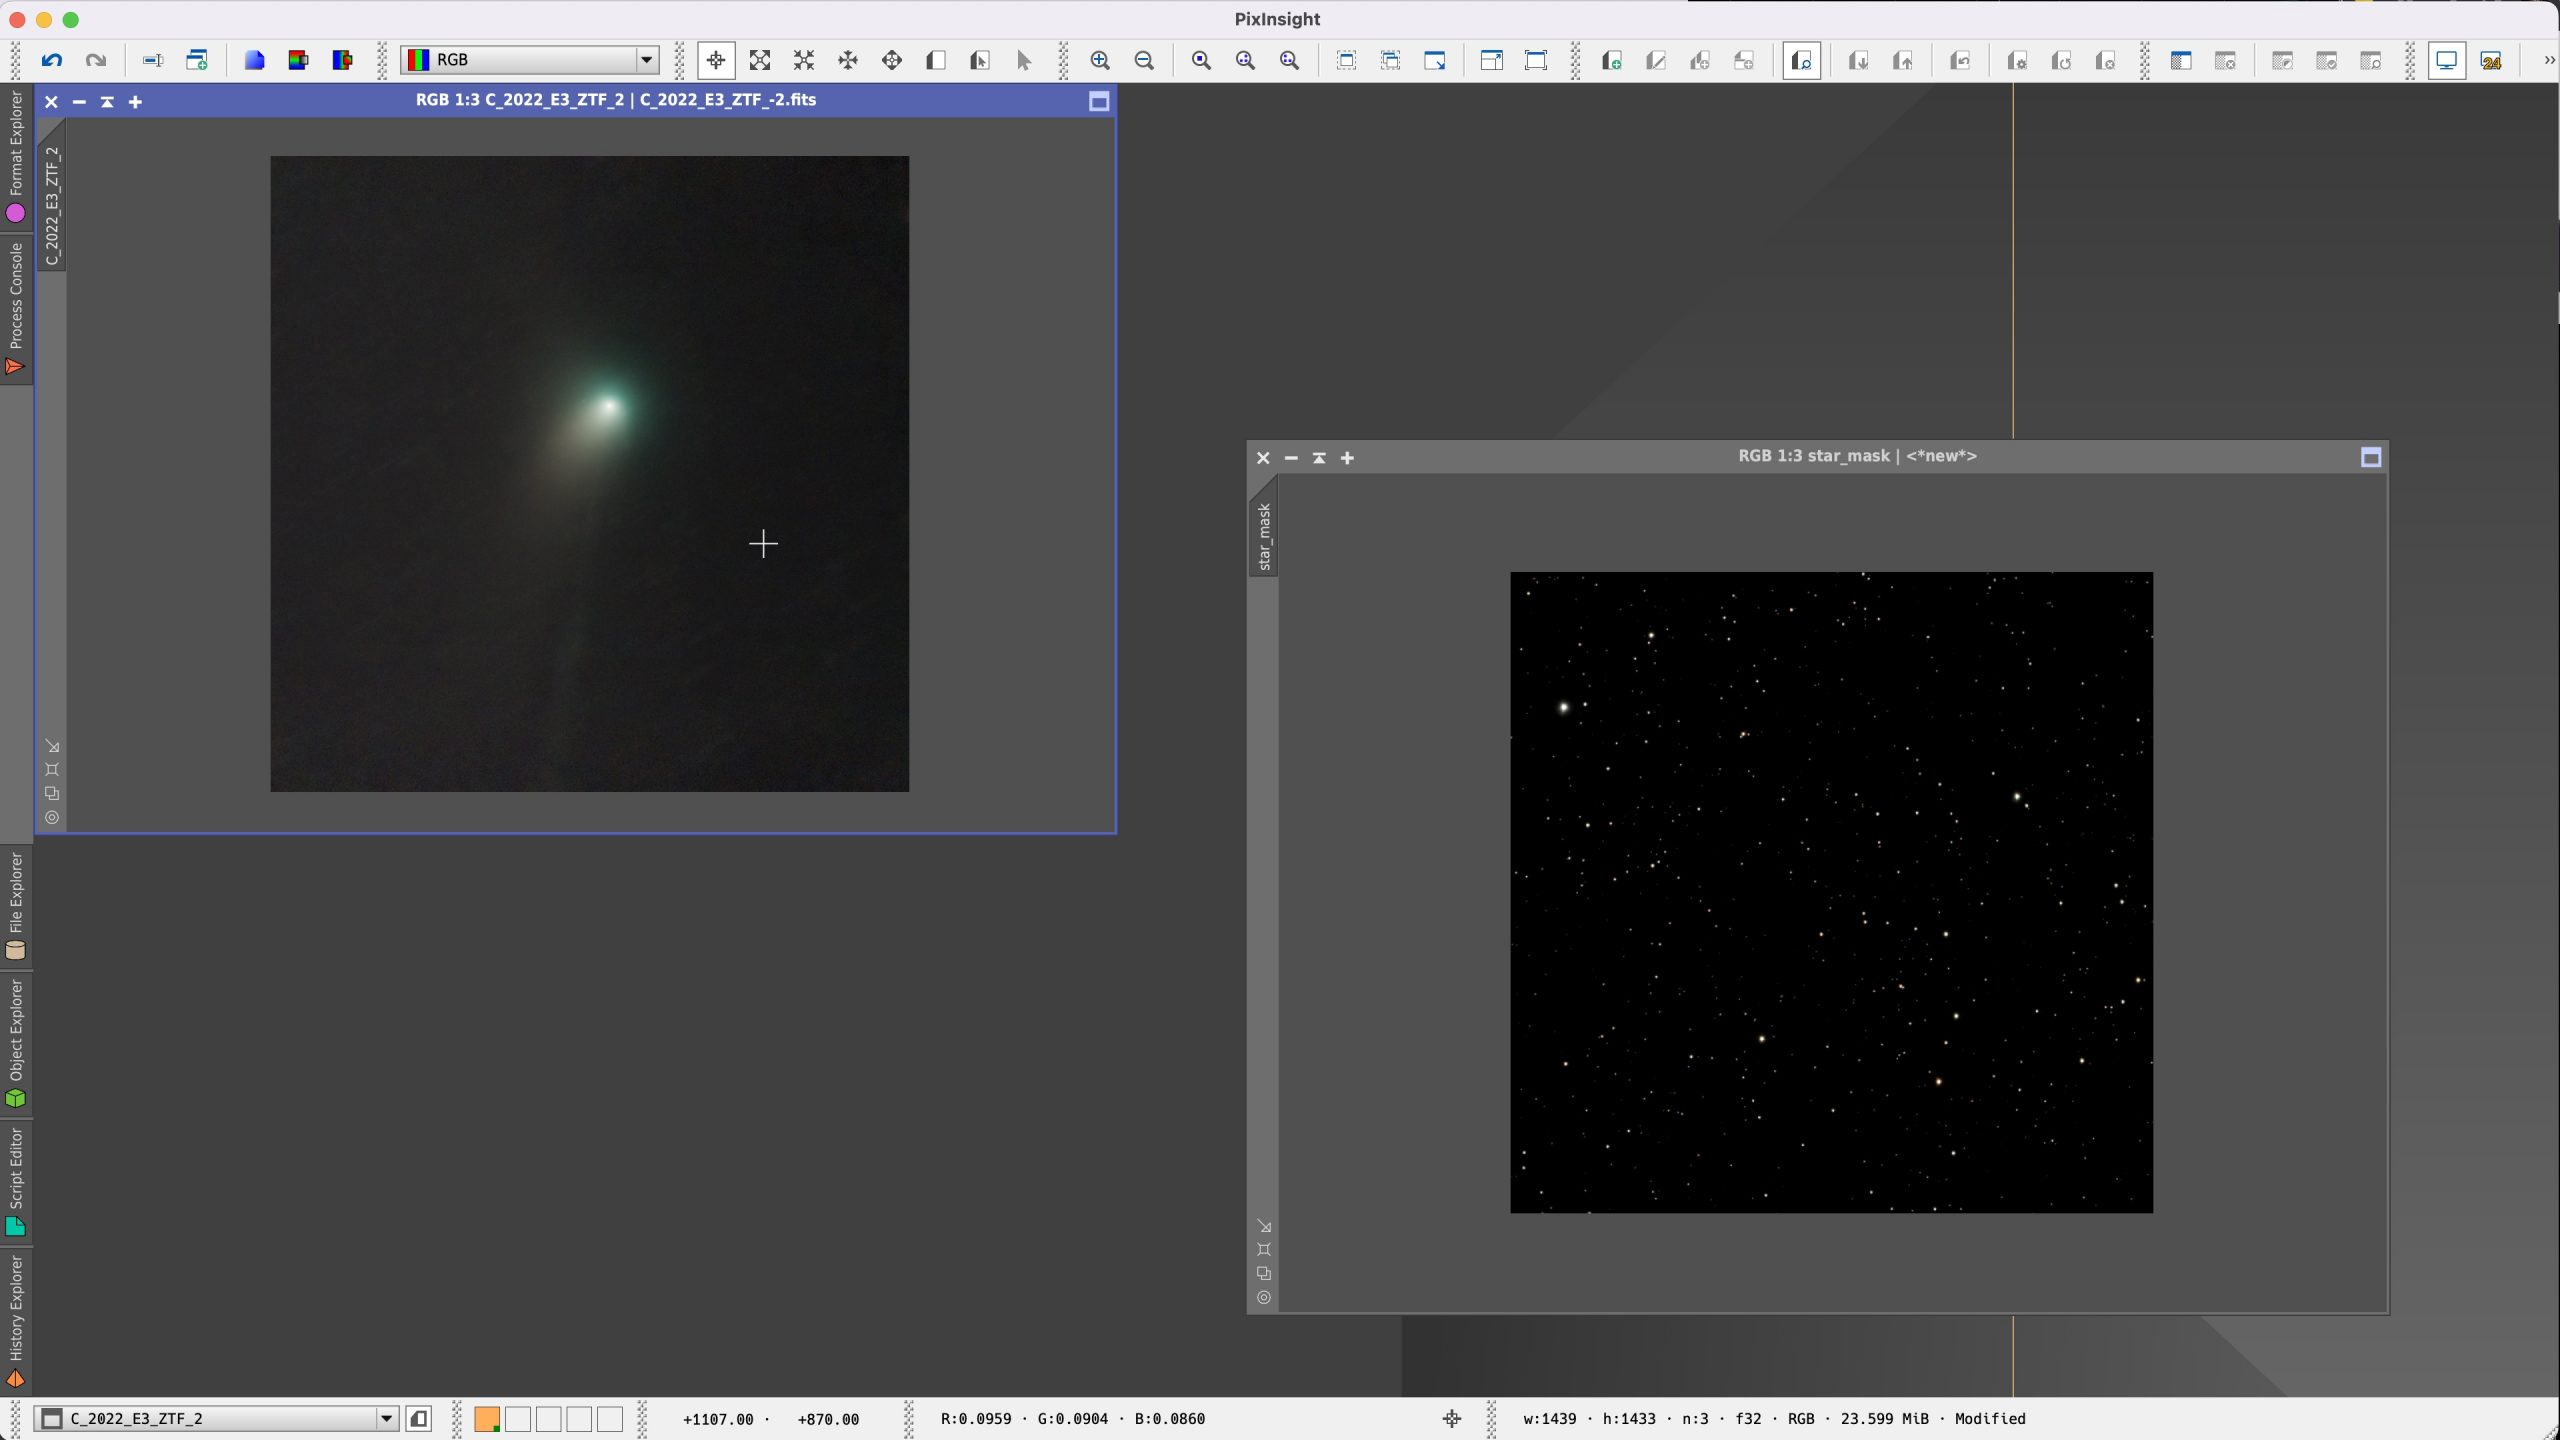
These images can then be combined using a PixelMath function that blends both images together.
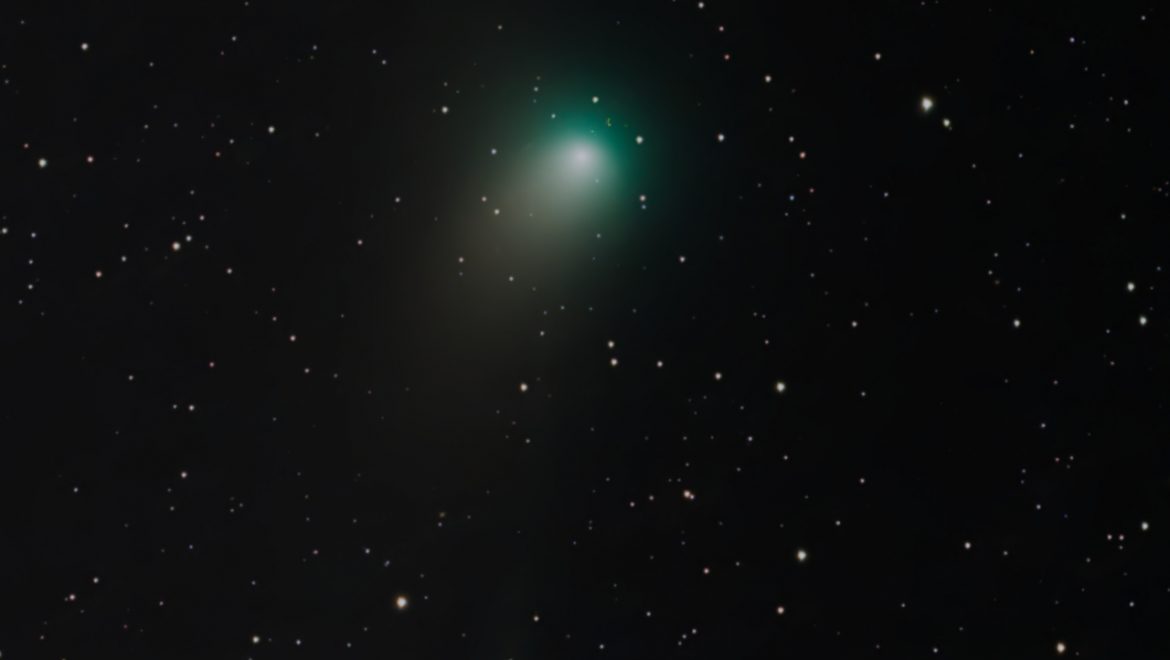
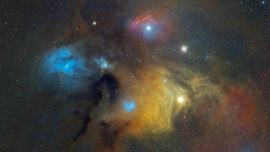
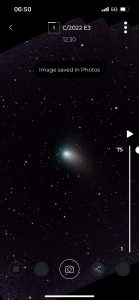
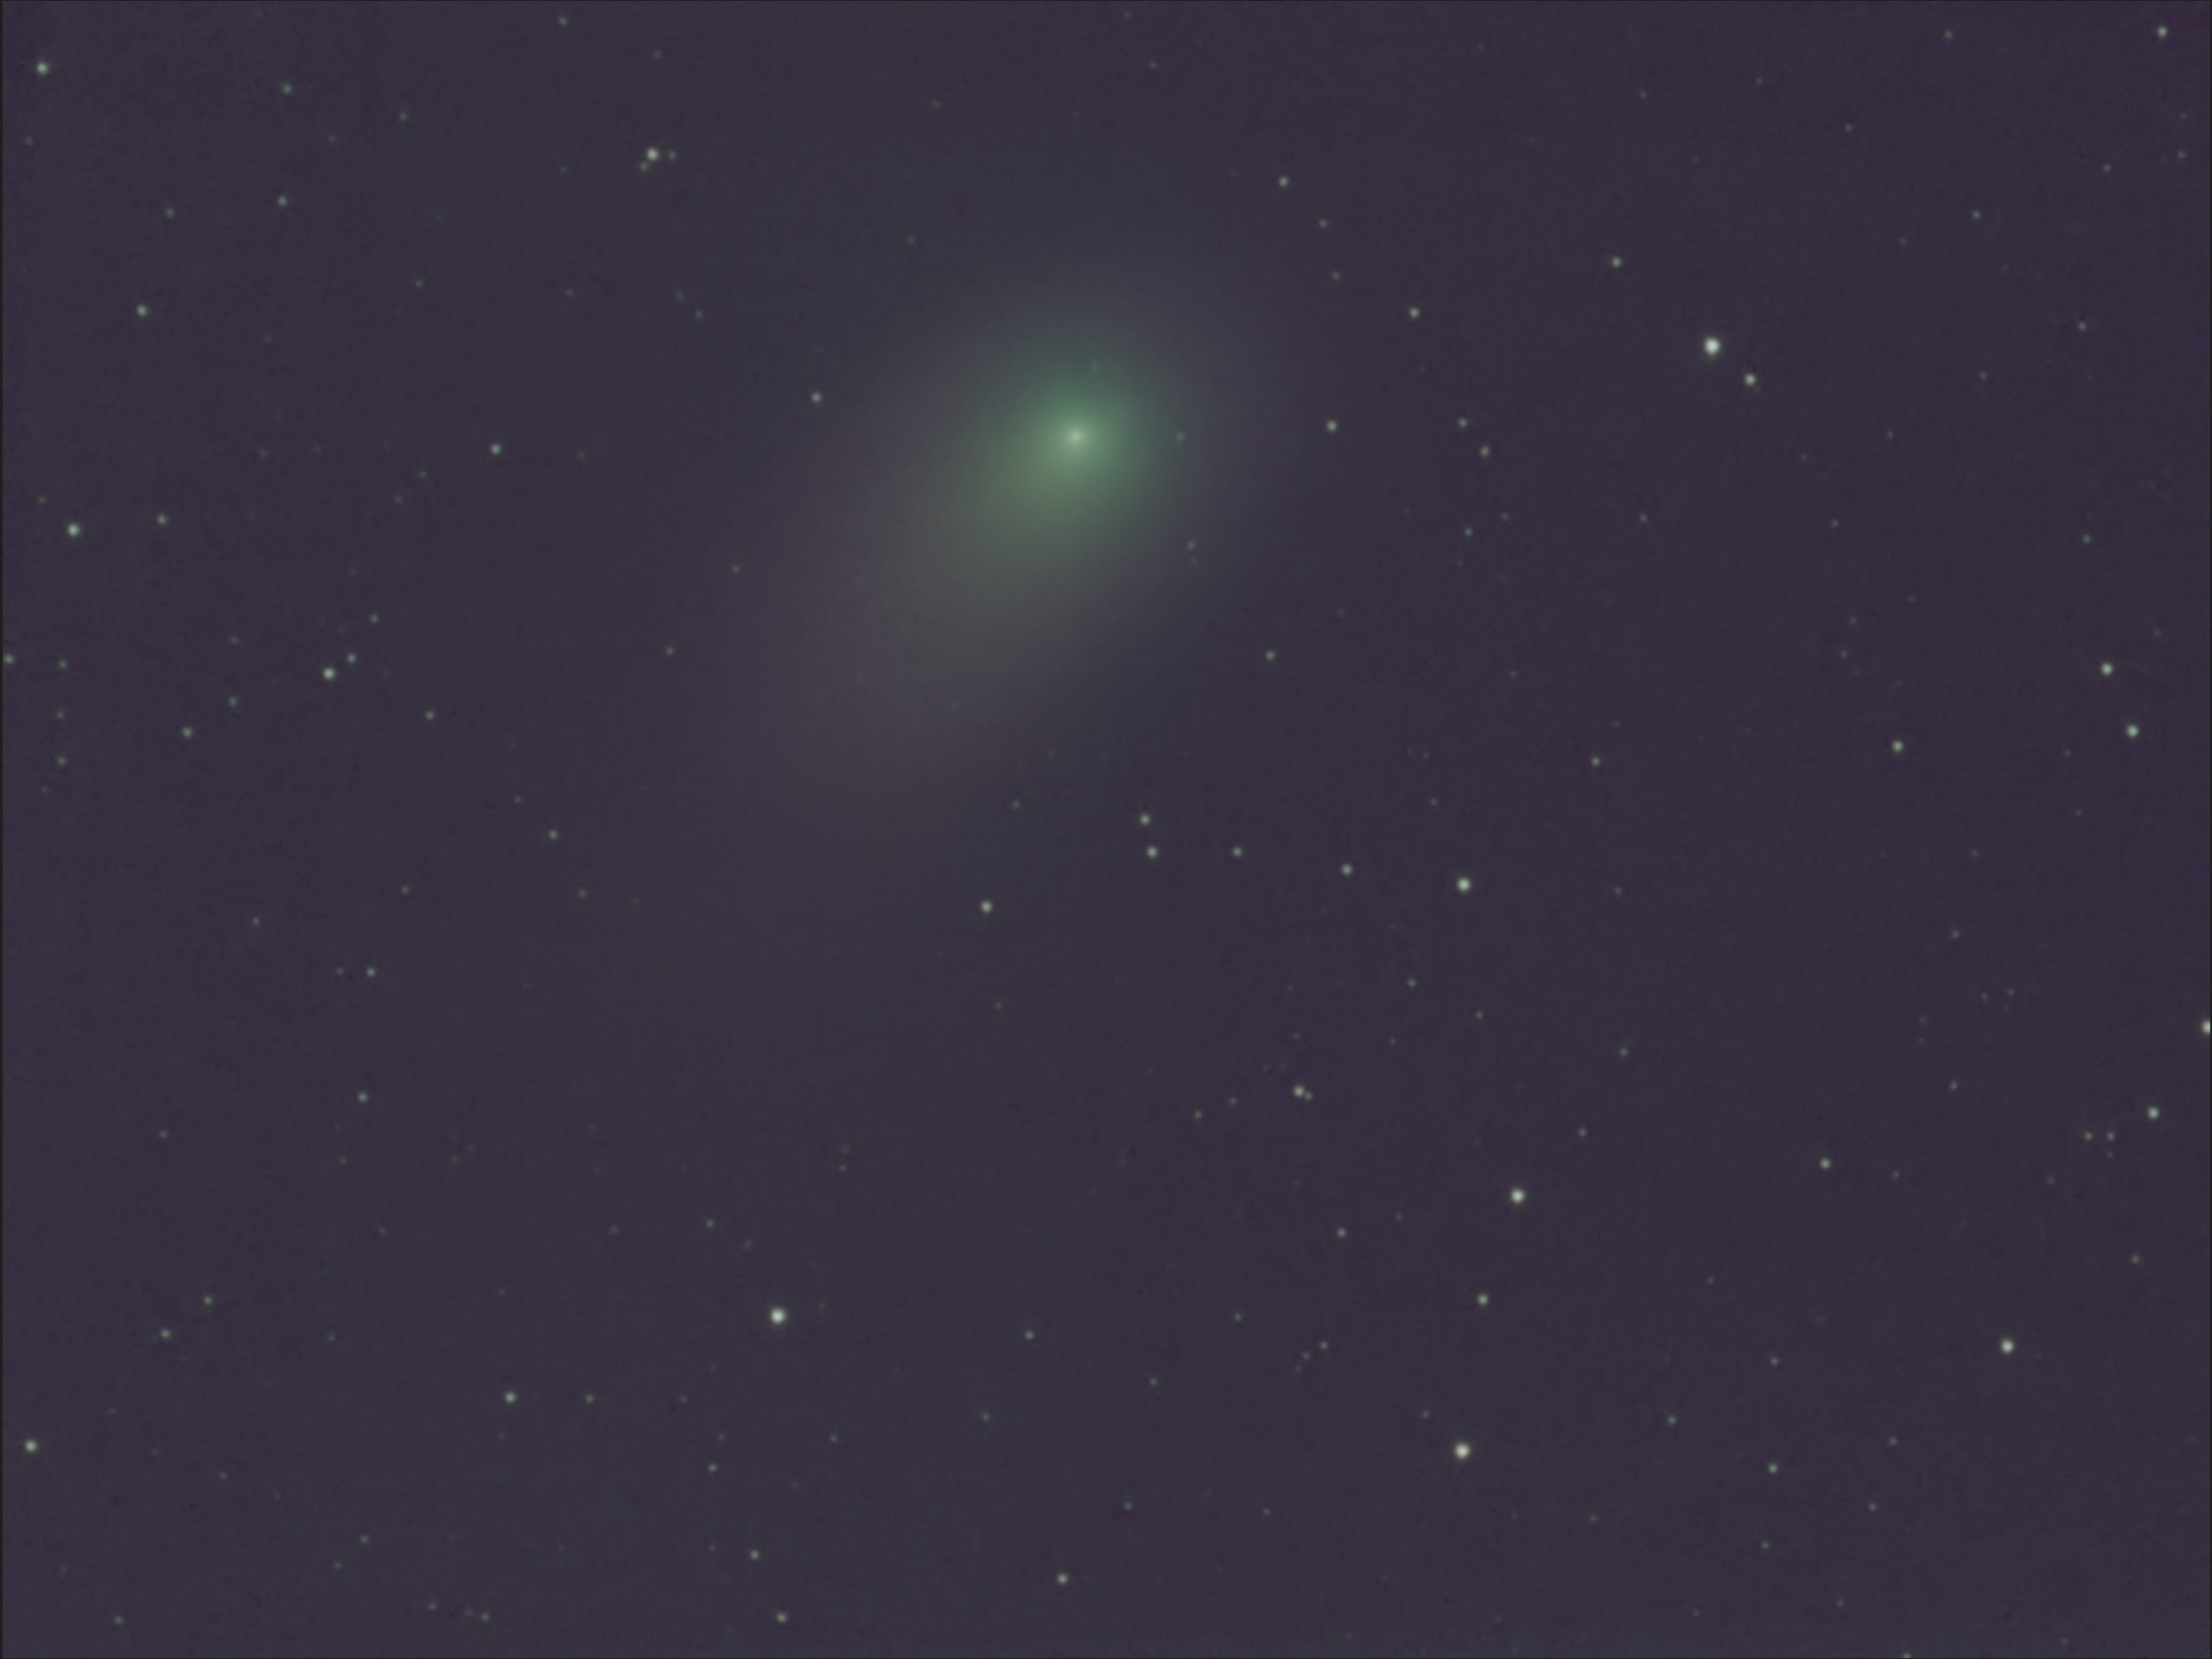
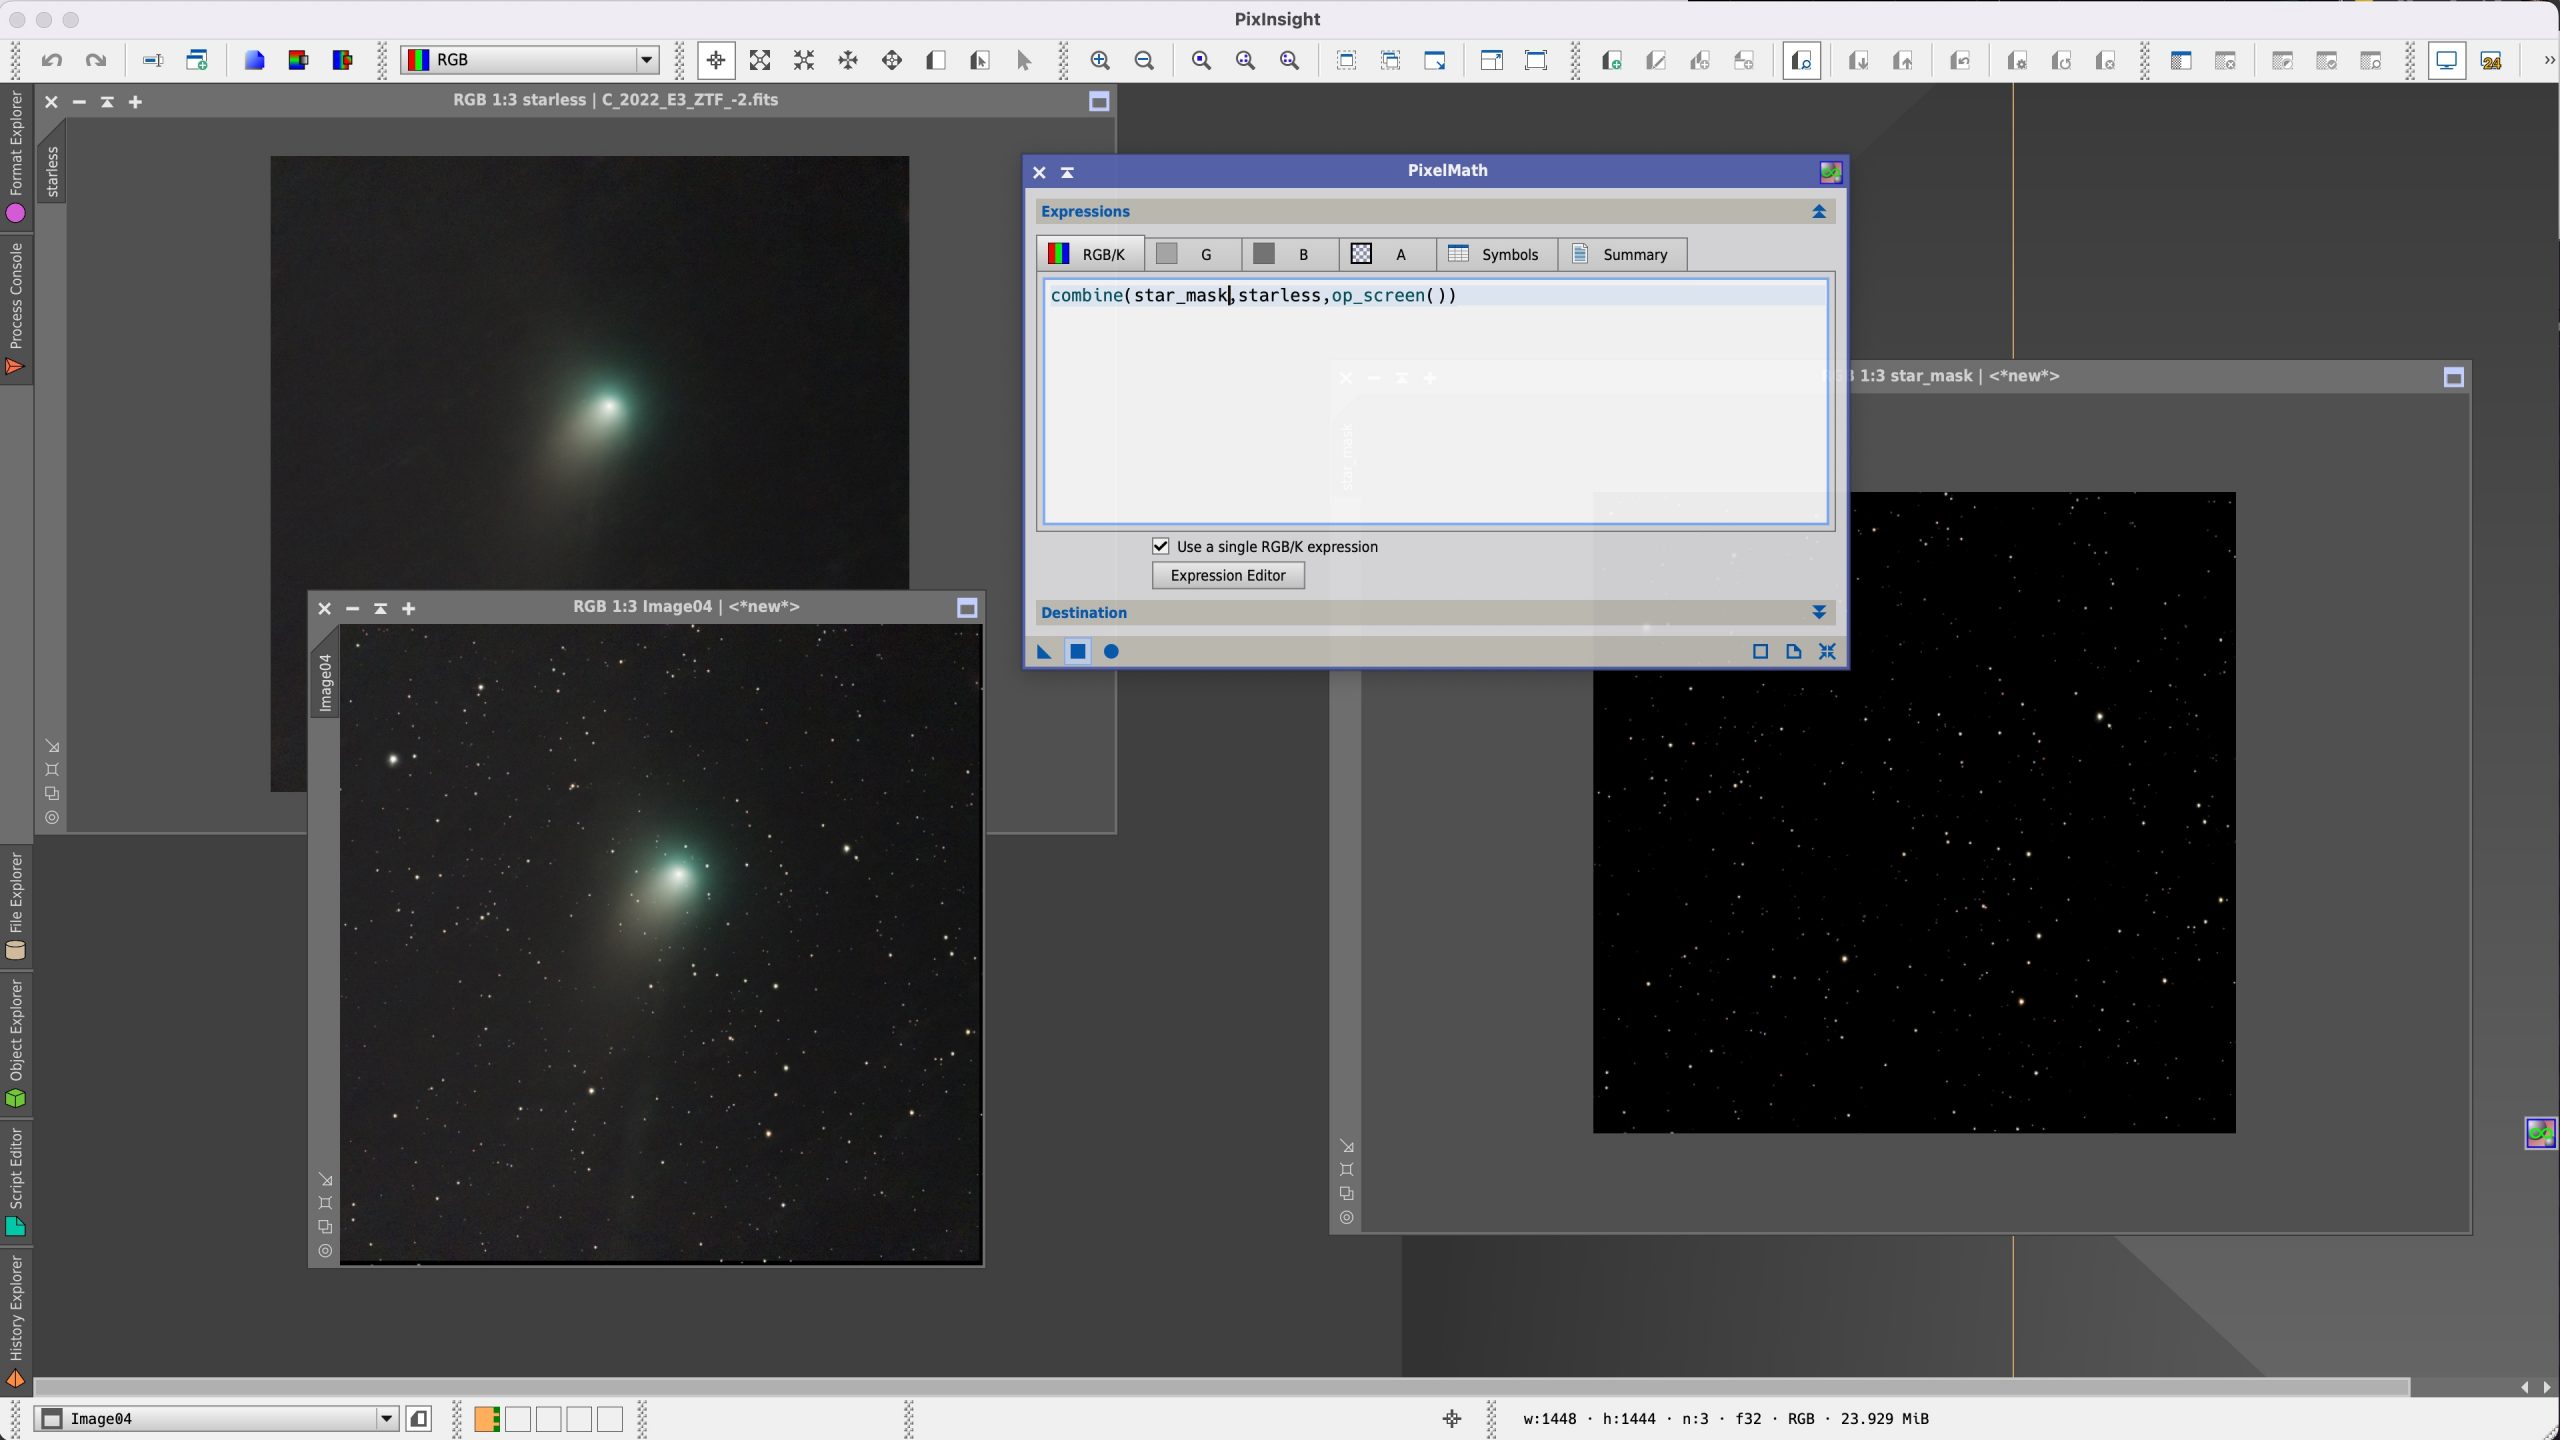 The final result can also be edited in a photo editing software for final touches as shown above. The data for the final image was only 15 minutes of observation time in mosaic mode.
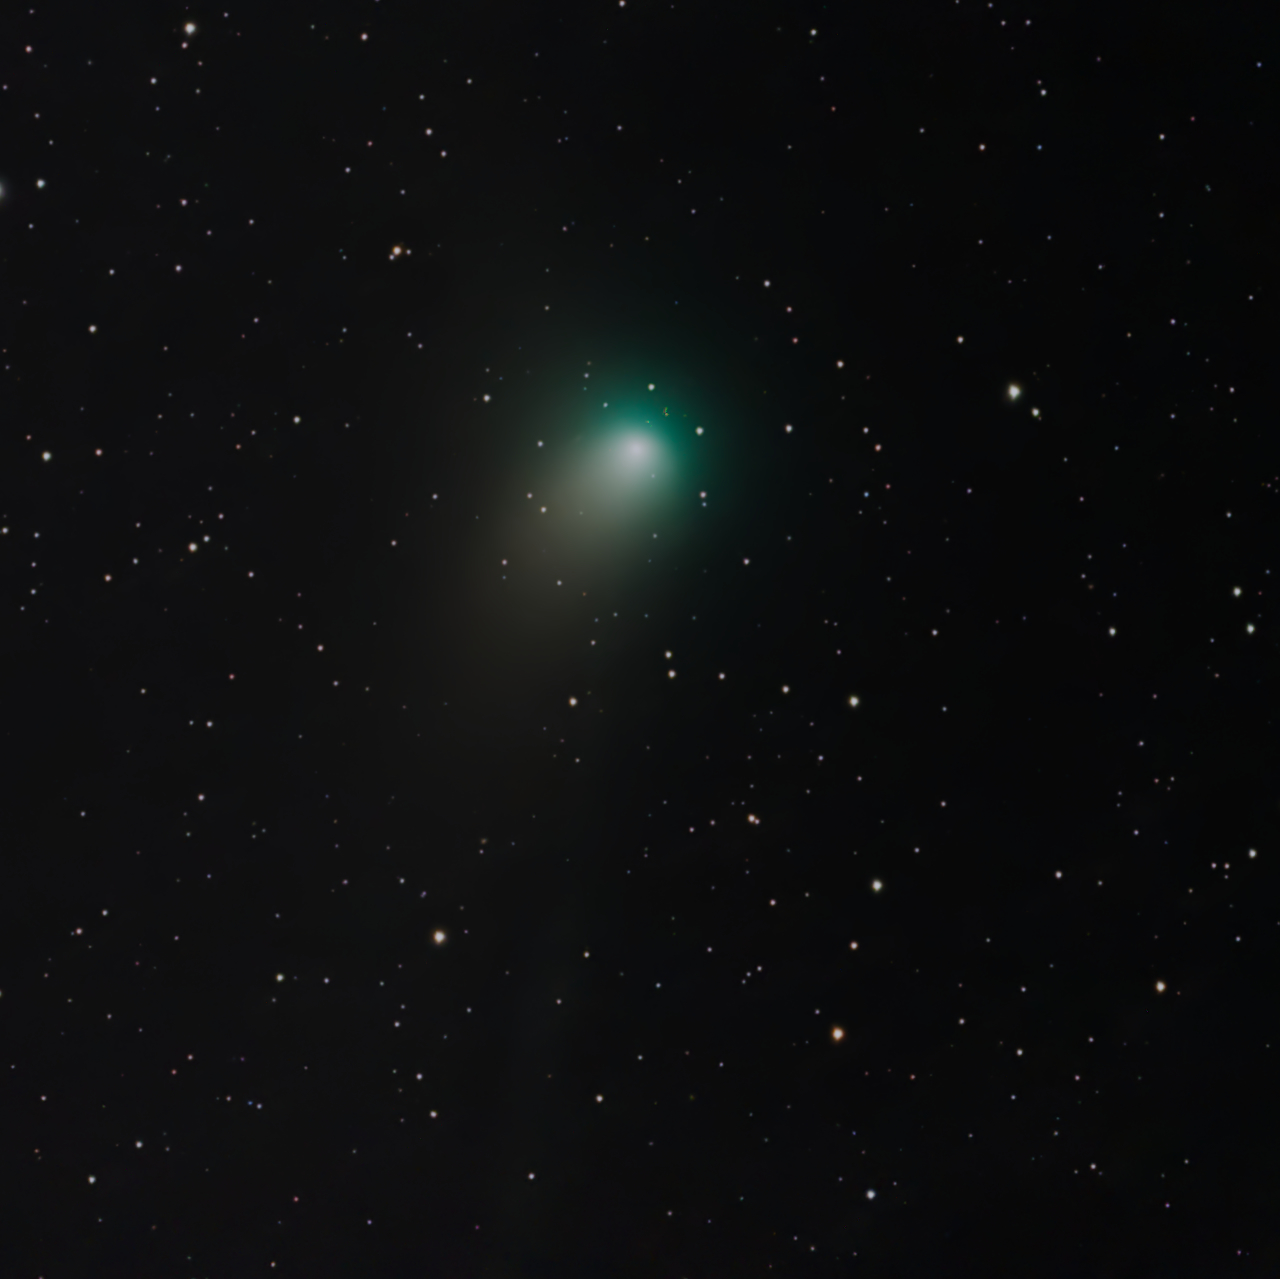
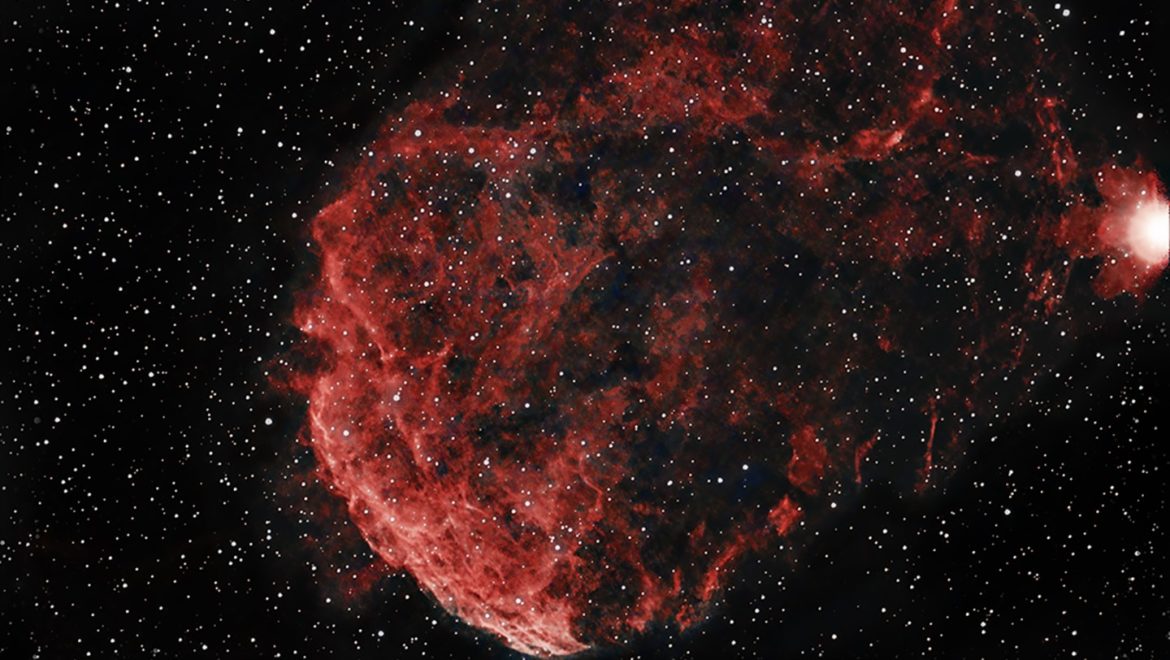
Comet final result. Author: Mario K.
This how to is based on an article about the comet C/2022 E3 published in German for golem.de.