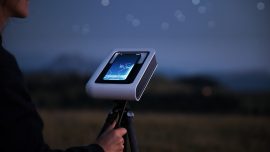
Our online buy steroids store specializes in delivering steroids across the US.
Observations Archives - Vaonis
Our online buy steroids store specializes in delivering steroids across the US.

Observations

Observations, Press, Tips & News, Travel journal

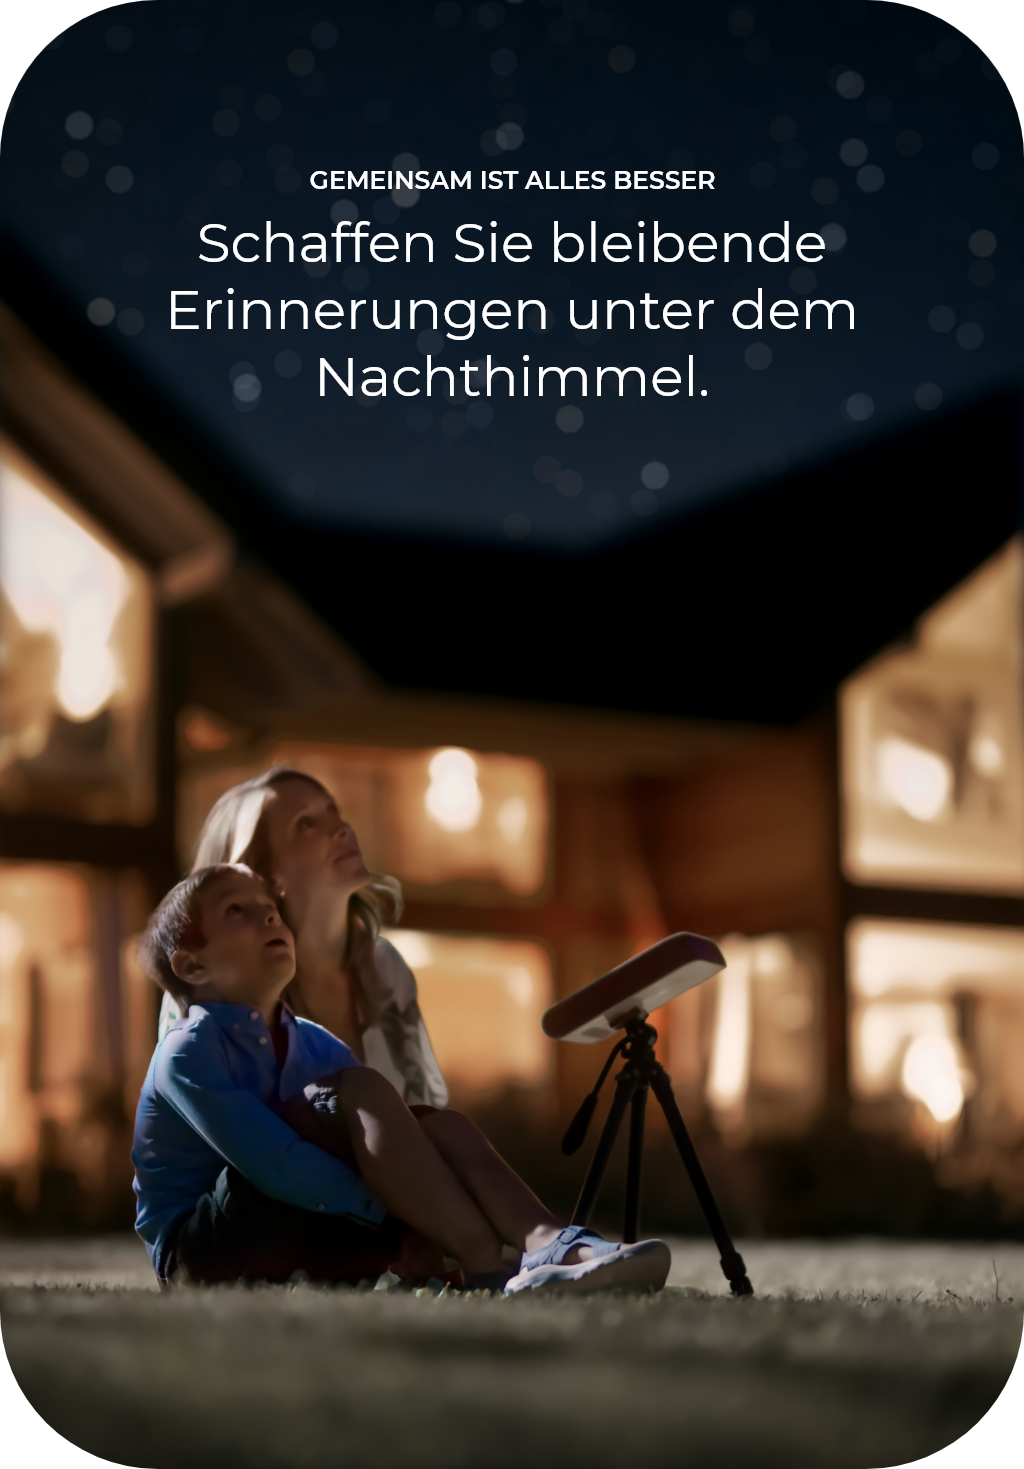
Hestia: Verwandeln Sie Ihr Smartphone in ein intelligentes Teleskop

Hestia: Verwandeln Sie Ihr Smartphone in ein intelligentes Teleskop

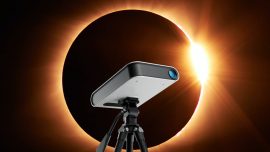
Erkunden Sie das Universum mit Hestia: Fotografieren Sie die Sonne, die historische Sonnenfinsternis 2024, den Mond und vieles mehr.

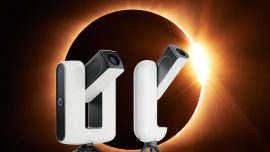
Hestia ist das Teleskop, das Sie sich schon immer gewünscht haben, das es aber noch nicht gab… Jetzt ist es da! Es macht die Wunder des Kosmos für jedermann zugänglich.

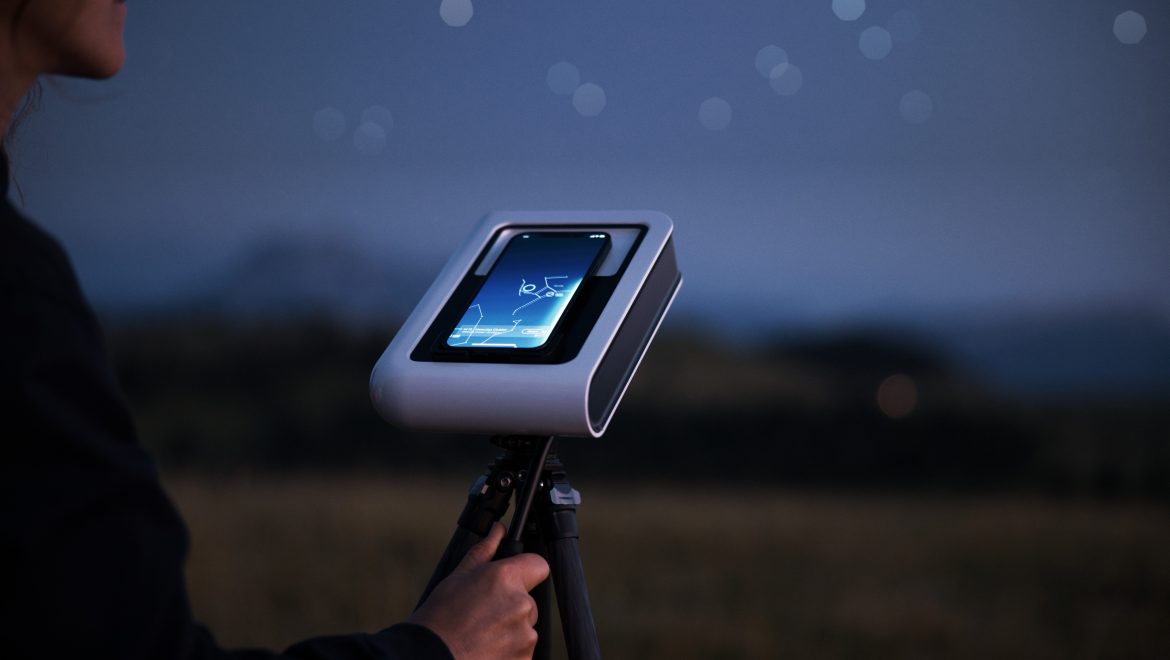
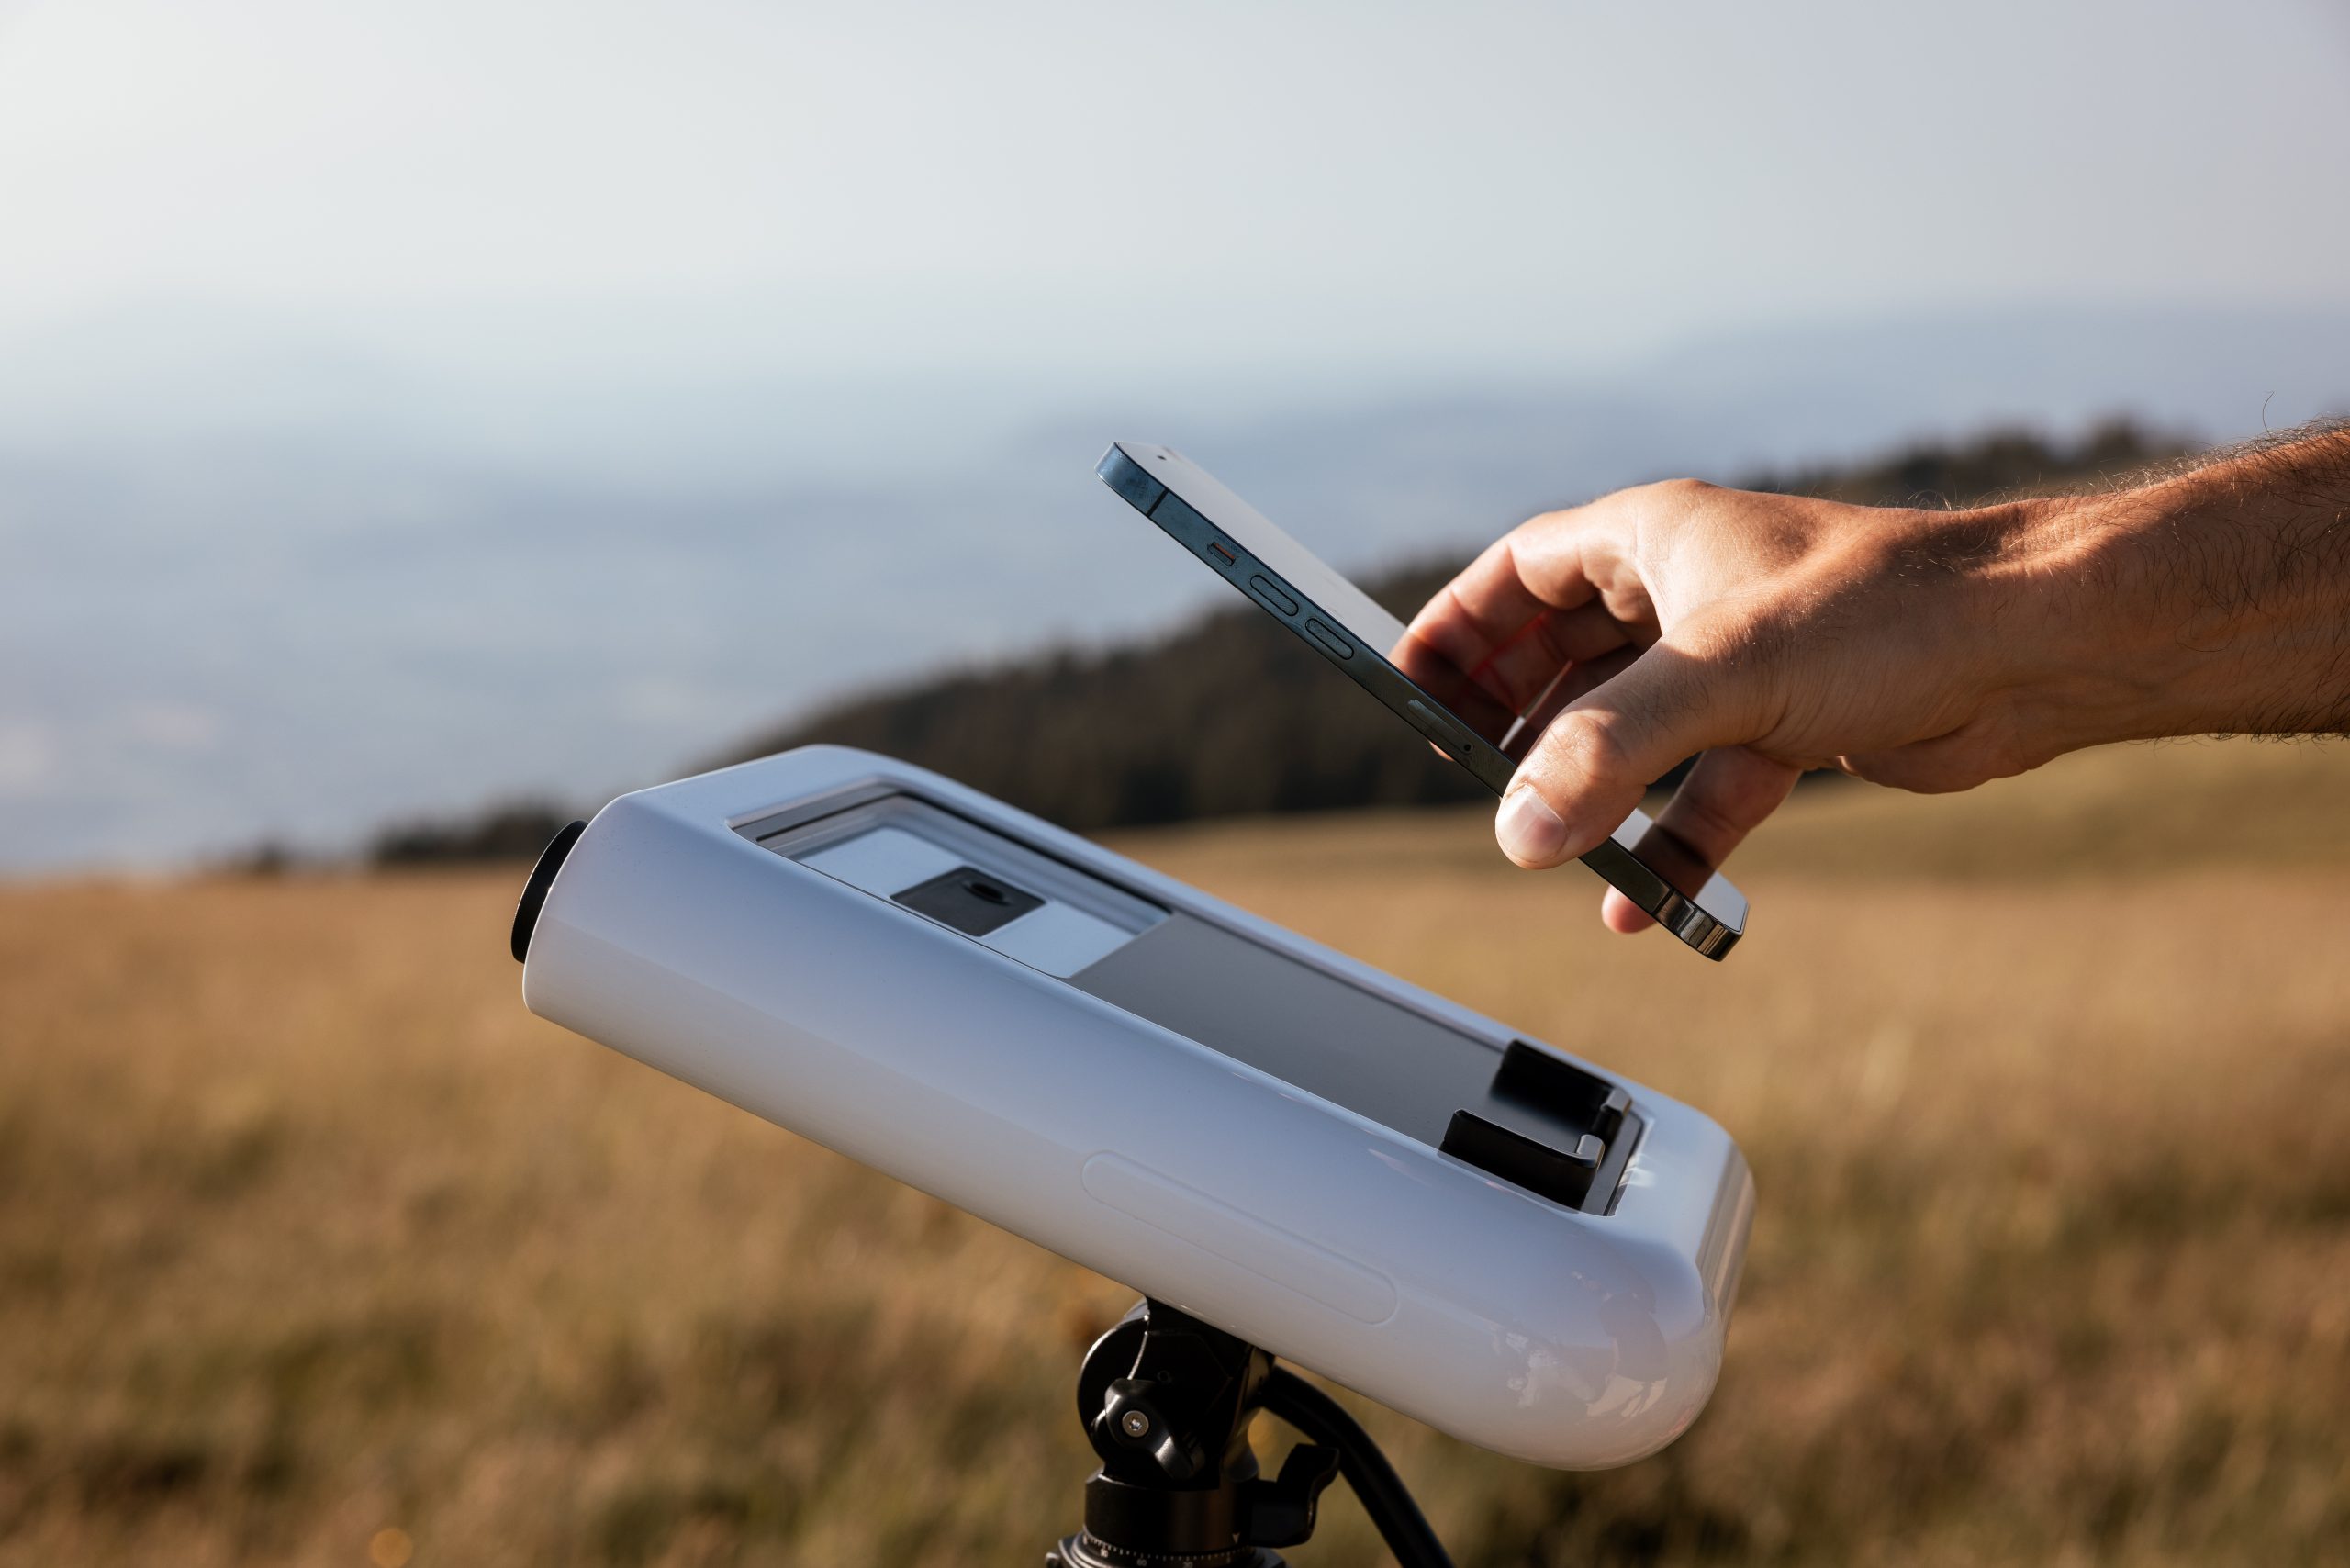
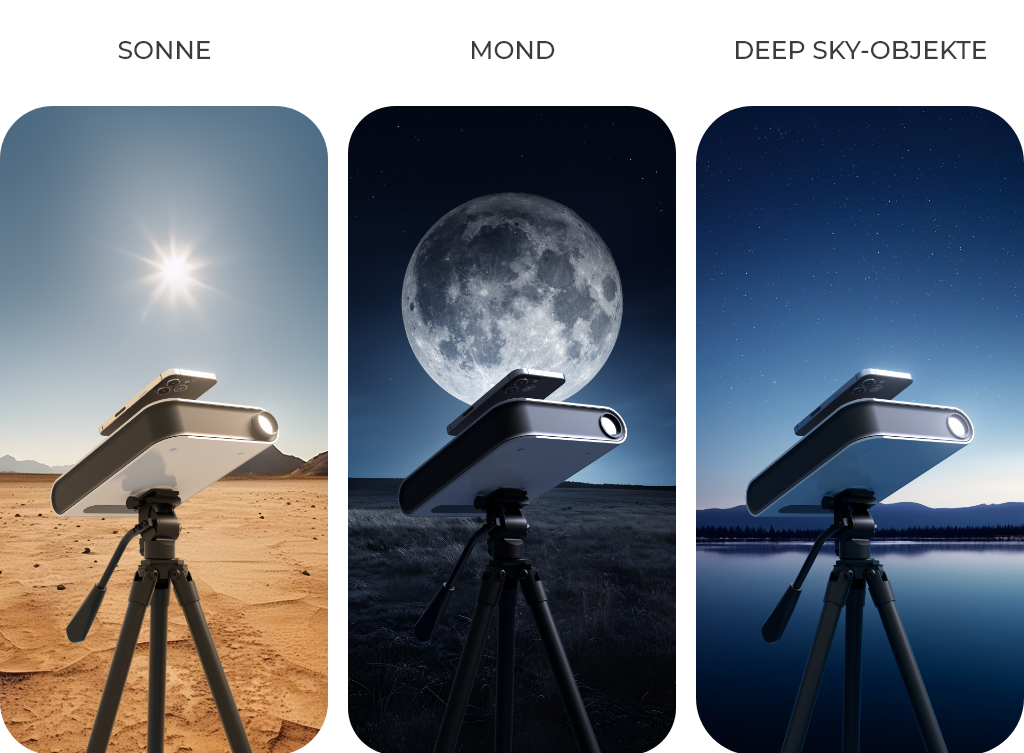
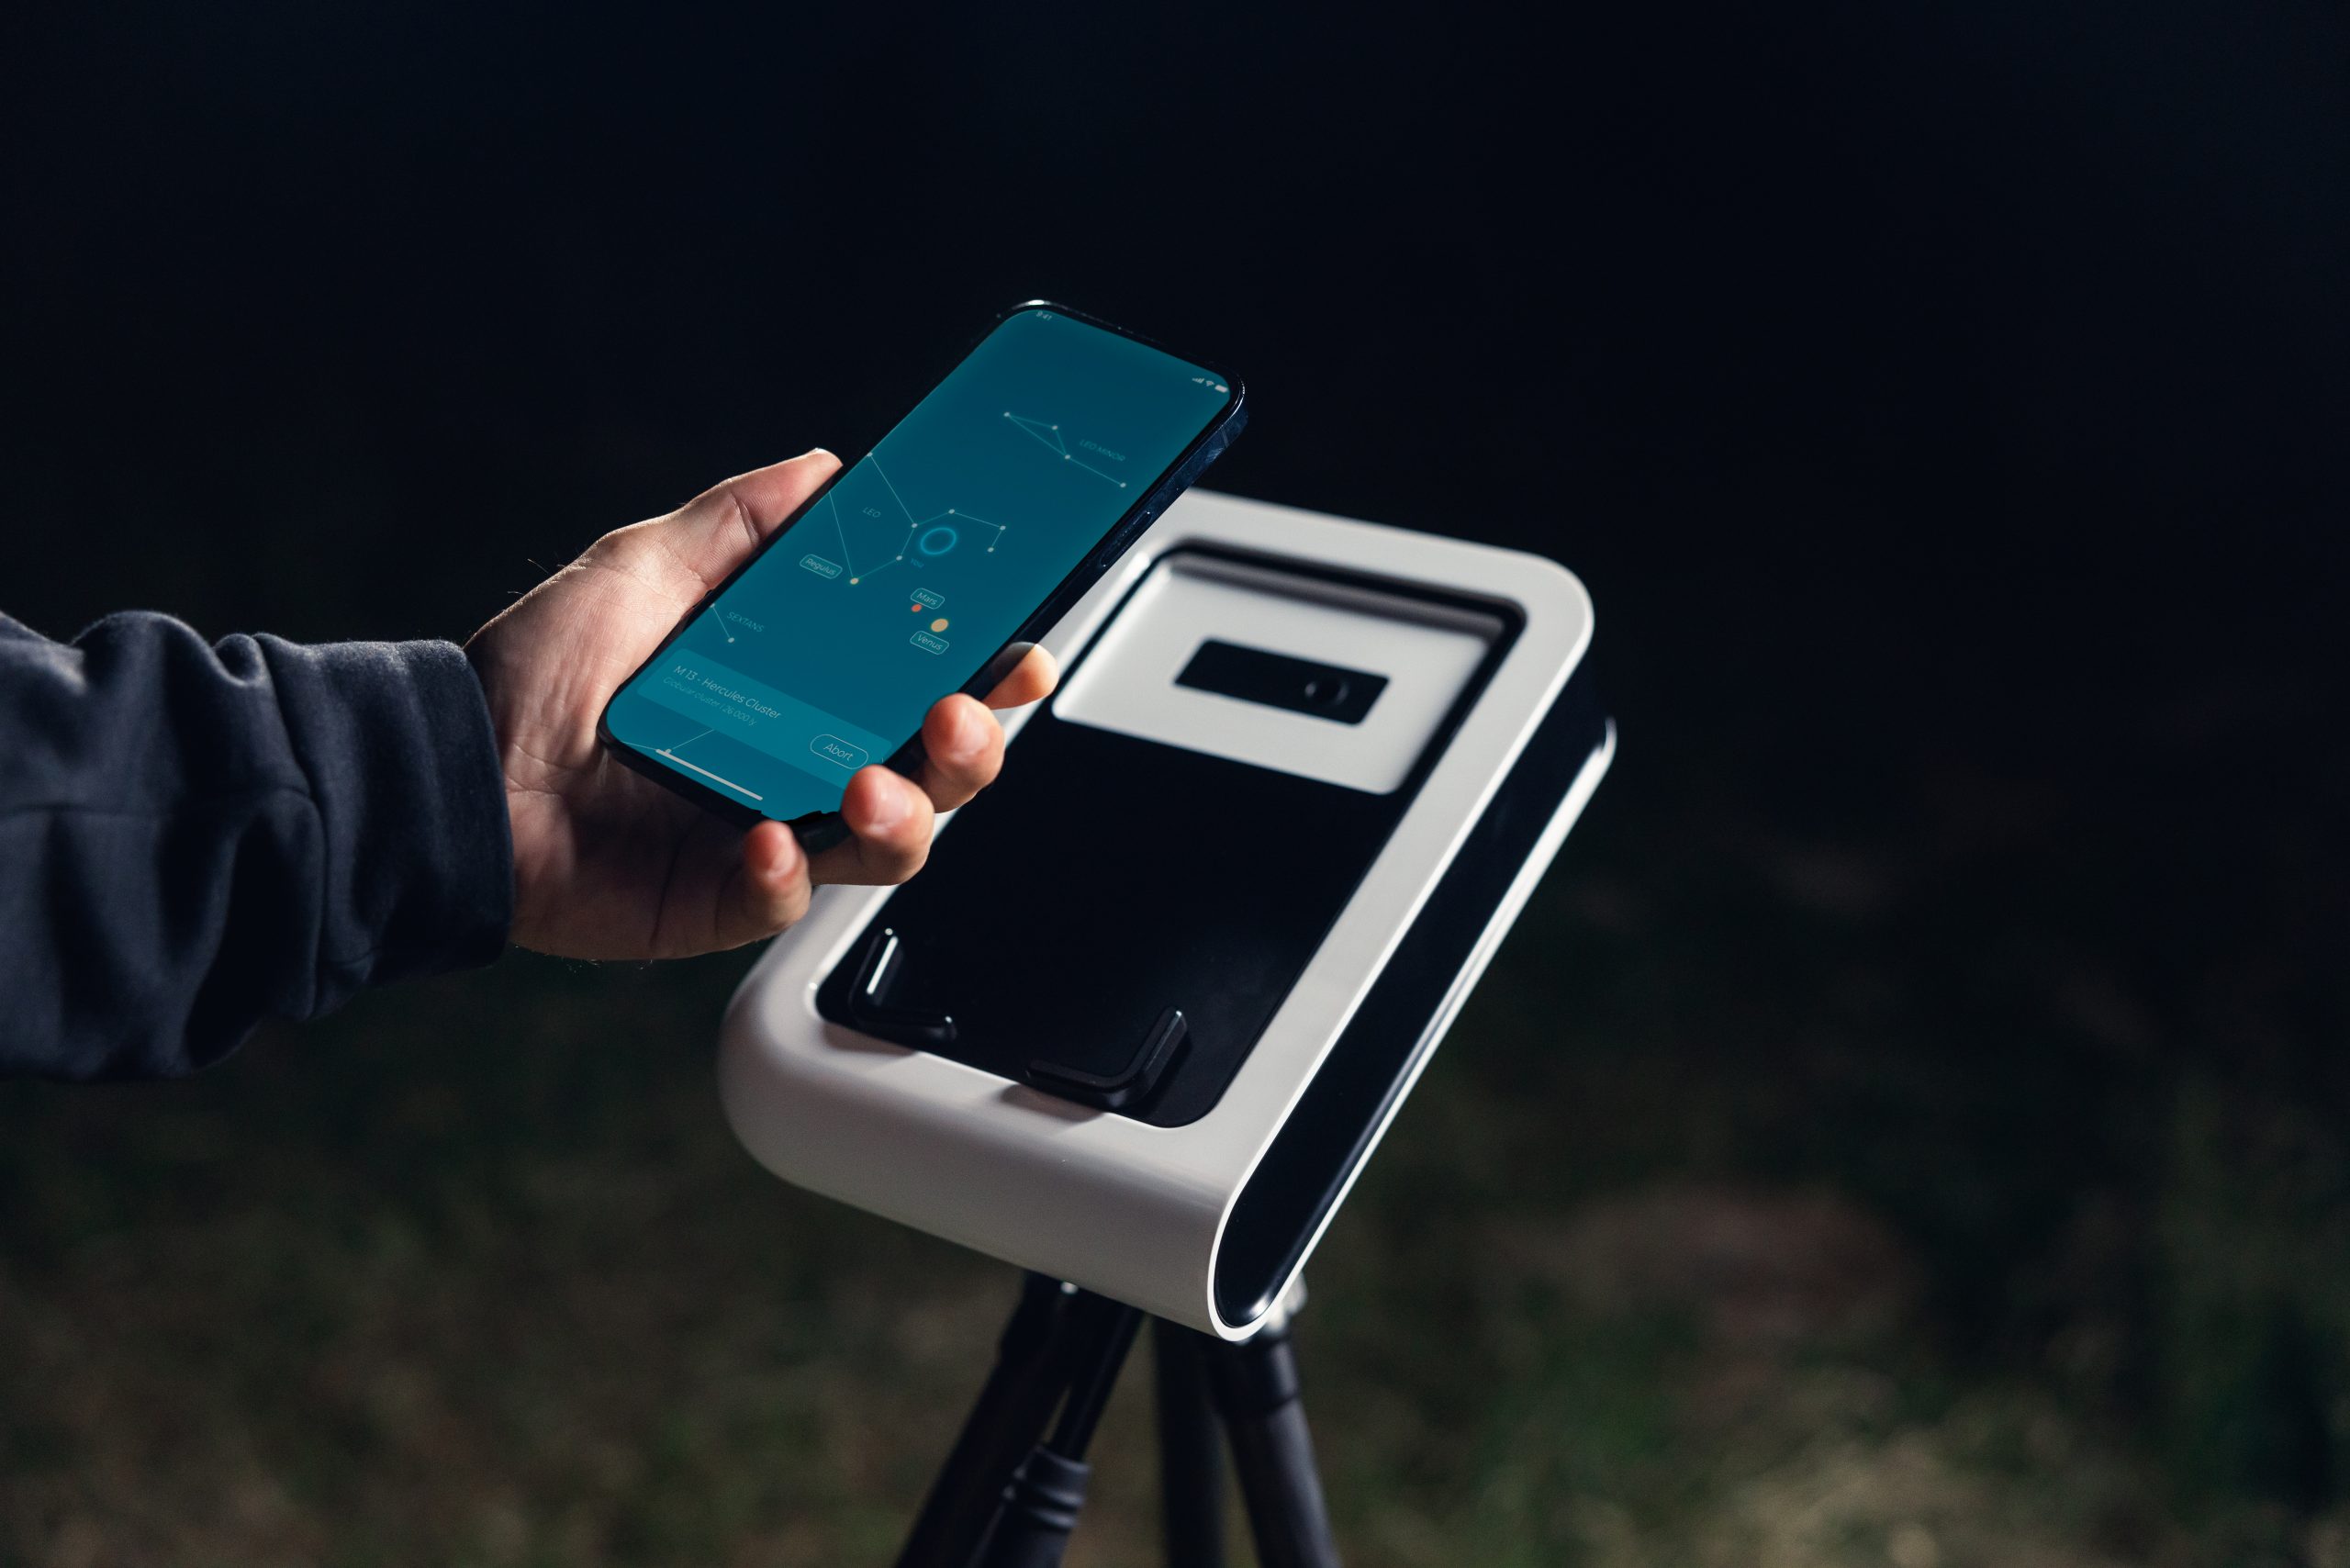
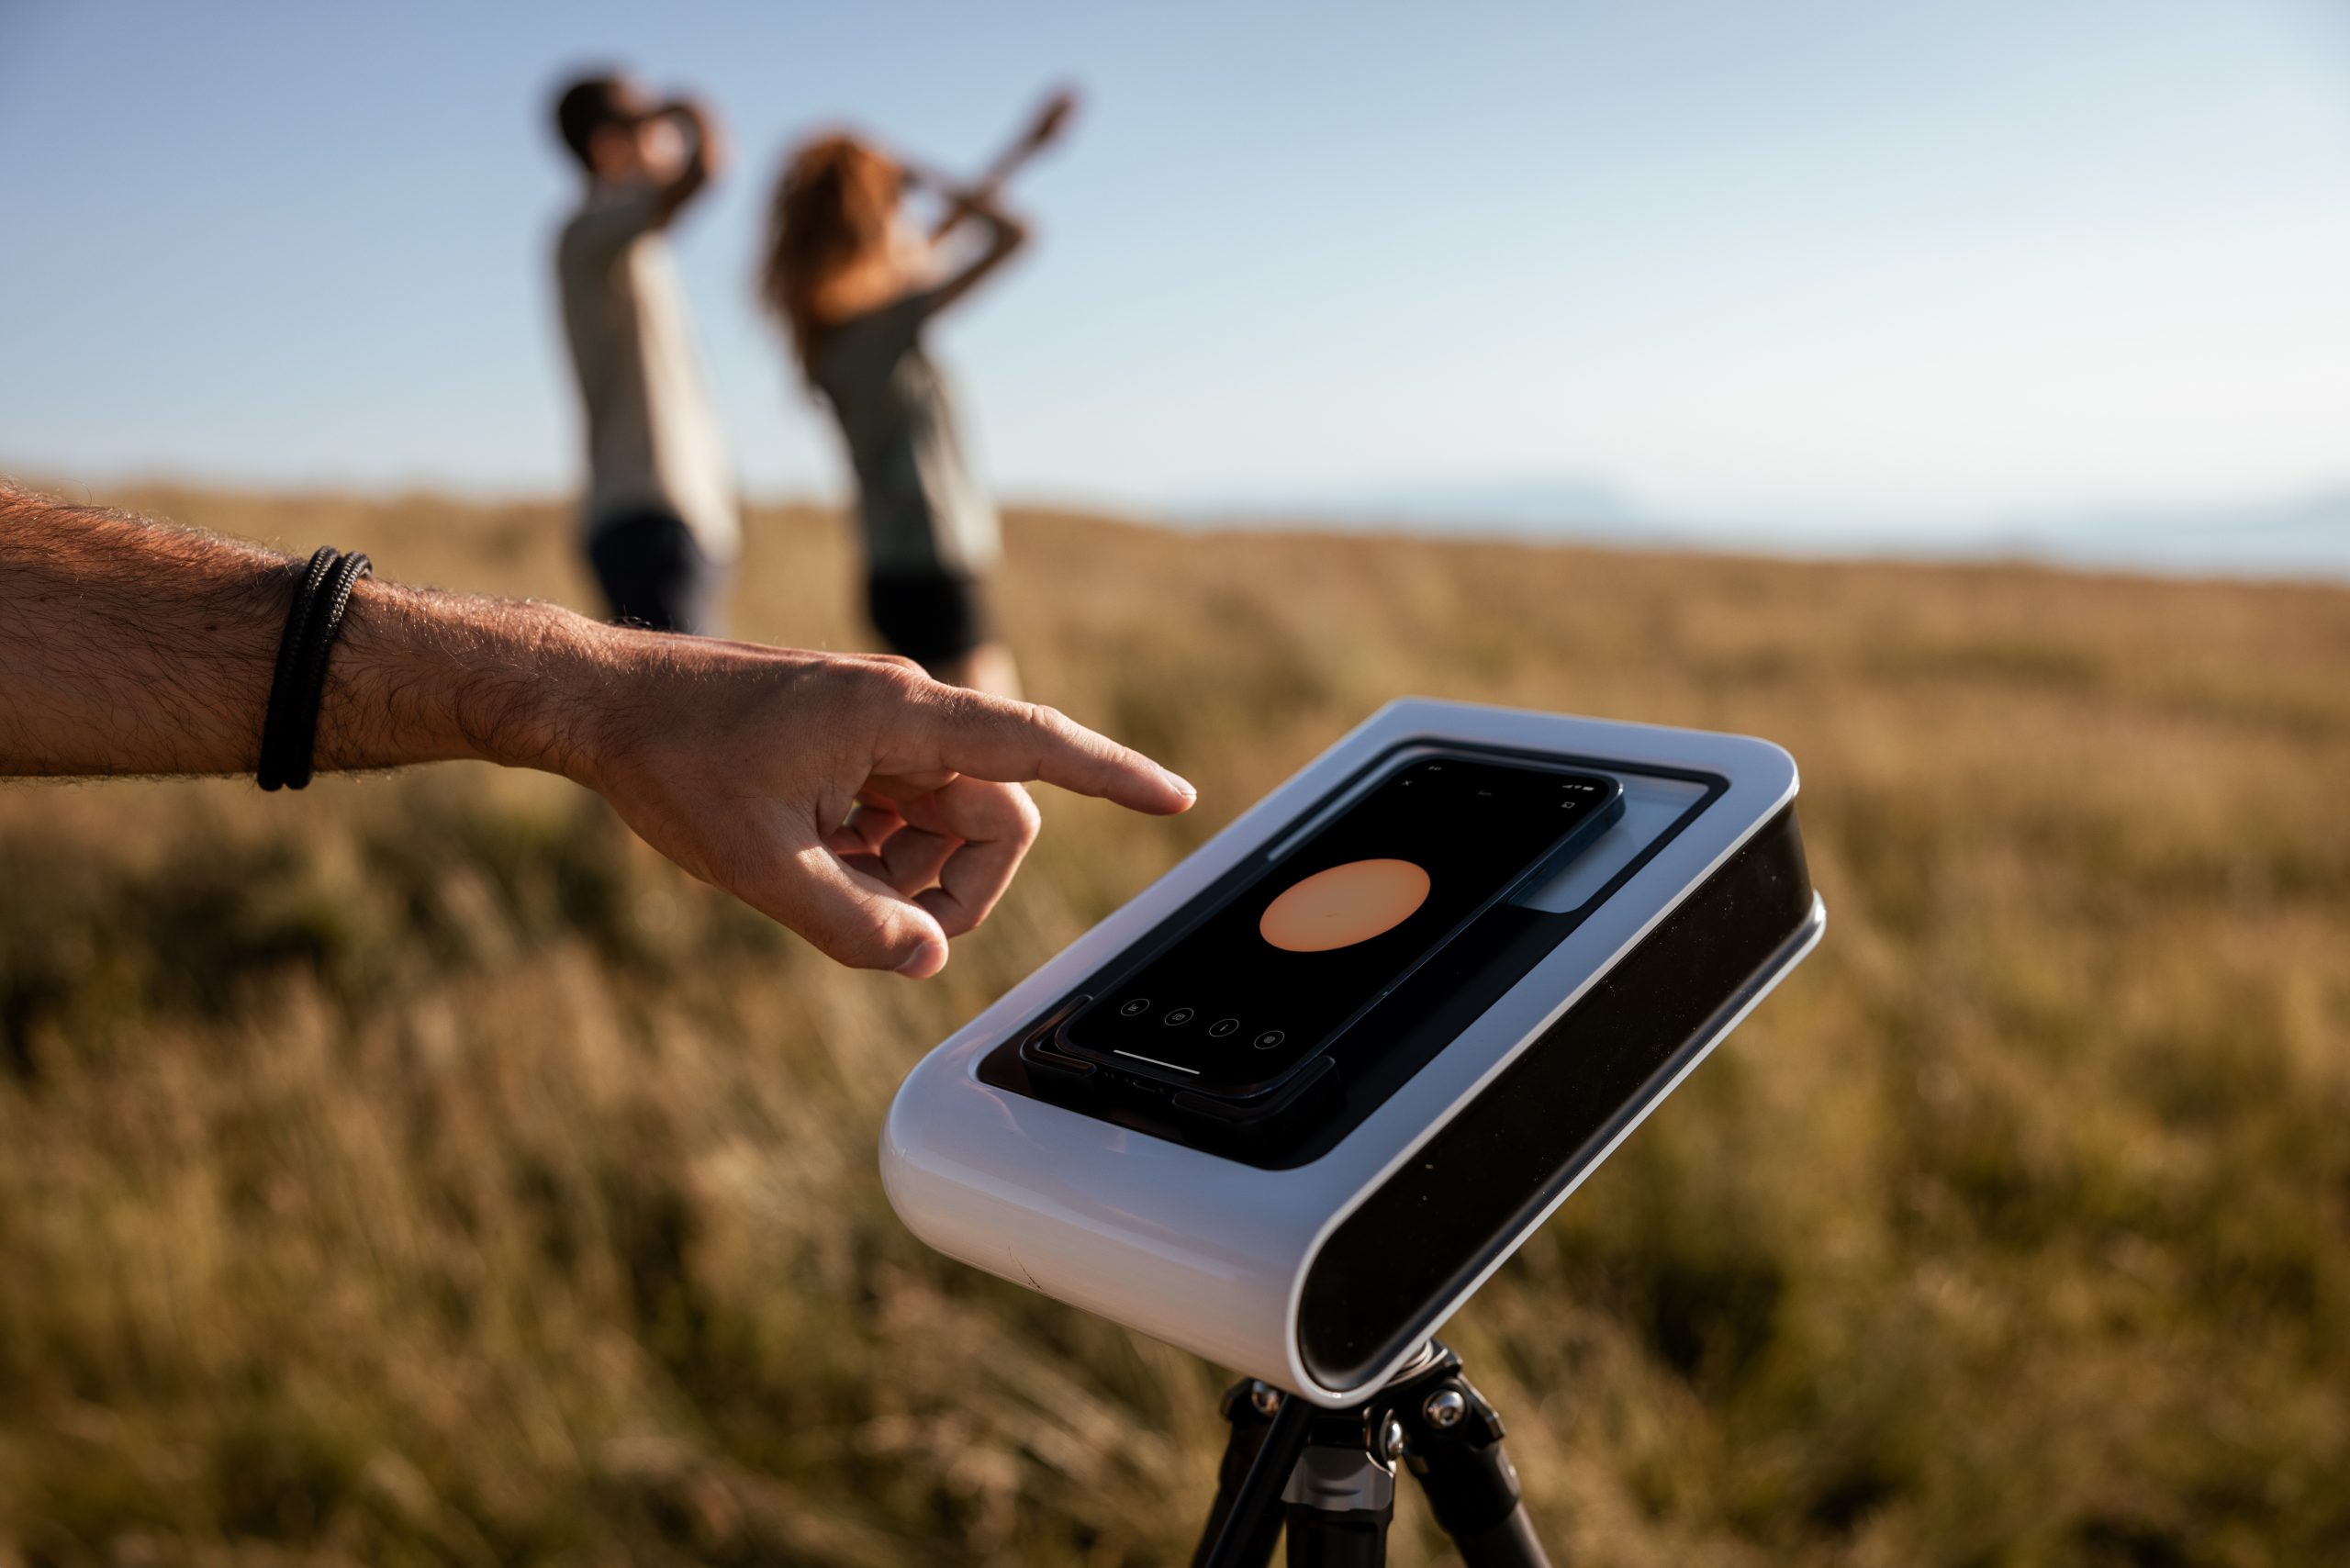
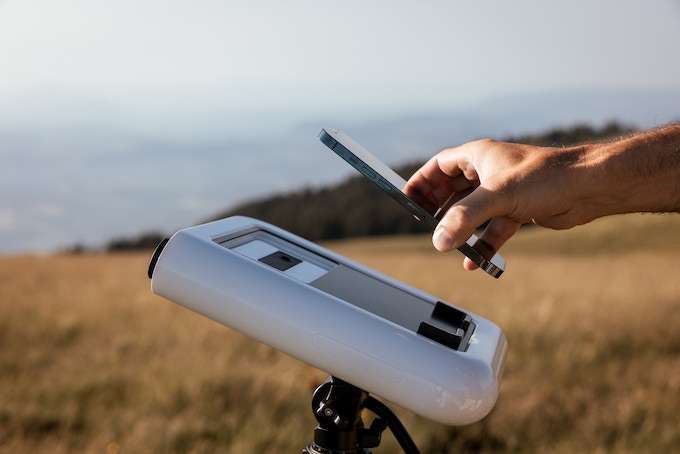
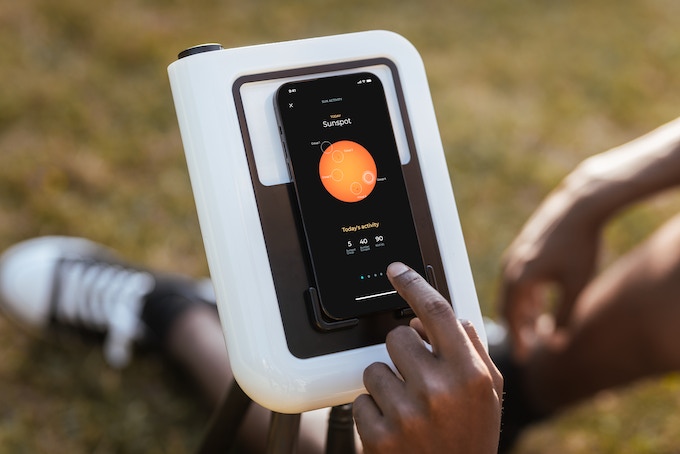
Hestia nutzt die Leistungsfähigkeit Ihres Smartphones und unsere Spitzentechnologie und ermöglicht es Ihnen, den Glanz der Sonne, die unglaubliche Schönheit des Mondes und die fesselnden Tiefen des Universums einzufangen – ohne komplexe Einstellungen oder umfassende Astronomiekenntnisse. Legen Sie Ihr Smartphone einfach auf das Okular von Hestia, richten Sie das Gerät auf ein Himmelsobjekt Ihrer Wahl, lassen Sie sich von unserer benutzerfreundlichen App leiten und entdecken Sie eine ganz neue Welt.

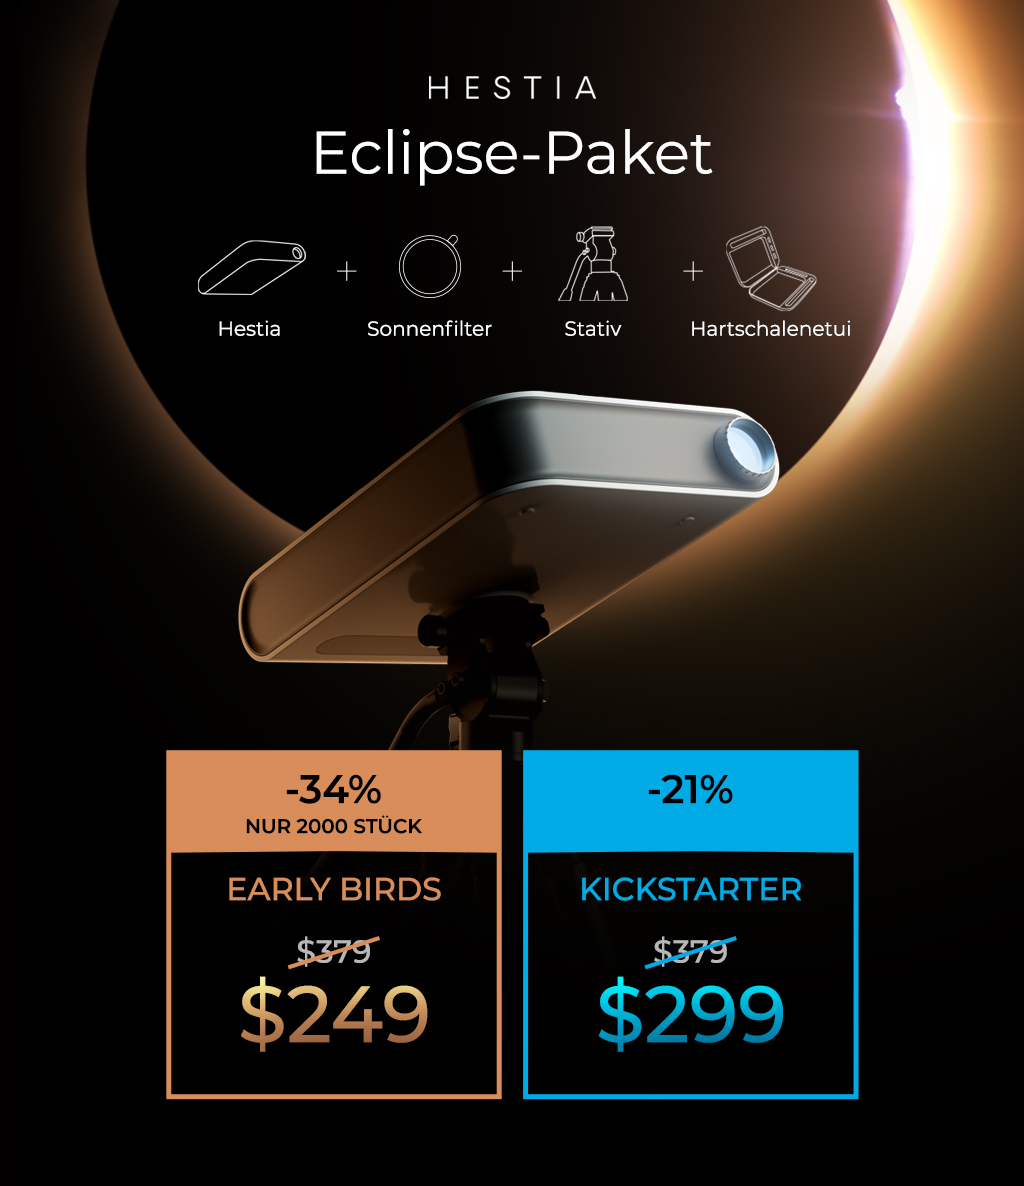
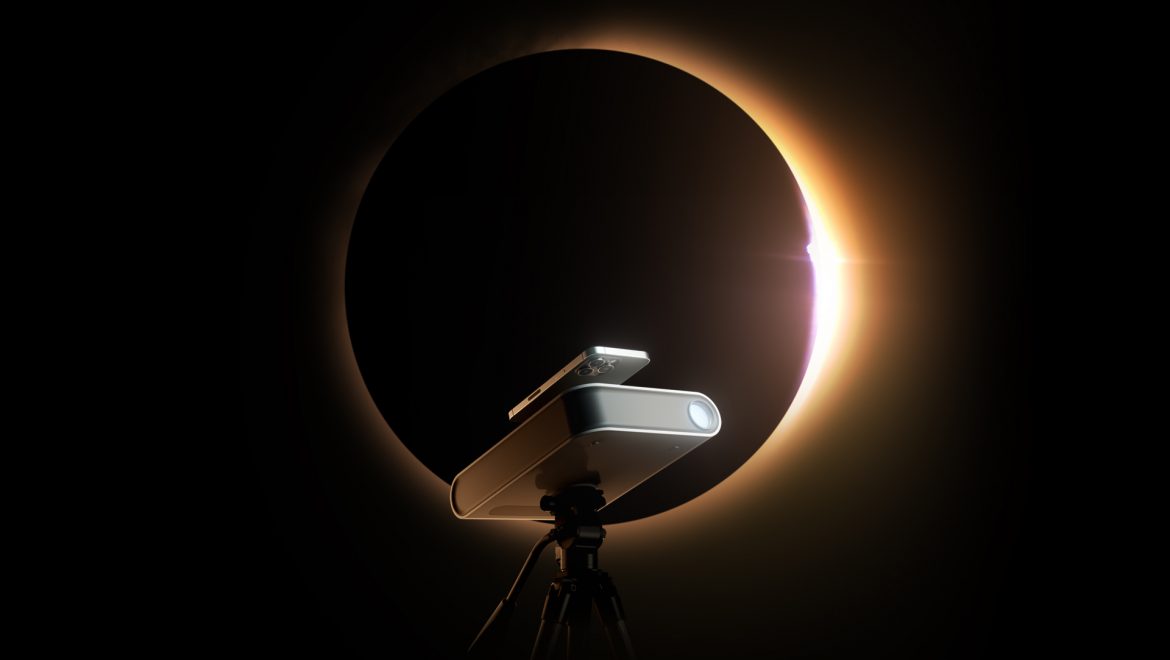
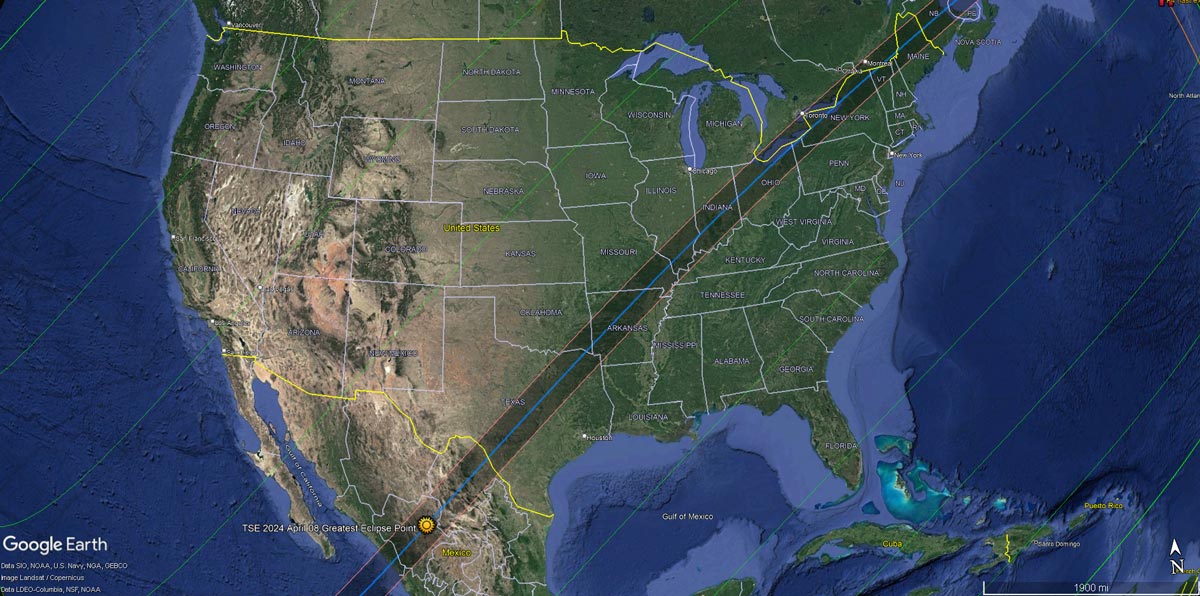
Nächstes Jahr zieht am 8. April eine totale Sonnenfinsternis über Nordamerika hinweg. Millionen Menschen werden sich versammeln, um dieses historische Ereignis zu beobachten. DAS DÜRFEN SIE NICHT VERPASSEN! Halten Sie diesen magischen Augenblick mit Hestia fest, um das beeindruckende Himmelsschauspiel sicherer und aus größerer Nähe zu beobachten.

Sehen Sie sich den Weg der Sonnenfinsternis unten an.

Am 12. August 2026 findet in Europa zum ersten Mal seit 2006 eine totale Sonnenfinsternis statt.

Hestia ist für jedes Ziel und jeden Zeitpunkt geeignet. Bewundern Sie die Schätze des Himmels, wann und wo Sie möchten.

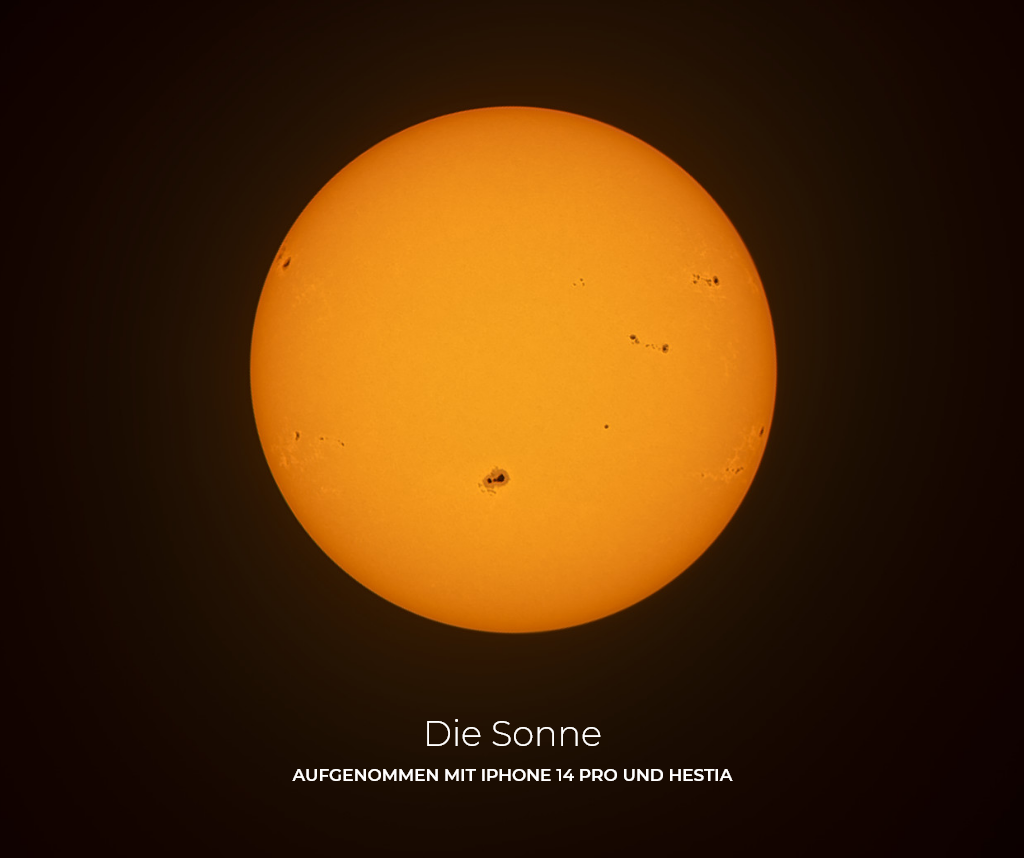
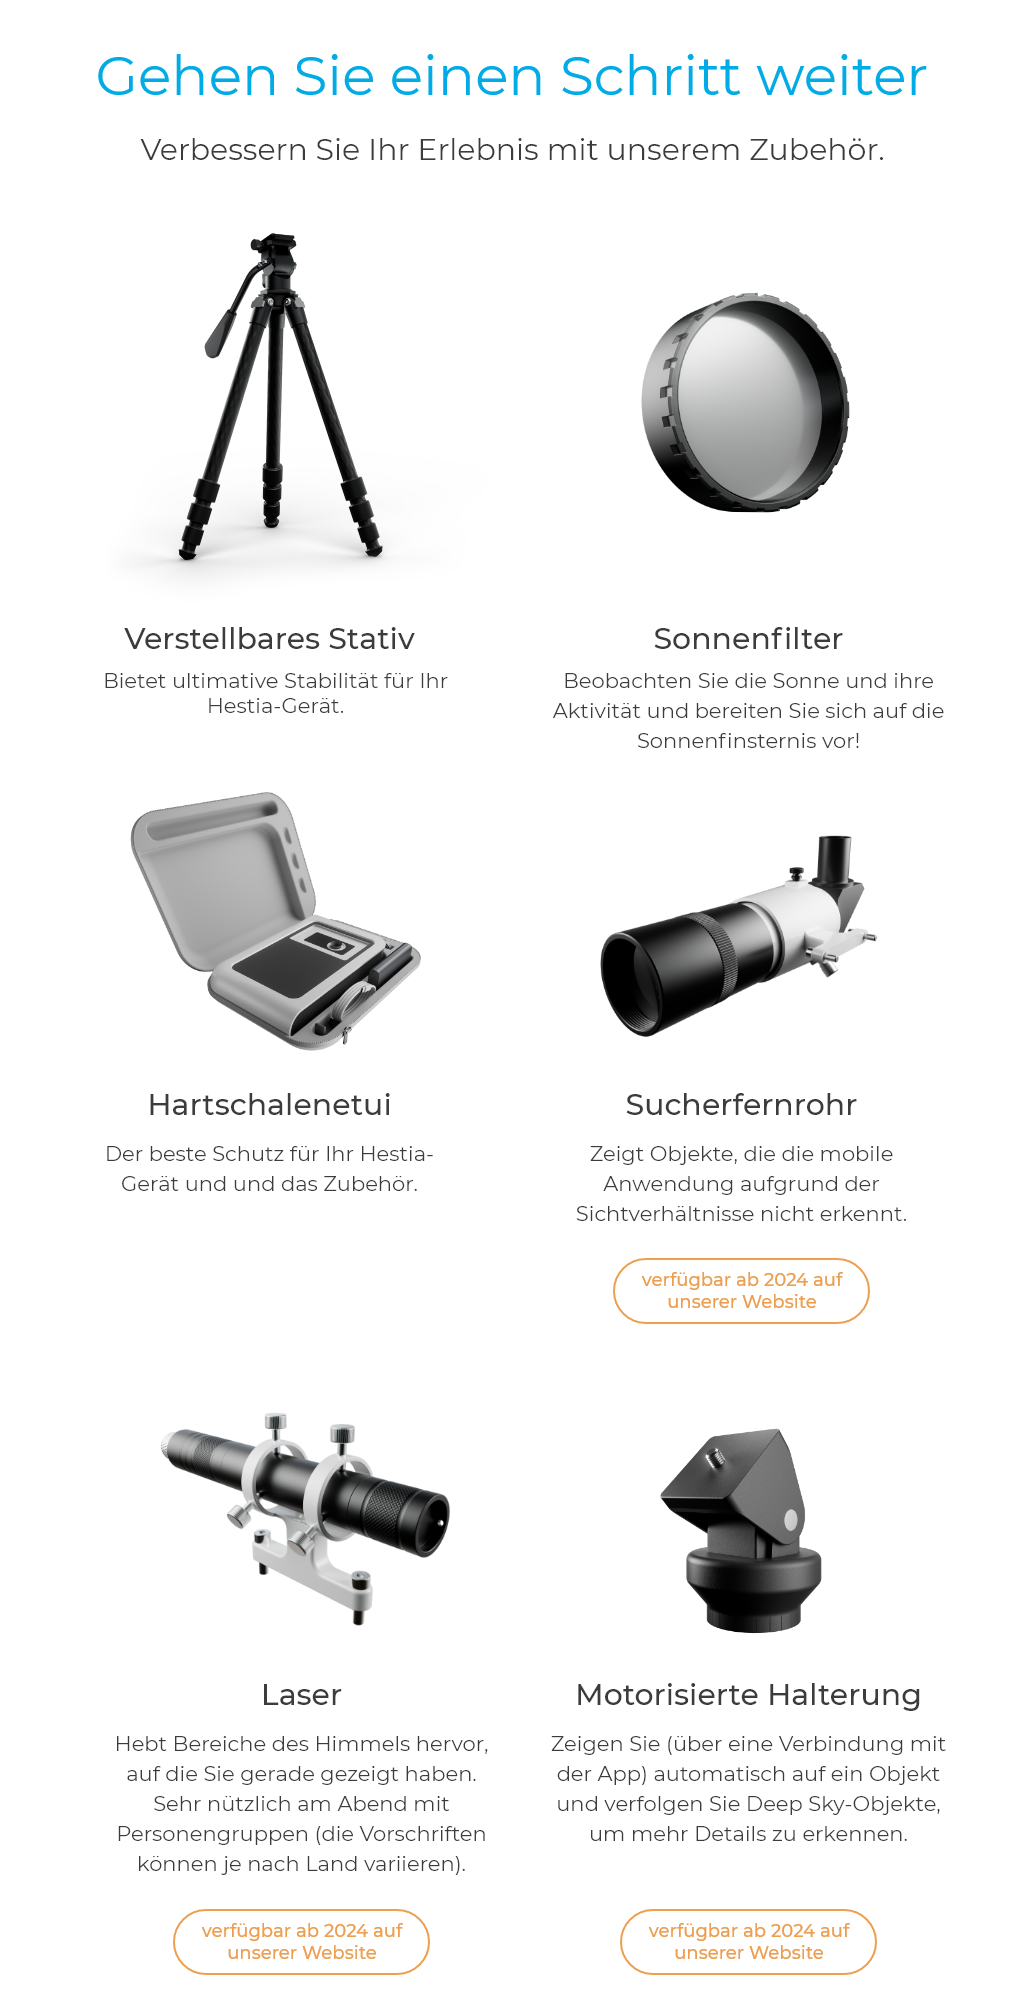
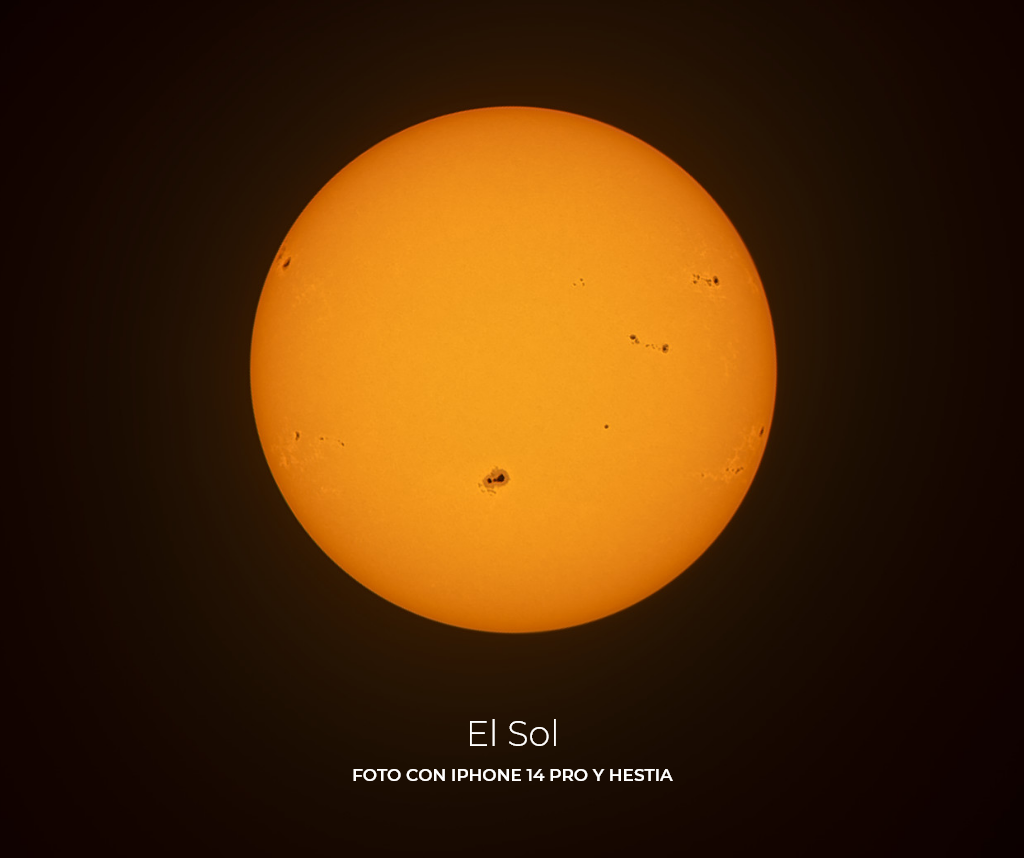
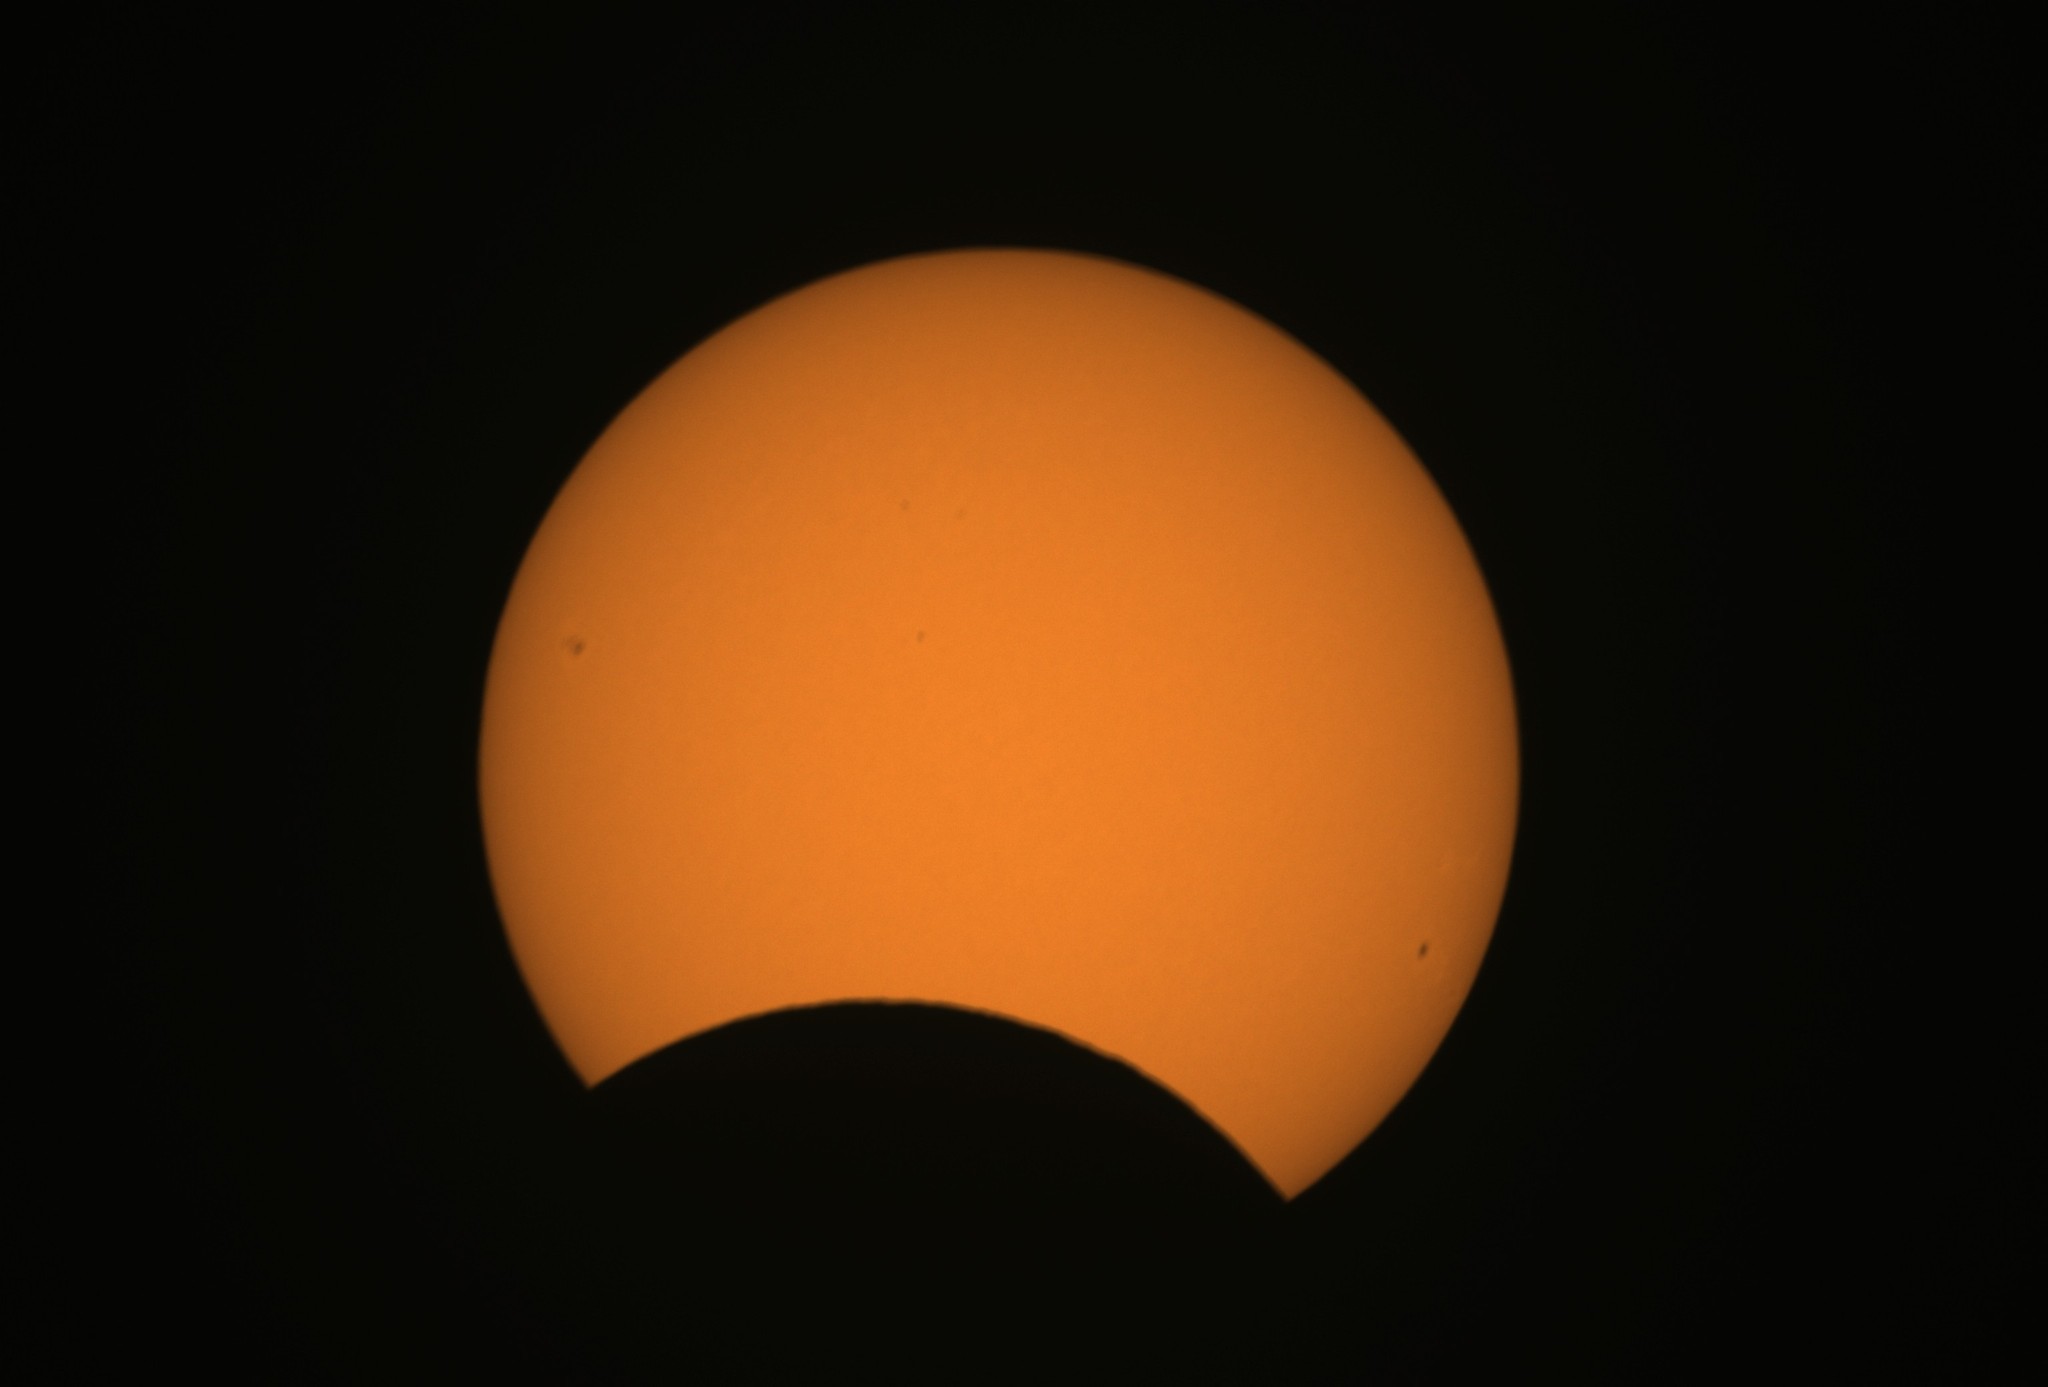
Je näher sie dem Höhepunkt des aktuellen Sonnenzyklus kommt, desto aktiver wird unser Stern. Die Beobachtung der Sonnenflecken mit Hestia und seinem Sonnenfilter hilft Ihnen, das Verhalten der Sonne, ihren Einfluss auf das Weltraumwetter und ihre Auswirkungen auf unseren Planeten zu verstehen.

Abends können Sie den Sonnenfilter in aller Sicherheit entfernen und den letzten Auftritt der Sonne bewundern.

Sonnenuntergang, aufgenommen mit Hestia ohne Sonnenfilter.

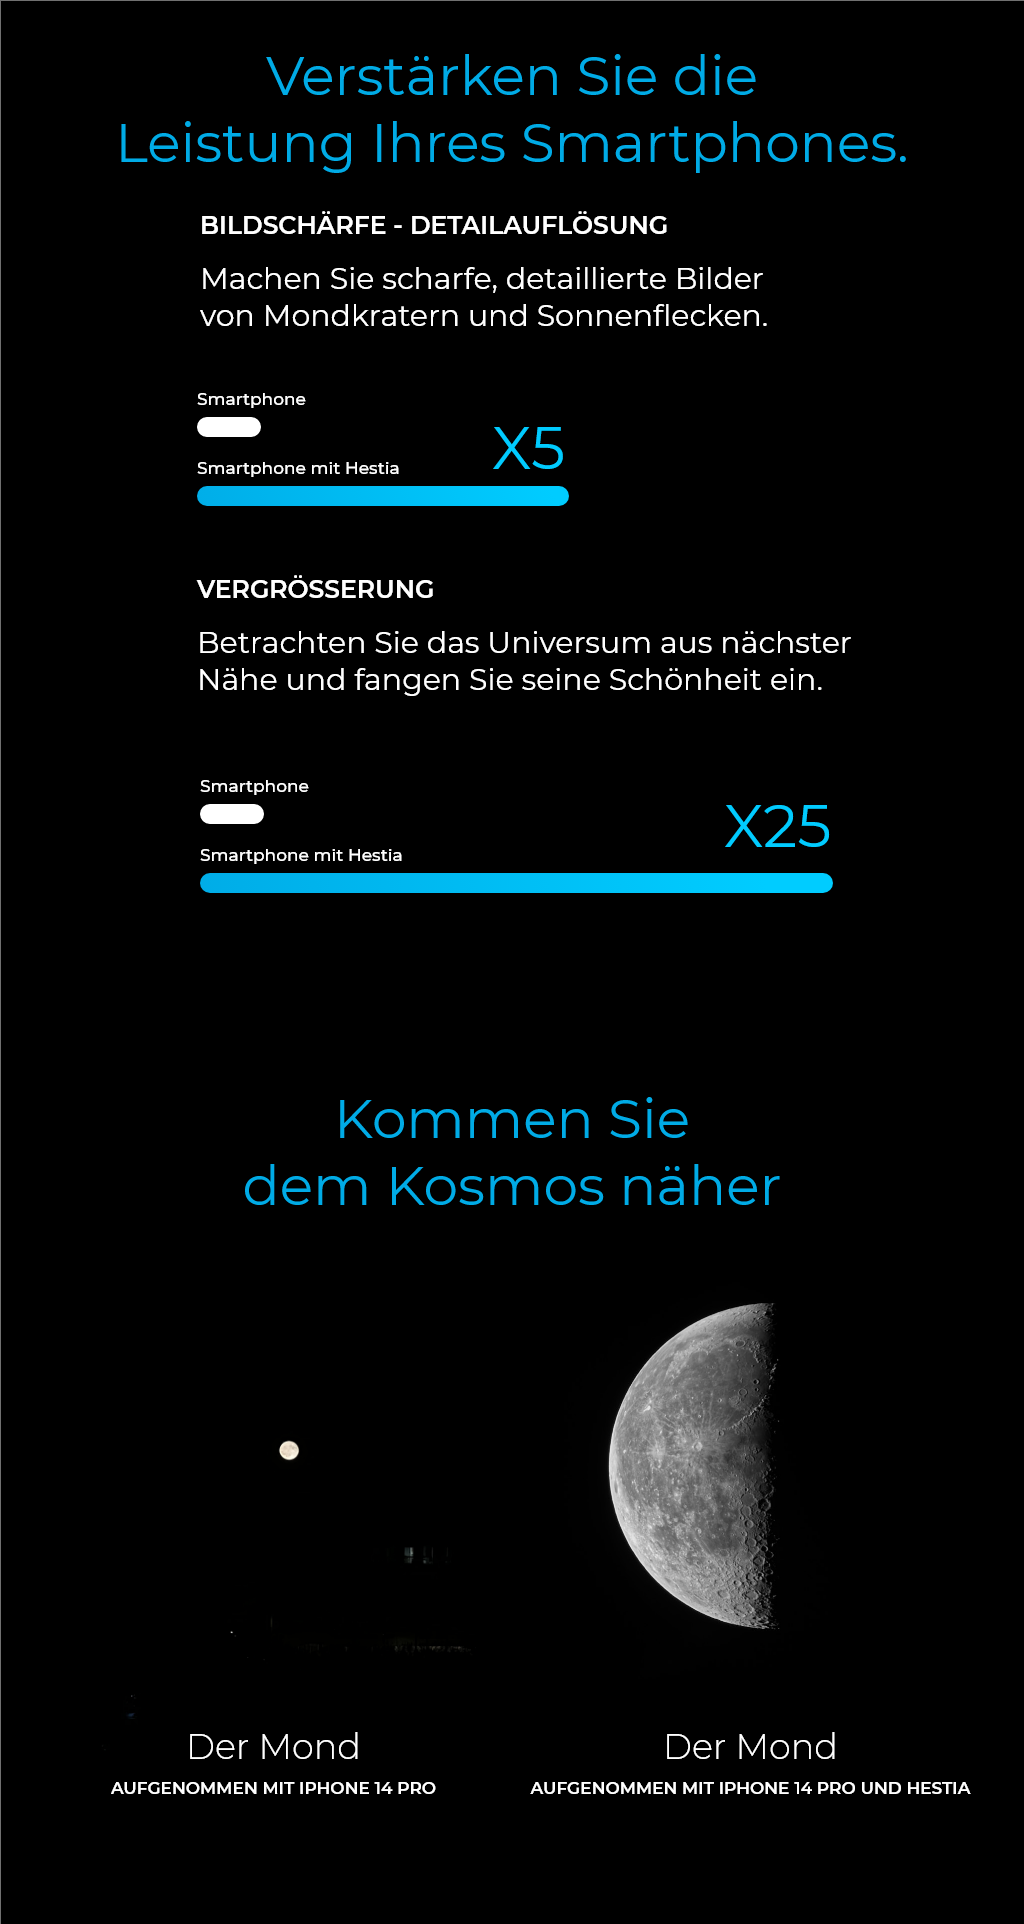
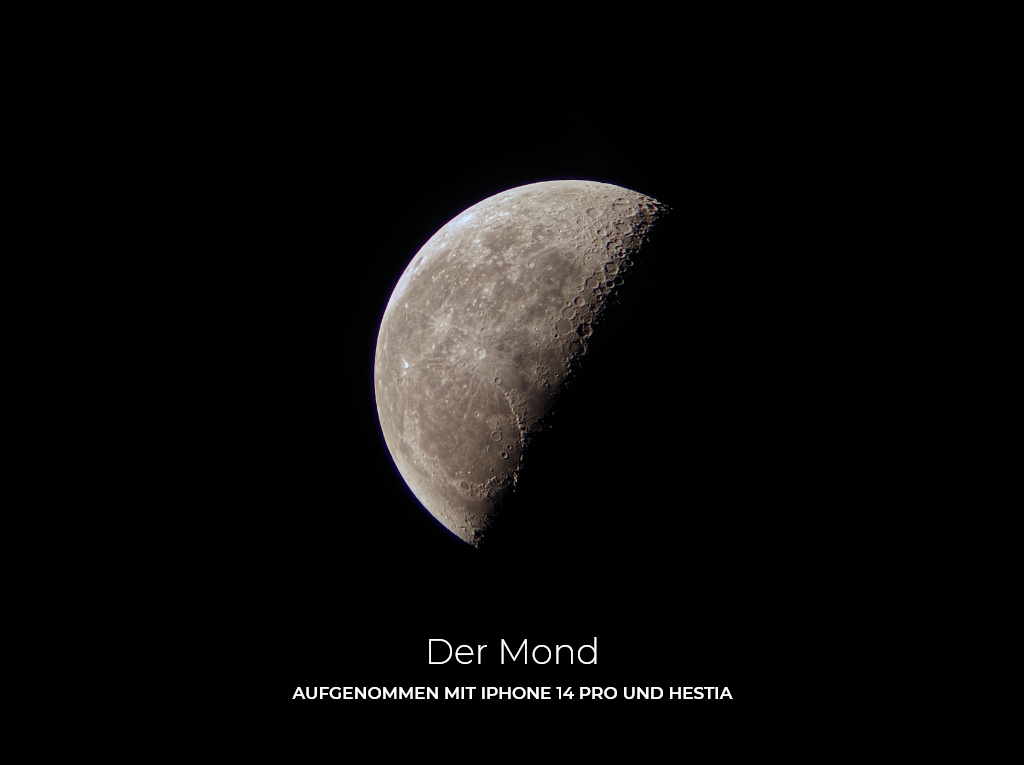
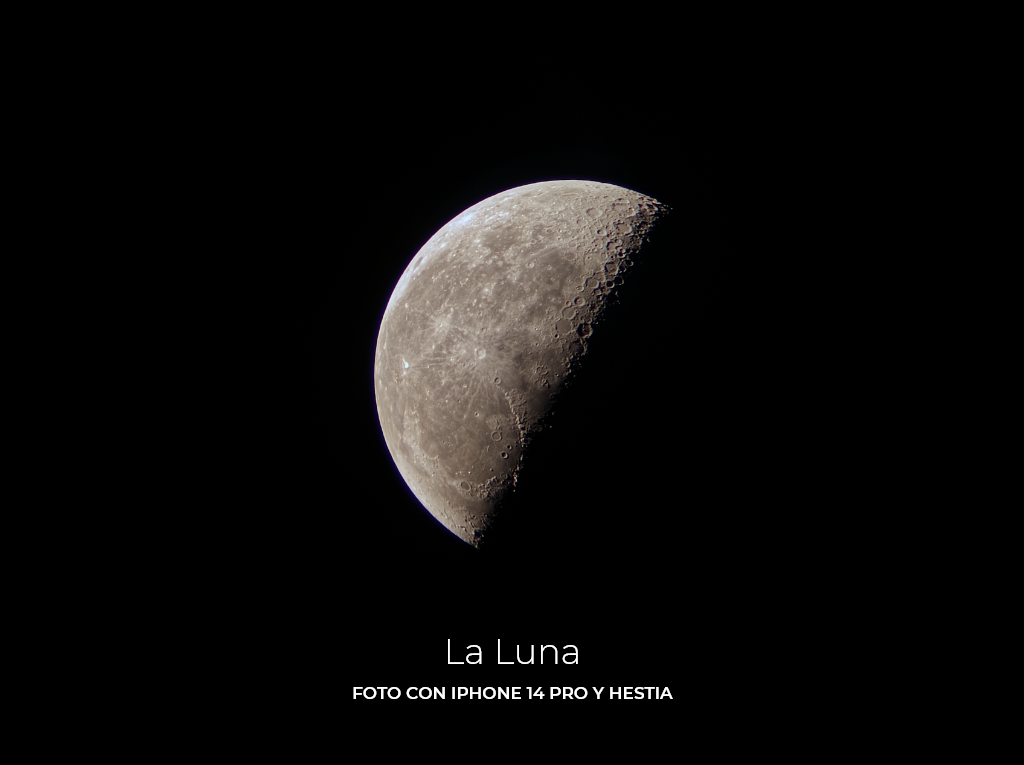
Jetzt wird jede Mondbeobachtung zu einem emotionalen Erlebnis. Entdecken Sie alle Facetten des faszinierend schönen Trabanten unseres Planeten.

Der Himmel ist nicht klar? Toll sind auch Aufnahmen des Mondes, der durch die Wolken scheint!

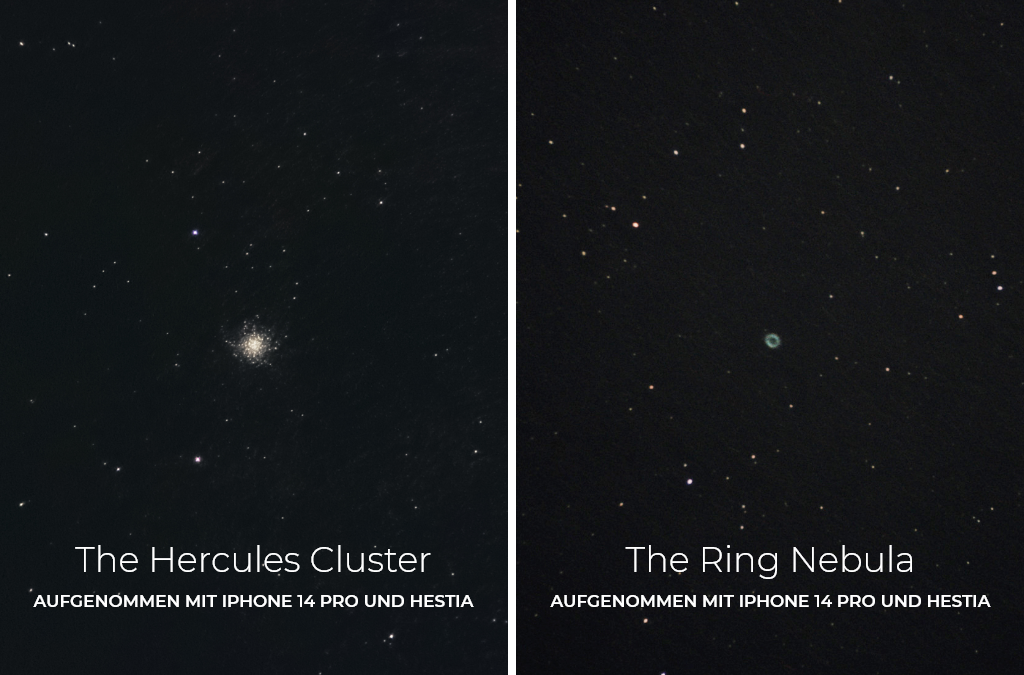
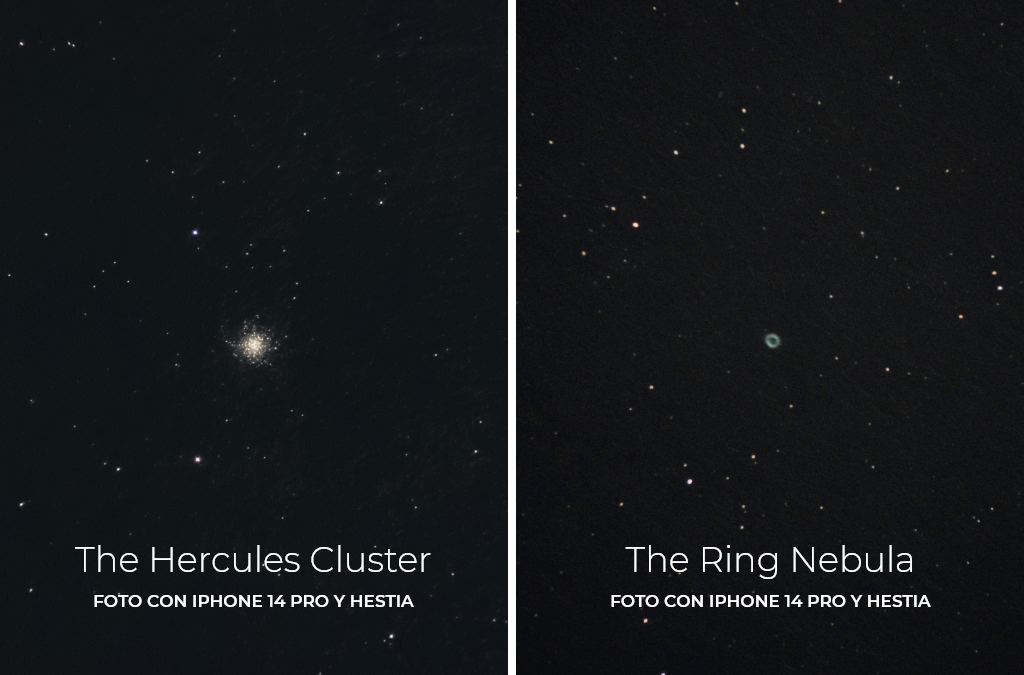
Alle Astronauten haben einmal angefangen. Hestia ist ideal als erstes Instrument für Einsteiger oder neugierige Menschen, die das Weltall gerne ausführlicher erkunden und verstehen möchten. Hestia und Ihr Smartphone bilden zusammen ein völlig neues Portal, das Ihnen dabei hilft, das Universum zu durchqueren, einige der hellsten Galaxien, Nebel und Sternhaufen zu beobachten und Ihre Reise in den Weltraum zu beginnen.

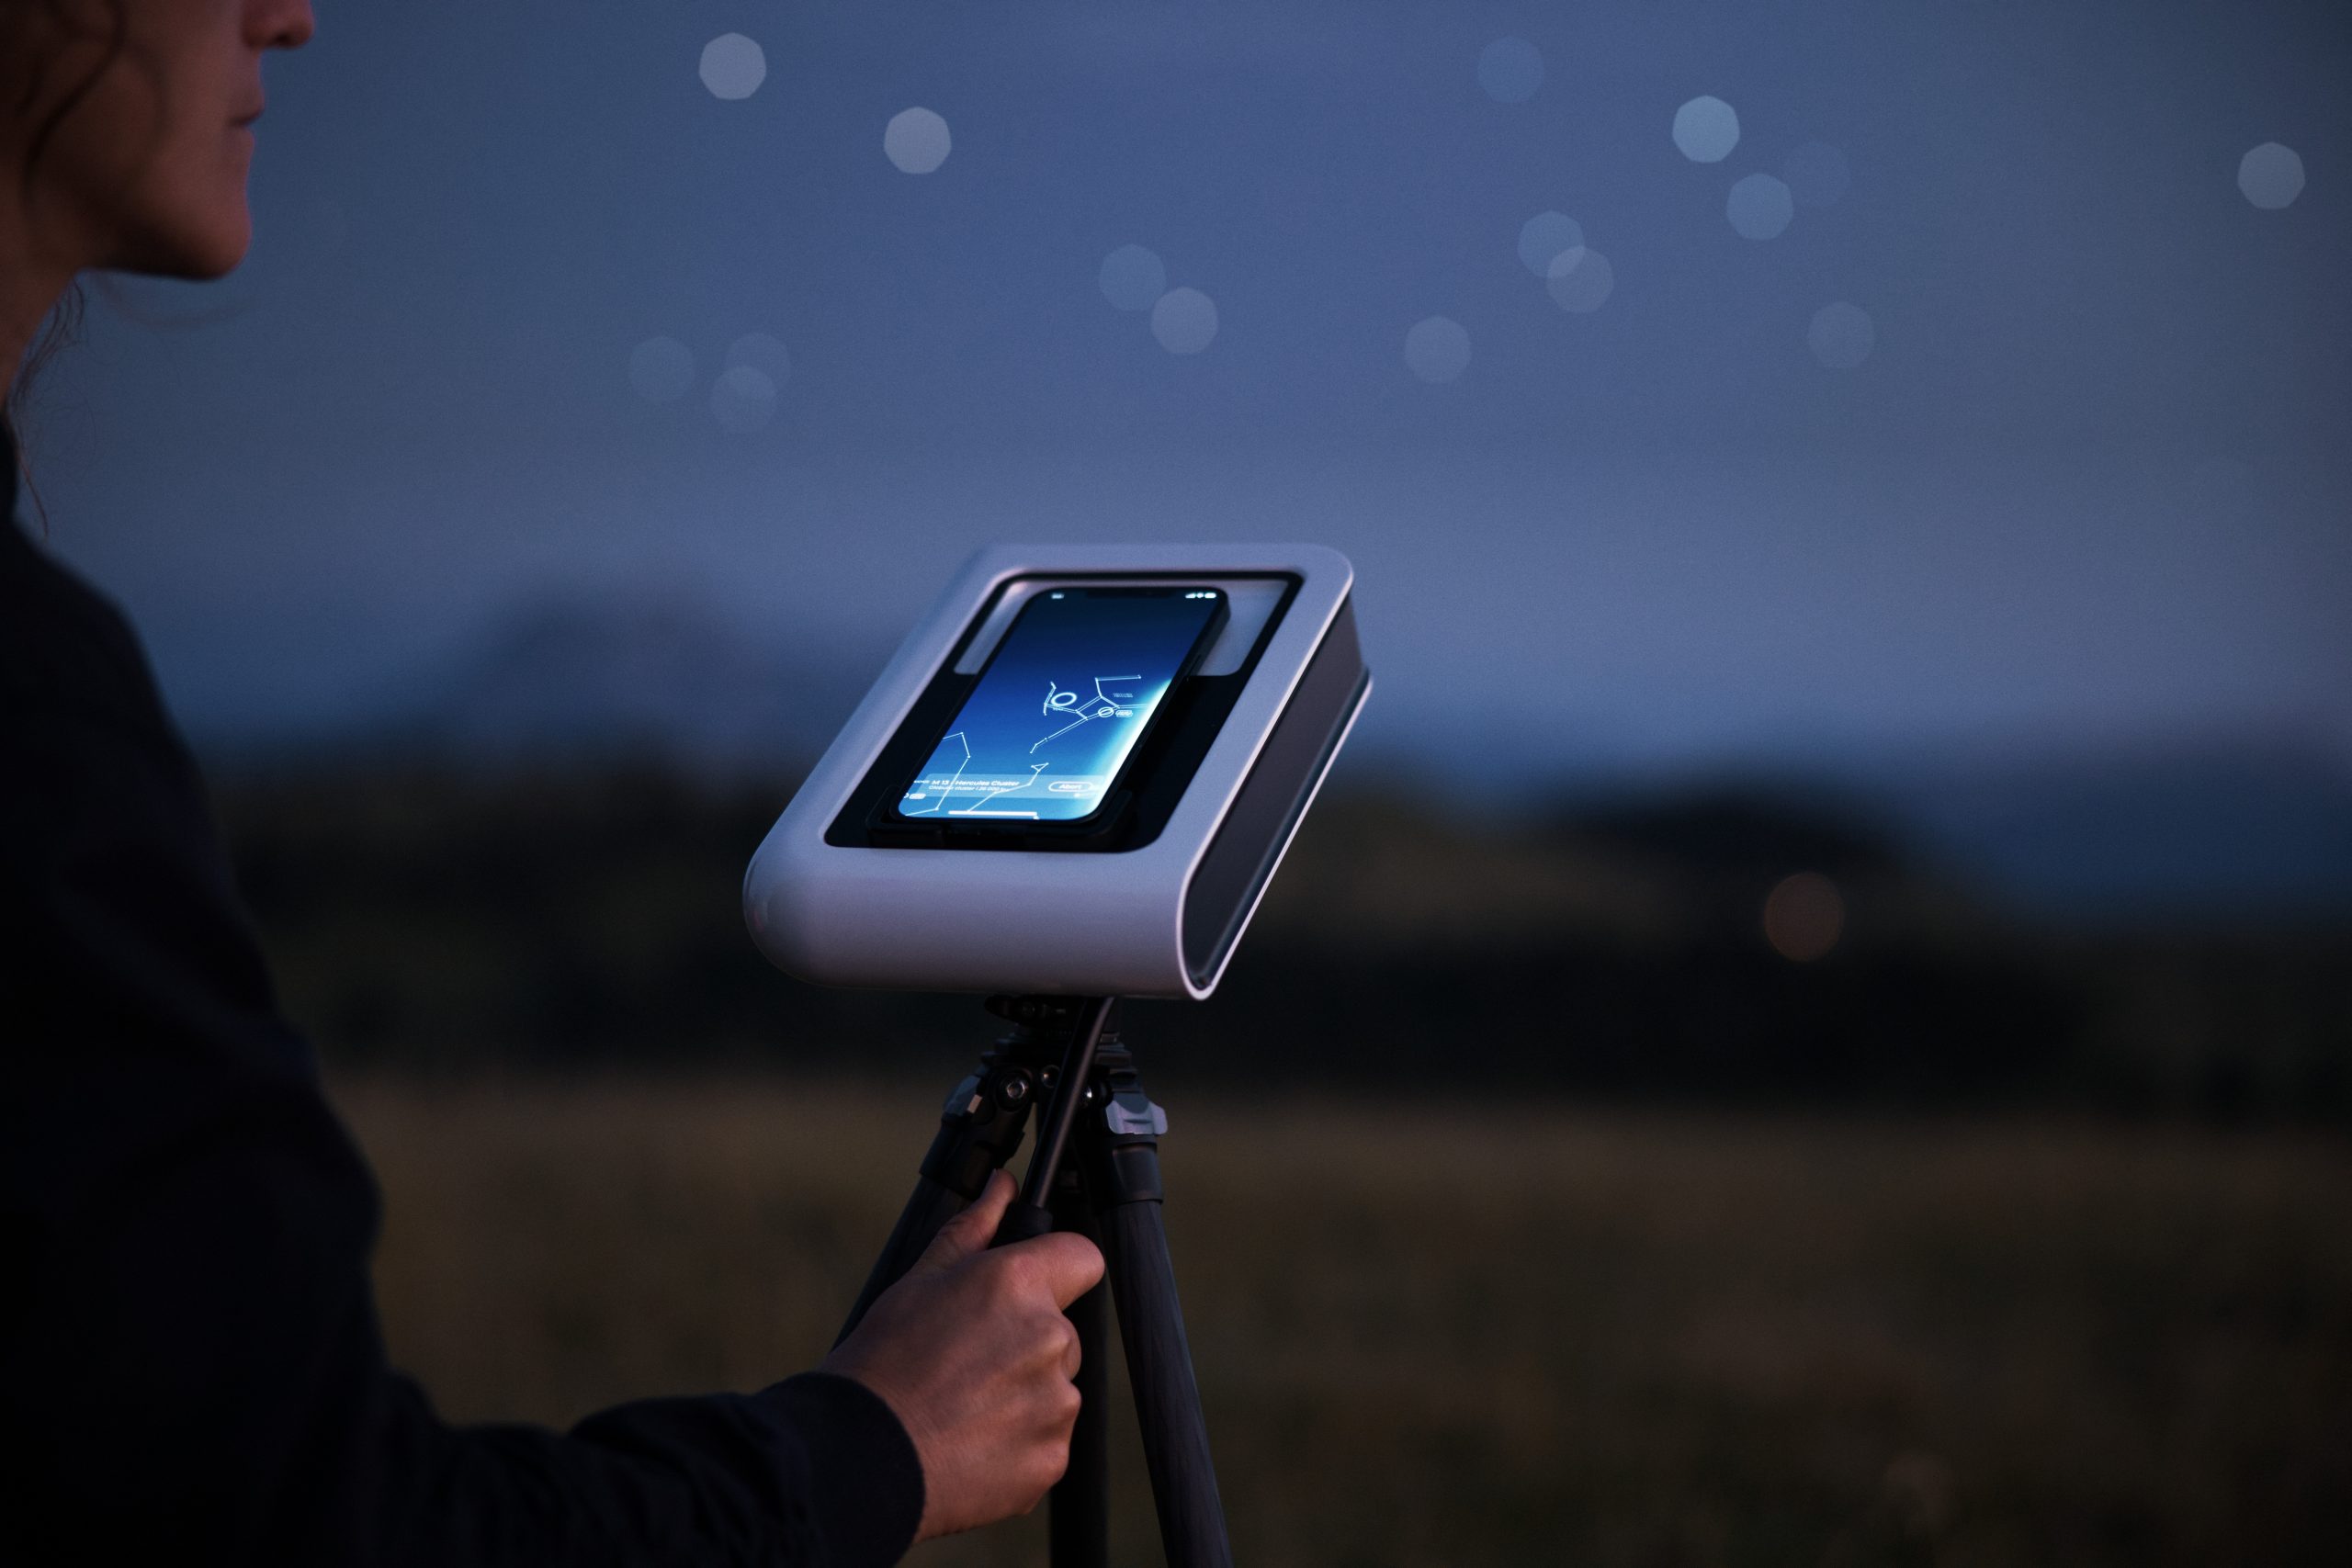
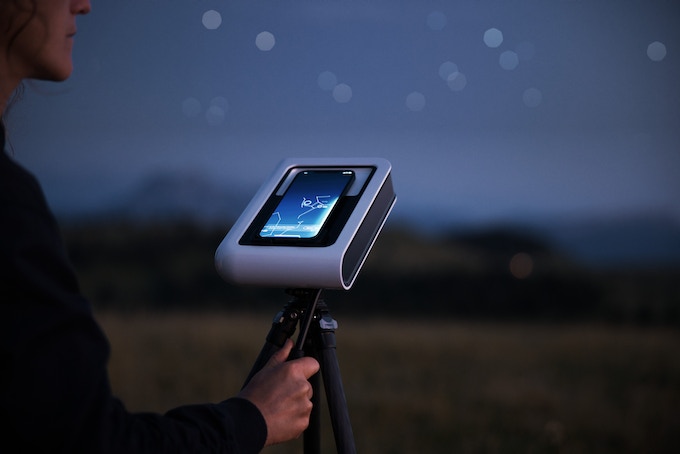
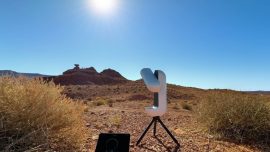
Die Verwendung von Hestia ist alles andere als komplex. Befestigen Sie Hestia am Stativ und richten Sie die Hauptkamera Ihres Smartphones mit Hilfe von Gravity by Vaonis auf das Okular von Hestia aus. Wählen Sie Ihr Ziel und lassen Sie sich von der App dorthin führen.

Voilà! Schon können Sie die Schönheiten des Kosmos bewundern.

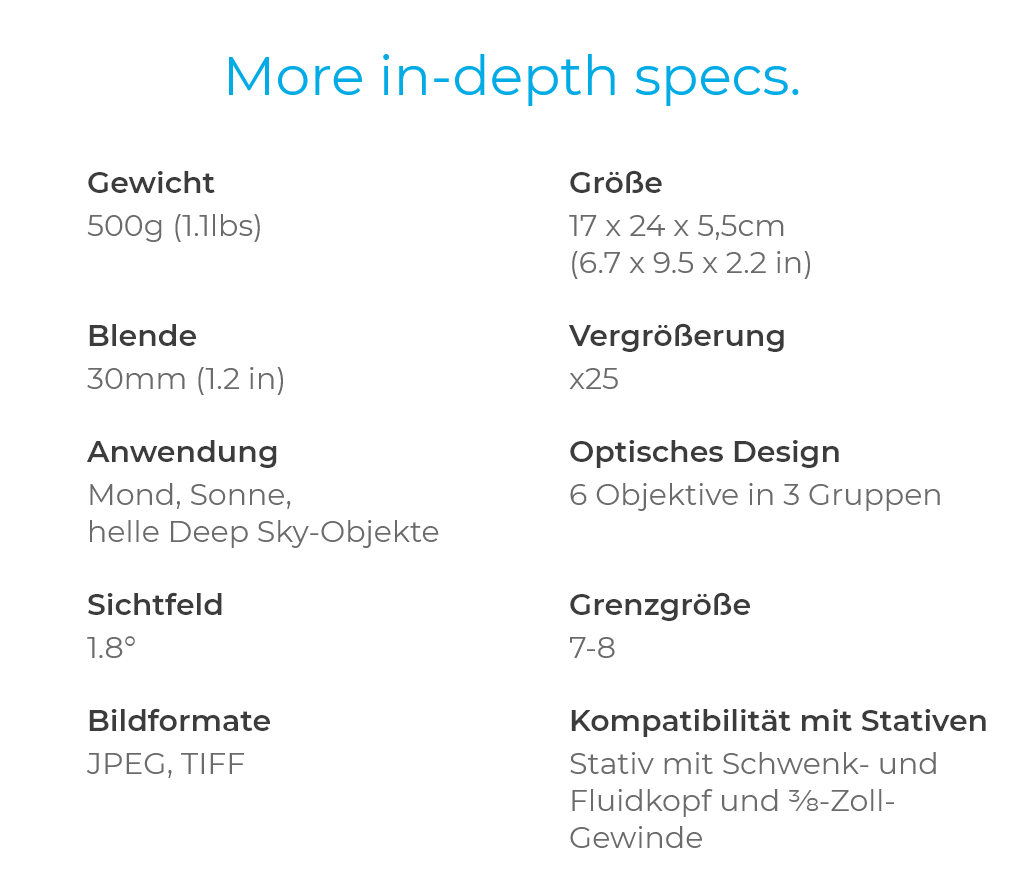
Mit seinem patentierten optischen Design mit sechs Linsen, einem 30-mm-Objektiv (1,2 Zoll) und Prismen, die das Licht brechen und direkt auf den Kamerasensor Ihres Smartphones fokussieren, lotet Hestia die Grenzen der Miniaturisierung neu aus.

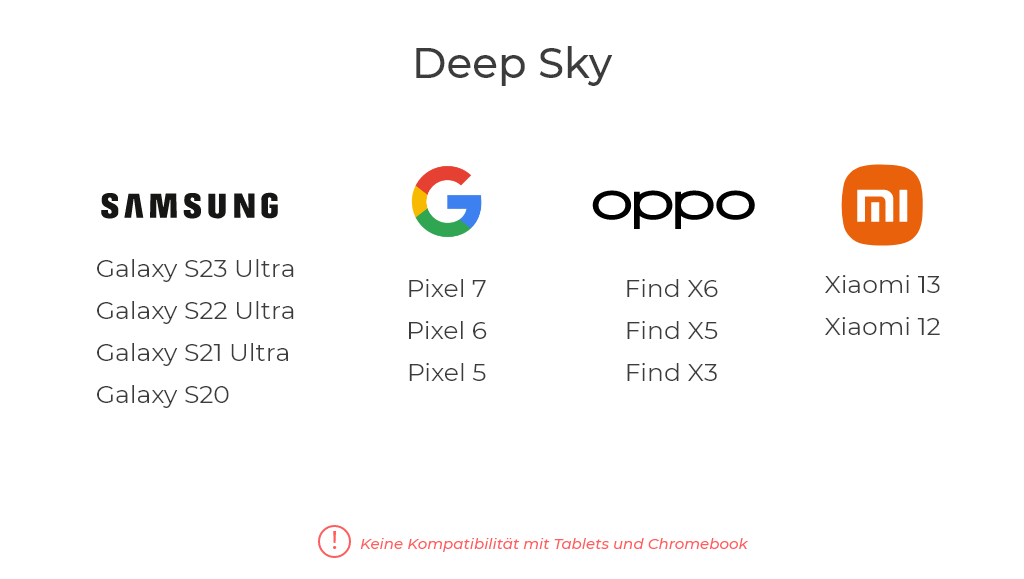
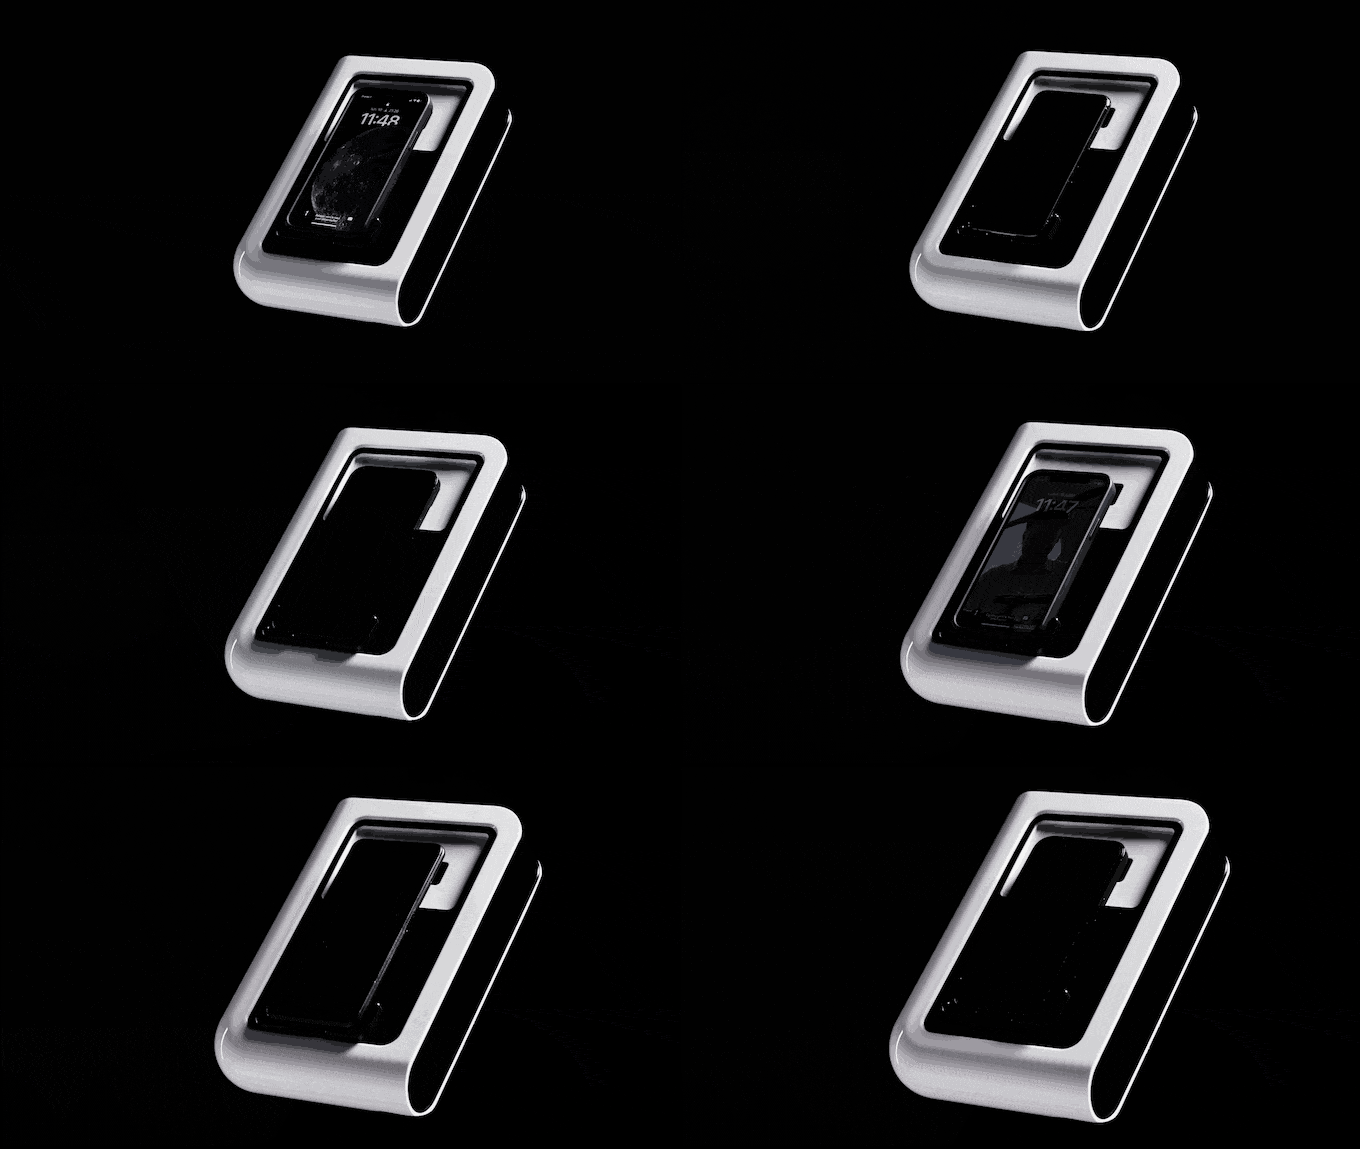
Durch ein System mit abnehmbaren Magneten ist Hestia mit allen Größen derzeitiger und zukünftiger Smartphones kompatibel. Hestia wird mit der Zeit immer besser.

Aber das ist noch nicht alles. Hestia benötigt keine andere Stromquelle als Ihr Smartphone und wurde so konzipiert, dass es den Test der Zeit besteht und ewig hält.

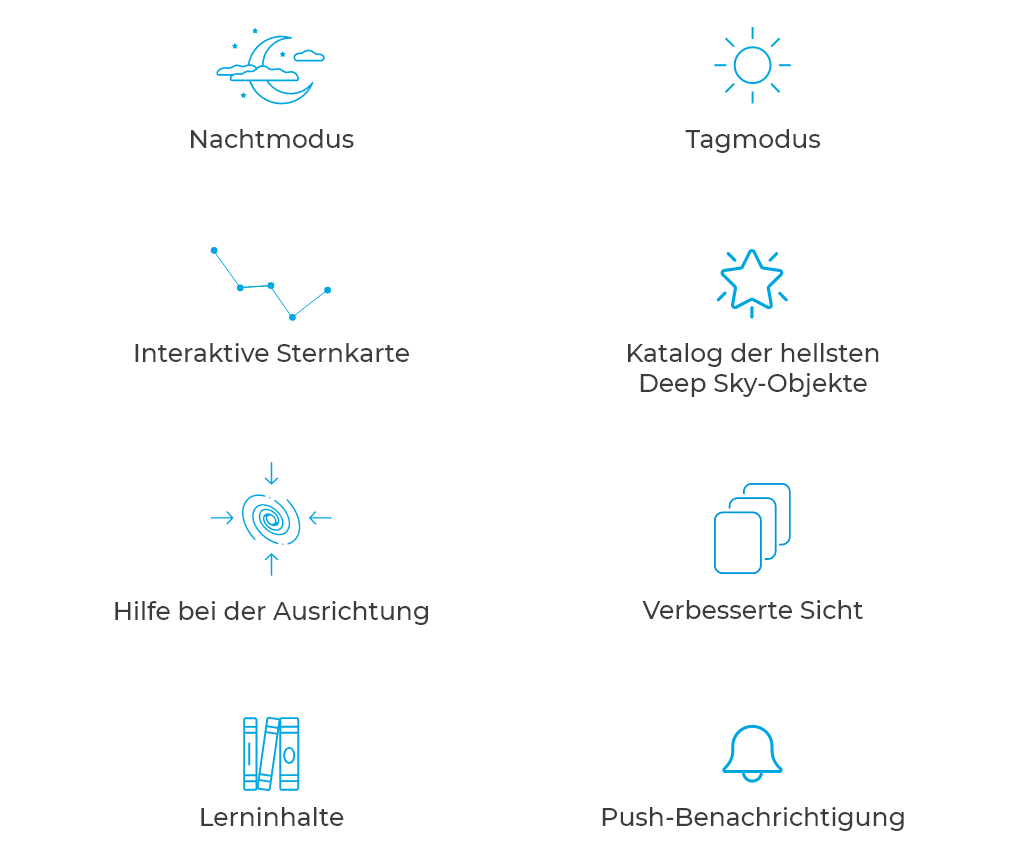
Unsere neue App unterstützt Sie Tag und Nacht bei Ihren Abenteuern im Weltraum, führt Sie mühelos zu den Sternen und bietet spannende Lerninhalte. Schnallen Sie sich an, machen Sie es sich bequem und tauchen Sie ein in den Kosmos.

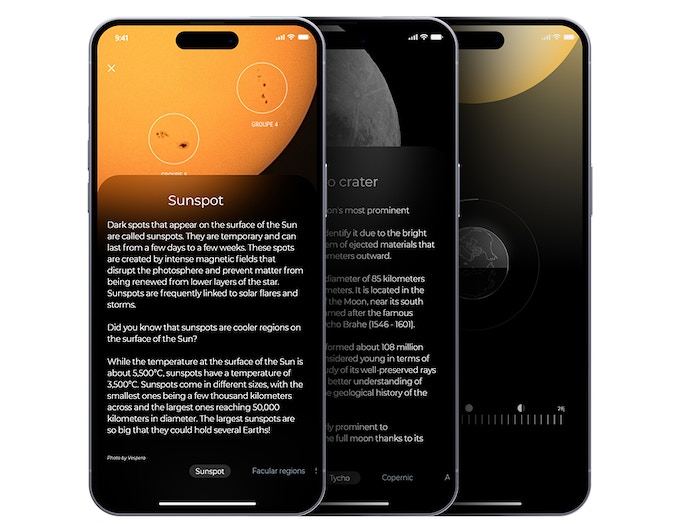
Gravity by Vaonis bietet zahlreiche Lerninhalte, mit denen Sie in Ihrem eigenen Tempo mehr über unser Universum erfahren können. Egal, ob Sie Einsteiger sind und die Entstehung von Mondkratern verstehen möchten oder als Weltraumfan täglich die Entwicklung der Sonnendaten verfolgen möchten: Unsere Anwendung hilft Ihnen, mehr über unsere kosmische Umgebung zu erfahren.

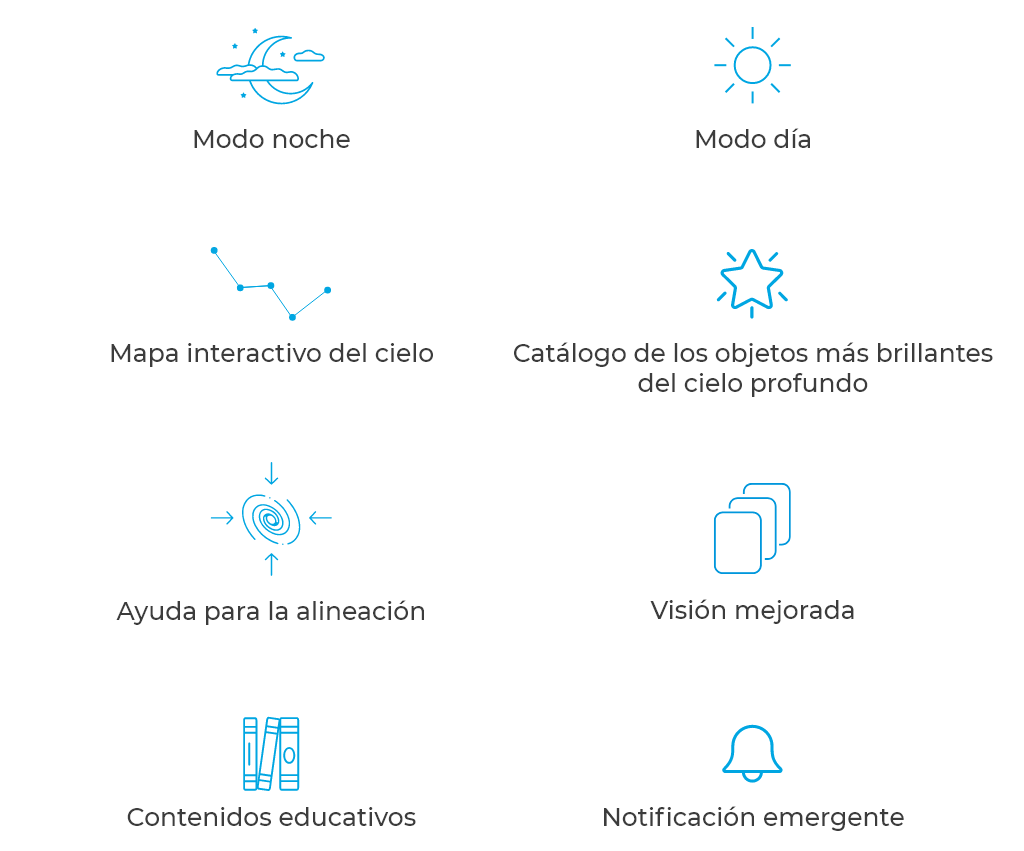
Verloren im Weltall? Keine Sorge, wir haben alles im Griff. Gravity von Vaonis umfasst eine interaktive Himmelskarte, die Ihnen hilft, Ihren Weg durch das Universum zu finden. Erforschen Sie die Sternbilder, lernen Sie den Himmel um Sie herum kennen, und finden Sie interessante Objekte. Wählen Sie einfach einen Sternhaufen, eine Galaxie oder einen Nebel aus und lassen Sie sich von unserer Sternkarte präzise ans Ziel führen. Legen Sie Ihr Smartphone einfach auf das Hestia-Gerät und folgen Sie den Lichtern, um Ihr Teleskop korrekt auszurichten und Objekte zu beobachten, die für das bloße Auge unsichtbar sind.

Machen Sie das, was für unsere Augen unsichtbar ist, mit der Live-Stacking-Technologie von Hestia sichtbar. Wählen Sie Ihr Ziel und lassen Sie die Magie von Gravity by Vaonis wirken. Die Hestia Begleit-App verbessert die Beobachtung mit Hilfe unserer proprietären Bildverarbeitungsalgorithmen, die mehrere mit dem Smartphone aufgenommene Kurzzeitbelichtungen zu einem einzigen hochwertigen Foto kombinieren und ausrichten.

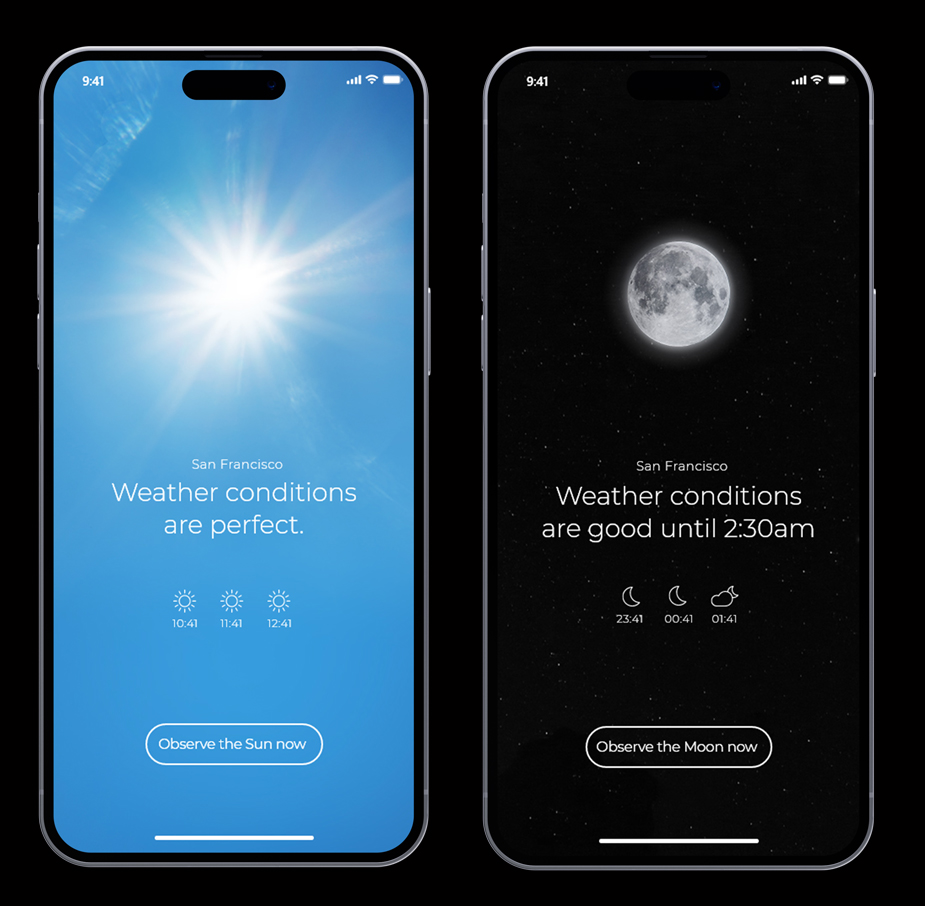
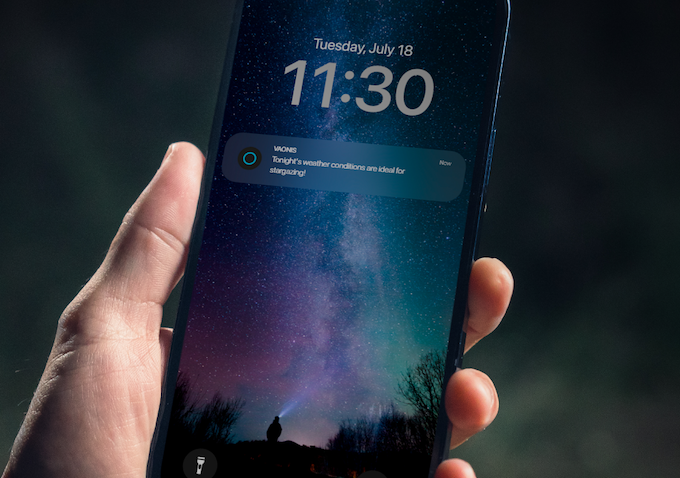
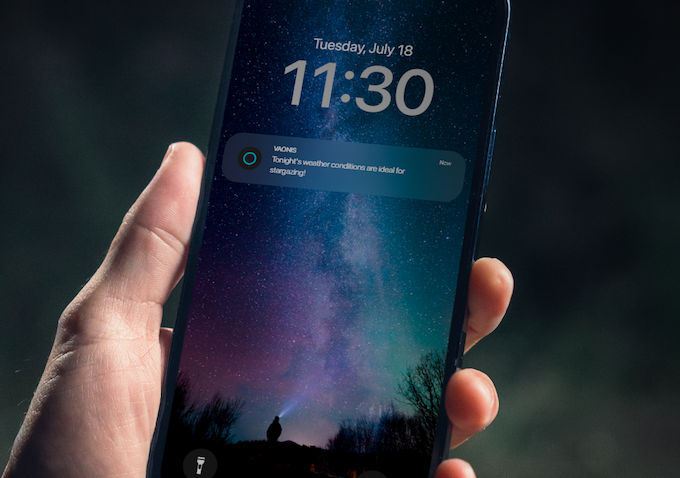
Lassen Sie sich über die Wetterbedingungen informieren, um draußen den Nachthimmel zu erkunden. Nutzen Sie alle Himmelsereignisse und Gelegenheiten zur Sternbeobachtung.


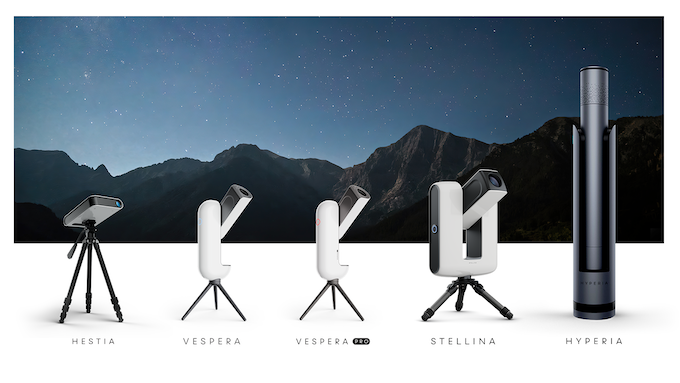
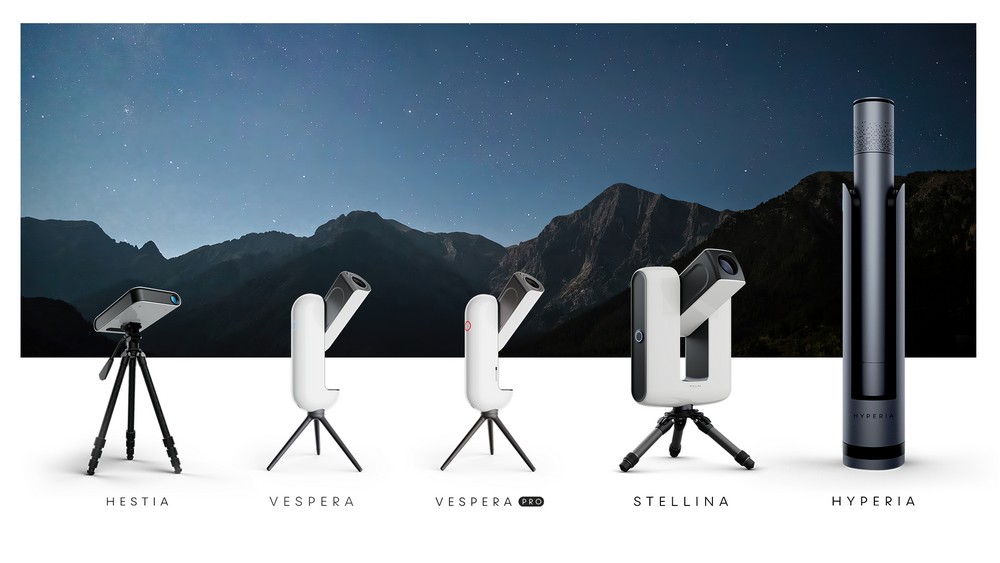
Nach Stellina, Vespera, Vespera Pro und Hyperia ist Hestia unser fünftes Familienmitglied. Wir wissen, wie man herausragende Produkte für die Astronomie herstellt.

Hestia: Verwandeln Sie Ihr Smartphone in ein intelligentes Teleskop

Hestia: Verwandeln Sie Ihr Smartphone in ein intelligentes TeleskopHestia: Verwandeln Sie Ihr Smartphone in ein intelligentes TeleskopHestia: Verwandeln Sie Ihr Smartphone in ein intelligentes Teleskop

Hestia: Verwandeln Sie Ihr Smartphone in ein intelligentes Teleskop

Observations, Press, Tips & News, Travel journal

Hestia: Turn Your Smartphone Into A Smart Telescope


Dear Vaonis Community,

We are pleased to announce that Vaonis will once again be leveraging the powerful platform of Kickstarter for the introduction of our next pioneering venture in the field of astronomy technology.

Our initial Kickstarter campaigns brought you Vespera, our innovative smart and light-weight telescope that democratizes astrophotography by making it accessible to astronomy enthusiasts of all levels. This products, along with Stellina, marked the beginning of our commitment to enhancing the stargazing experience through cutting-edge technology. Now, we are eager to build upon this foundation and continue to shape the future of this captivating discipline.

Our team, comprised of skilled engineers and design experts, has been working diligently to develop our next-generation product and, while we are not willing to share the specifics of our new project yet in order to keep the momentum til D-Day, we assure you it is designed with the intent of offering an even more immersive and advanced stargazing experience: it’s part of our DNA.

The decision to return to Kickstarter is not incidental. We hold firm our belief in the invaluable role of community engagement. Kickstarter allows us to involve you—our trusted supporters and beloved customers—in the development process from the earliest stages. We value your input and commitment and want you to be part of our journey into the future of astronomical exploration.

Therefore, we invite you to join us in this ambitious endeavor. To participate in the expansion of astronomical knowledge. To further our collective understanding of the universe that surrounds us. 

We strongly encourage you to follow our social media channels and sign up for our Kickstarter newsletter.

We at Vaonis are excited to be returning to Kickstarter and we look forward to your continued support as we embark on this new chapter of astronomical advancement.

Clear skies,

The Vaonis Team

Observations, Press, Tips & News, Travel journal

Hestia: convierte tu Smartphone en un telescopio inteligente


Los subtítulos de vídeo están disponibles en: Francès, Español, Japonés, Inglès.

¿Tiene usted alguna pregunta sobre Hestia? Le invitamos a leer las preguntas más frecuentes en nuestro sitio web.

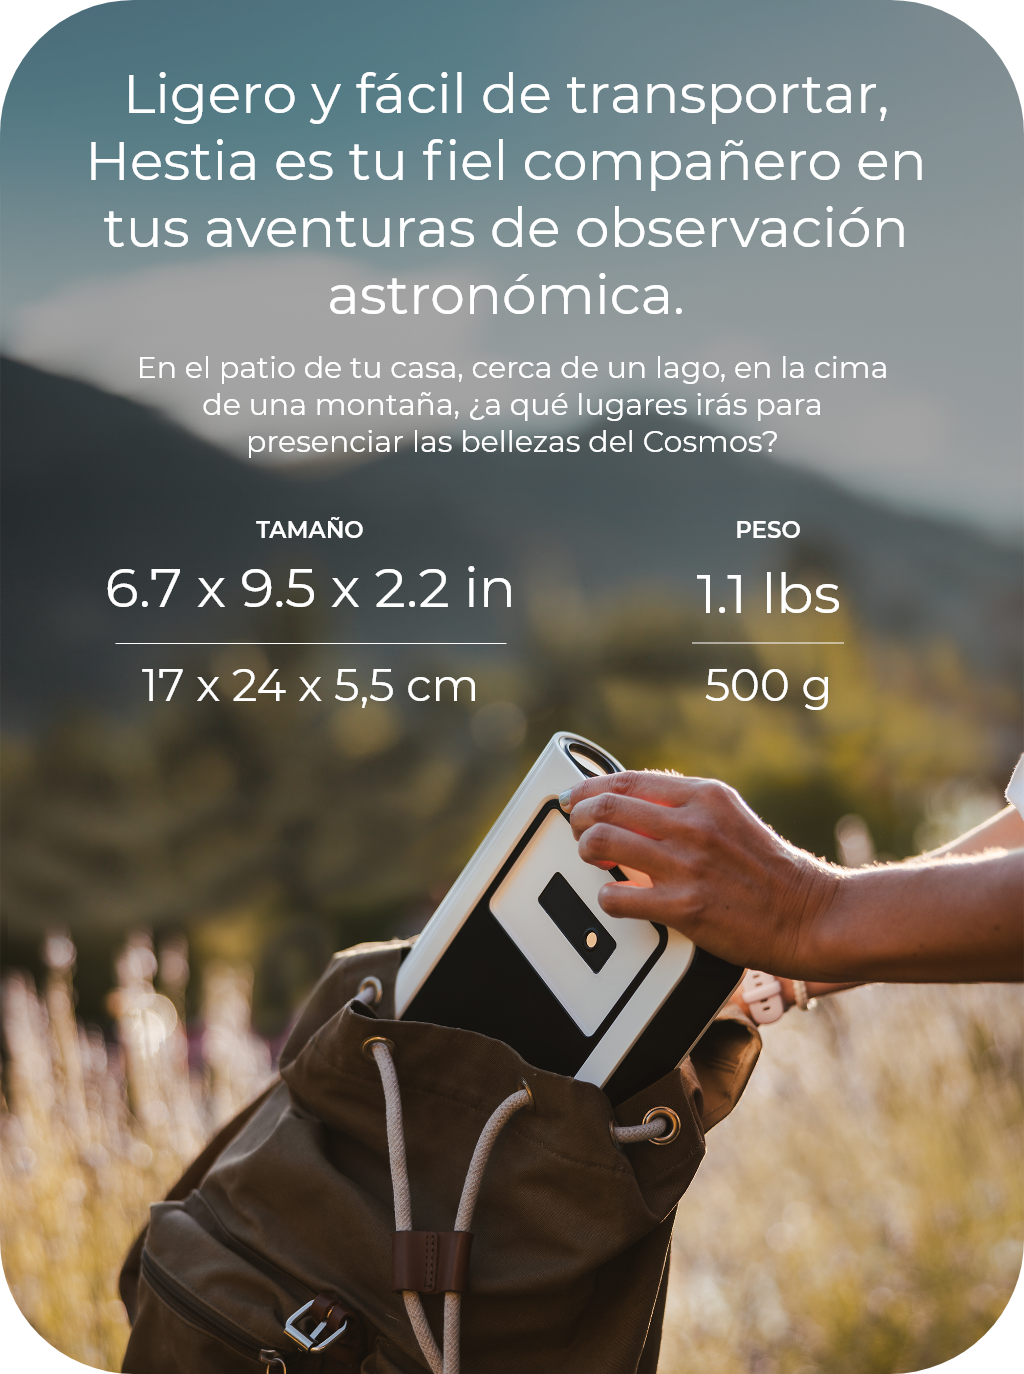
Hestia es el telescopio que siempre has deseado pero que no existía… hasta ahora. Diseñado para que todas las personas puedan disfrutar de las maravillas del Cosmos.

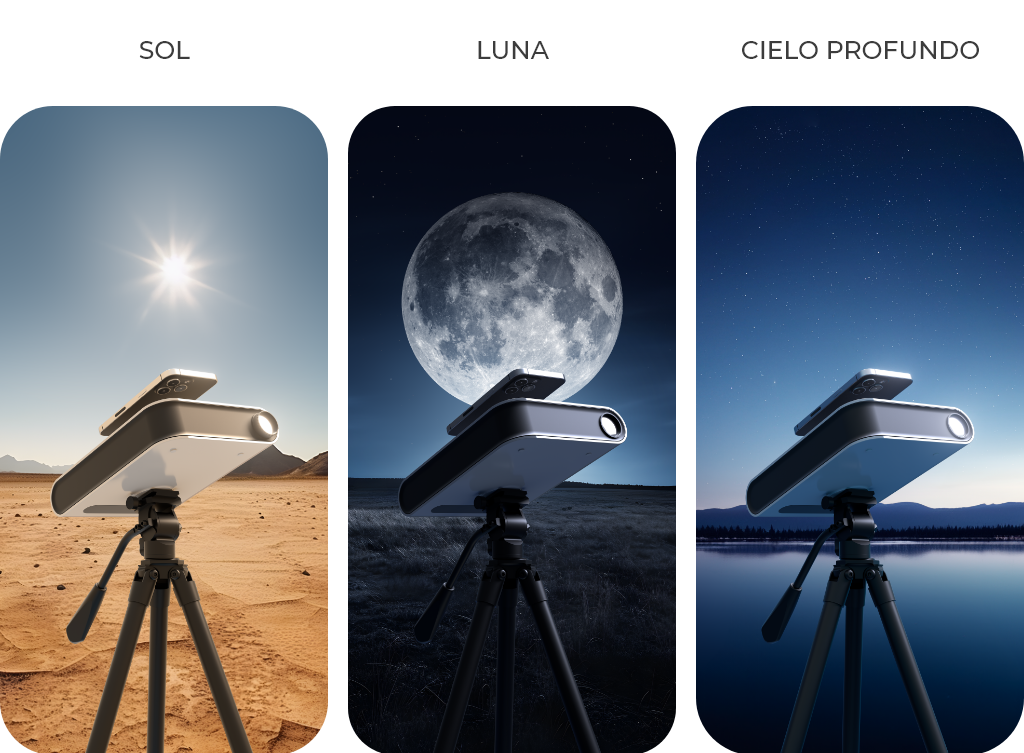
Aprovechando la potencia de tu Smartphone y nuestra tecnología de última generación, Hestia te permite capturar el brillo del Sol, la fascinante belleza de la Luna y las asombrosas profundidades del Universo, sin necesidad de complejas configuraciones ni amplios conocimientos de astronomía. Simplemente tienes que colocar tu Smartphone en el ocular de Hestia, alinear el dispositivo con el objeto celeste que elijas, dejarte guiar por nuestra aplicación de fácil manejo y descubrir todo un nuevo mundo de exploración.

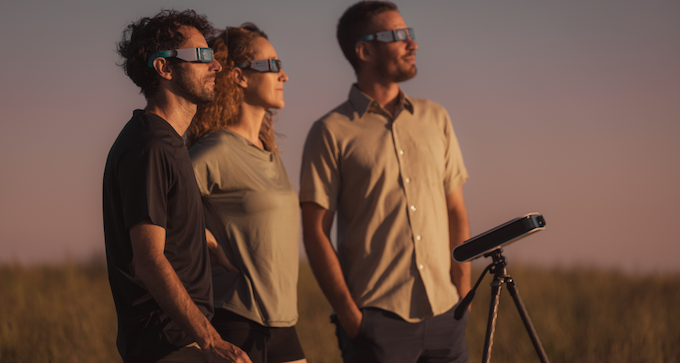
El año que viene, el 8 de abril, Norteamérica será testigo de un Eclipse solar. Millones de personas se reunirán para presenciar el acontecimiento más impresionante de su vida. NO TE LO PIERDAS. Captura ese momento mágico con Hestia para ver más de cerca y de forma totalmente segura este sobrecogedor espectáculo.

En Europa también se producirá un Eclipse solar total, por primera vez desde 2006, el miércoles 12 de agosto de 2026.

Hestia se ajusta a cada objetivo y momento. Disfruta de las maravillas del cielo cuando y donde quieras.

A medida que el Sol se acerca al punto álgido de su actual ciclo solar, el astro rey se muestra cada vez más activo. Hacer un seguimiento de las manchas solares con Hestia y su filtro solar te ayudará a comprender el comportamiento del Sol, su influencia en la meteorología espacial y su impacto en nuestro planeta.

Para disfrutar de la última gran actuación del Sol al final del día, retira con total tranquilidad el filtro solar. Sunset Hestia prototype

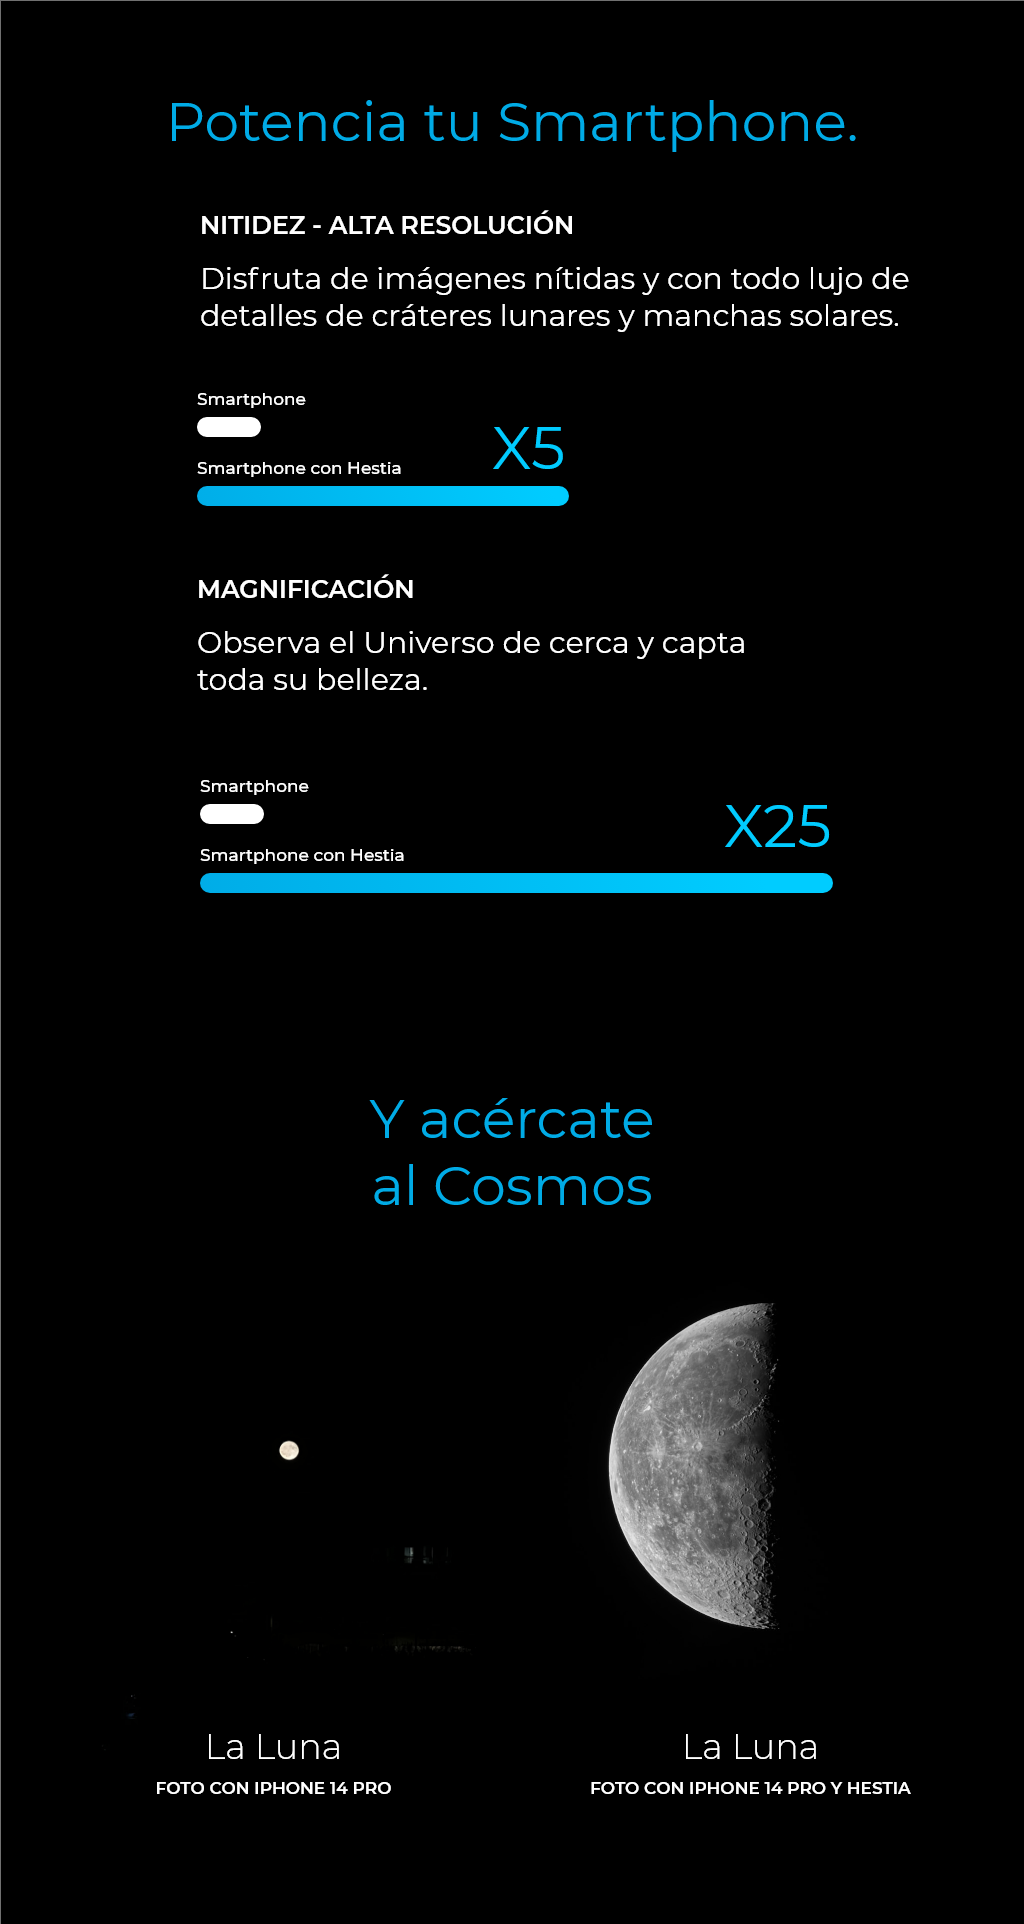
Cada encuentro con la Luna será ahora una experiencia llena de emociones. Descubre todas las caras del bello y enigmático satélite de nuestro planeta.

¿Cielo nublado esta noche? Captar la Luna asomándose entre las nubes también es un espectáculo magnífico:Moon piercing the clouds Hestia prototype

¿Tiene usted alguna pregunta sobre Hestia? Le invitamos a leer las preguntas más frecuentes en nuestro sitio web.

Antes de convertirnos en capitanes interespaciales, todos empezamos como jóvenes cadetes estelares. Hestia es el mejor primer instrumento para principiantes o personas curiosas a las que les encantaría descubrir y comprender mejor los secretos de la bóveda celeste. Hestia y tu Smartphone unen sus fuerzas para formar un portal desconocido hasta ahora, ayudándote a cruzar el Universo para ser testigo de algunas de las Galaxias, Nebulosas y Cúmulos Estelares más brillantes y comenzar tu viaje espacial.

El funcionamiento de Hestia es todo menos complejo. Sujeta Hestia a tu trípode y alinea la cámara principal de tu Smartphone con el ocular de Hestia con la ayuda de Gravity by Vaonis. Elige tu objetivo y deja que la aplicación te guíe para encontrarlo.

¡Ya está! Ya puedes empezar a disfrutar de las bellezas del Cosmos.

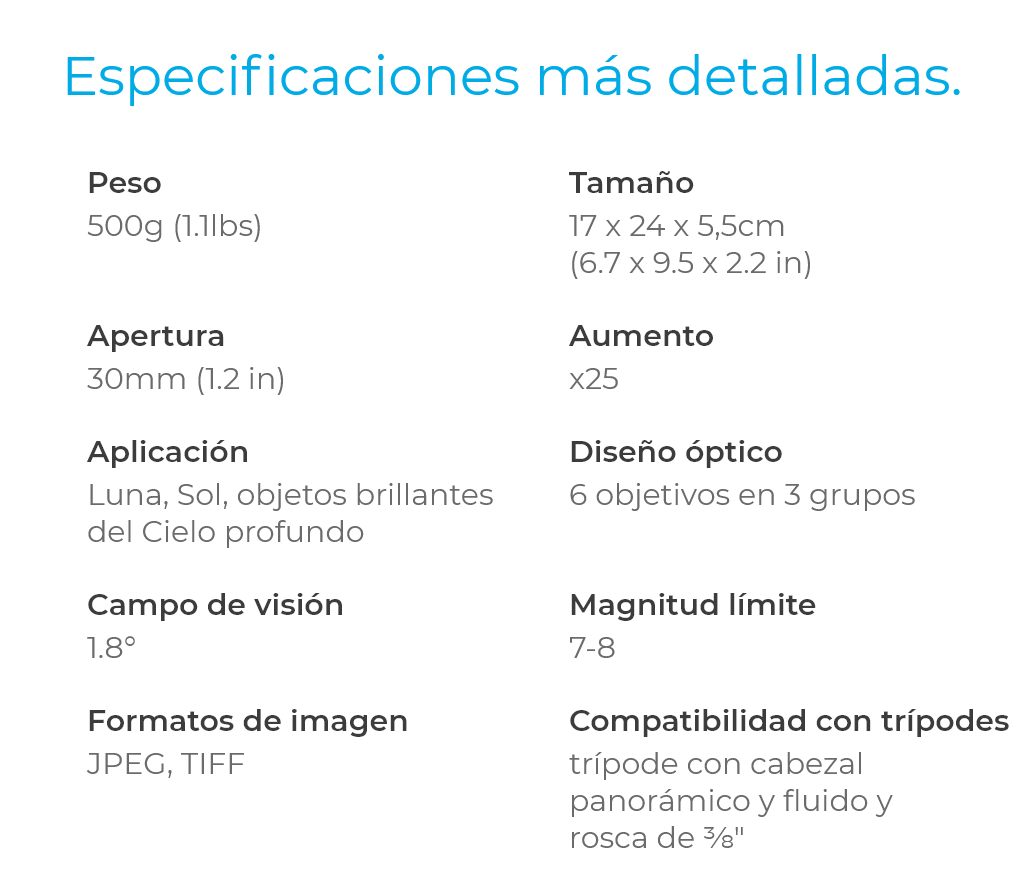
Con su diseño óptico patentado de seis lentes con un objetivo de 30 mm (1,2 pulgadas) y prismas para recoger y enfocar la luz directamente en el sensor de la cámara de tu Smartphone, Hestia supera los límites de la miniaturización.


Gracias a un sistema de imanes extraíbles, Hestia se adapta a todos los tamaños de Smartphone actuales y futuros. Hestia solo puede mejorar con el tiempo.

Pero aún hay más. Sin más fuente de alimentación que la de tu Smartphone, Hestia ha sido diseñado para resistir el paso del tiempo y durar para siempre.

Nuestra nueva aplicación está diseñada para ayudarte en tus aventuras espaciales, de día y de noche, guiarte a las estrellas con facilidad y ofrecerte contenidos apasionantes. Así que abróchate el cinturón, ponte cómodo y prepárate para surcar el cosmos.

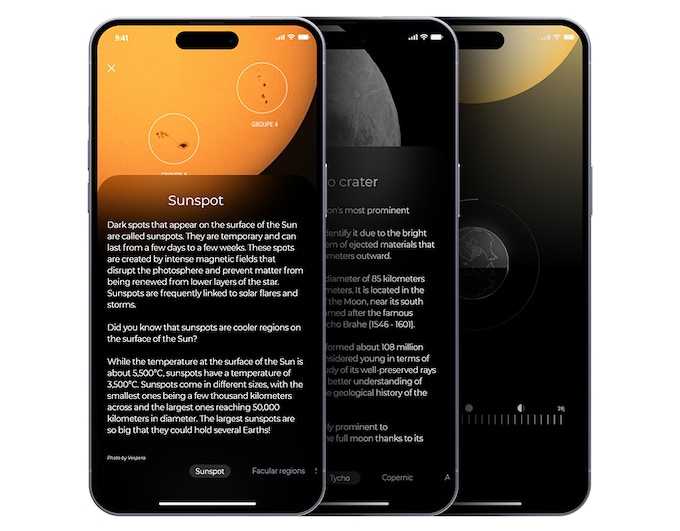
Gravity by Vaonis incluye todo un itinerario educativo que te permitirá descubrir más sobre nuestro Universo a tu ritmo. Desde principiantes en astronomía que desean comprender la formación de los cráteres lunares hasta entusiastas que desean seguir diariamente la evolución de los datos solares, nuestra aplicación ayudará a todos a aprender más sobre nuestro entorno cósmico.

¿Te has perdido en el espacio? No te preocupes, tenemos lo que necesitas. Gravity by Vaonis integra un mapa celeste interactivo para ayudarte a orientarte en el Universo. Explora las constelaciones, aprende a reconocer el cielo que te rodea y encuentra un objeto que despierte tu interés. Tanto si seleccionas un cúmulo estelar, una galaxia o una nebulosa, nuestro mapa celeste te guiará hasta tu objetivo con precisión. Simplemente con colocar tu Smartphone en Hestia y seguir las luces para alinear correctamente el telescopio podrás capturar lo que es invisible a simple vista.

Haz visible lo que es invisible a nuestros ojos con la tecnología de apilamiento de imágenes en directo de Hestia. Elige tu objetivo y deja que Gravity by Vaonis haga magia. La aplicación complementaria de Hestia te permite mejorar tu observación utilizando nuestros algoritmos de procesamiento de imágenes patentados para combinar y alinear varias imágenes de corta exposición capturadas con tu Smartphone en una única fotografía de alta calidad.

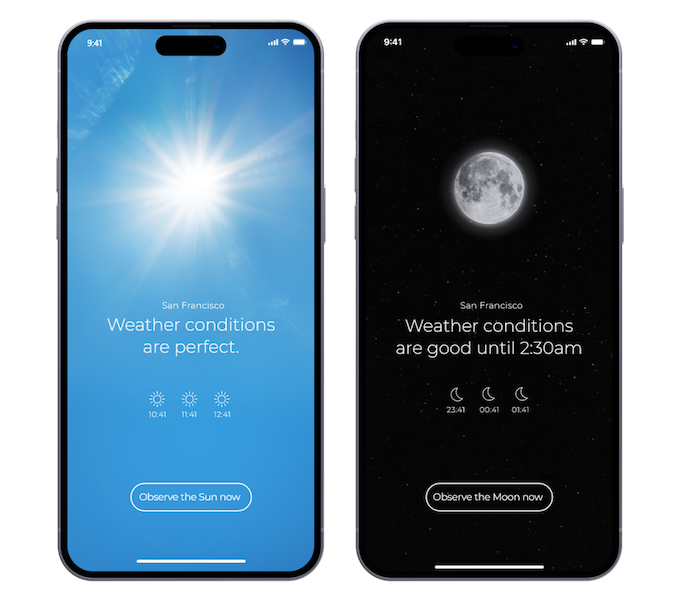
Recibe notificaciones sobre las condiciones meteorológicas para salir a explorar el cielo nocturno. Entérate de todos los acontecimientos astronómicos y las mejores oportunidades para observar las estrellas.

¿Tiene usted alguna pregunta sobre Hestia? Le invitamos a leer las preguntas más frecuentes en nuestro sitio web.

Después de Stellina, Vespera, Vespera Pro e Hyperia, Hestia es el quinto miembro de nuestra familia. Sabemos hacer grandes productos astronómicos.


¿Tiene usted alguna pregunta sobre Hestia? Le invitamos a leer las preguntas más frecuentes en nuestro sitio web.

Observations, Travel journal

What can we observe in the sky in June 2023?

What can we observe in the sky in June: ephemeris of astral events for the month of June 2023.

June, a month of brilliant starry skies, offers us a wealth of celestial events and objects to explore. With the aid of your Vaonis instruments, these astronomical wonders reveal their splendour. Let’s take a deeper look into the universe’s spectacle, a story of galaxies, nebulae, star clusters, and supernova visible in June 2023. 

M101 and the Fading Supernova

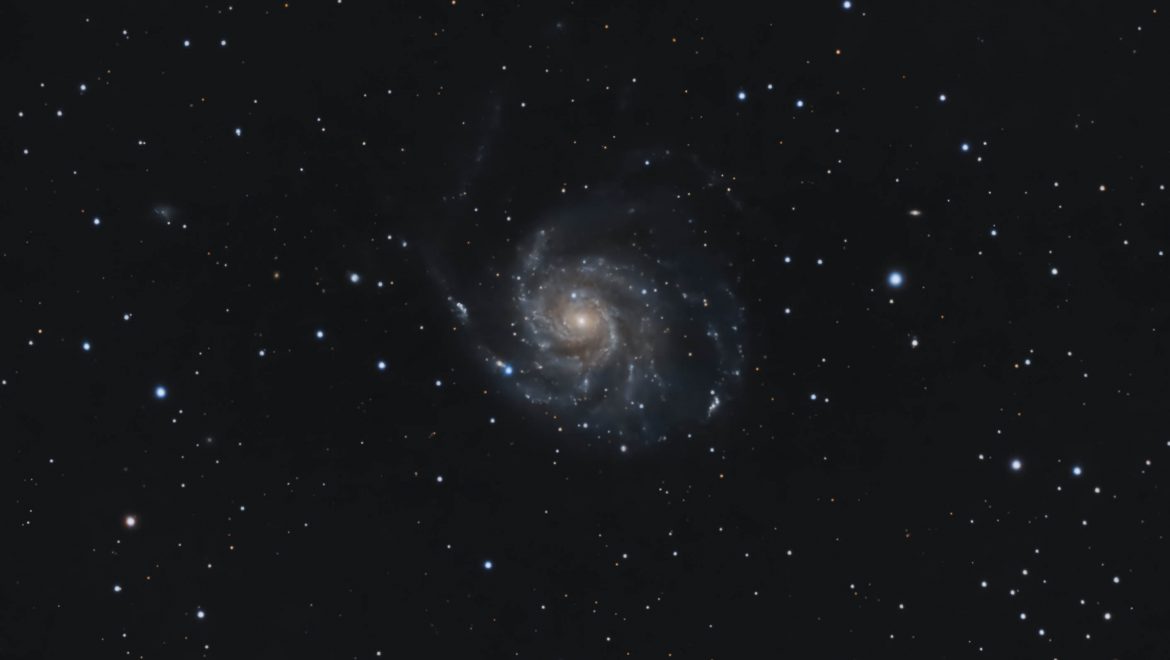
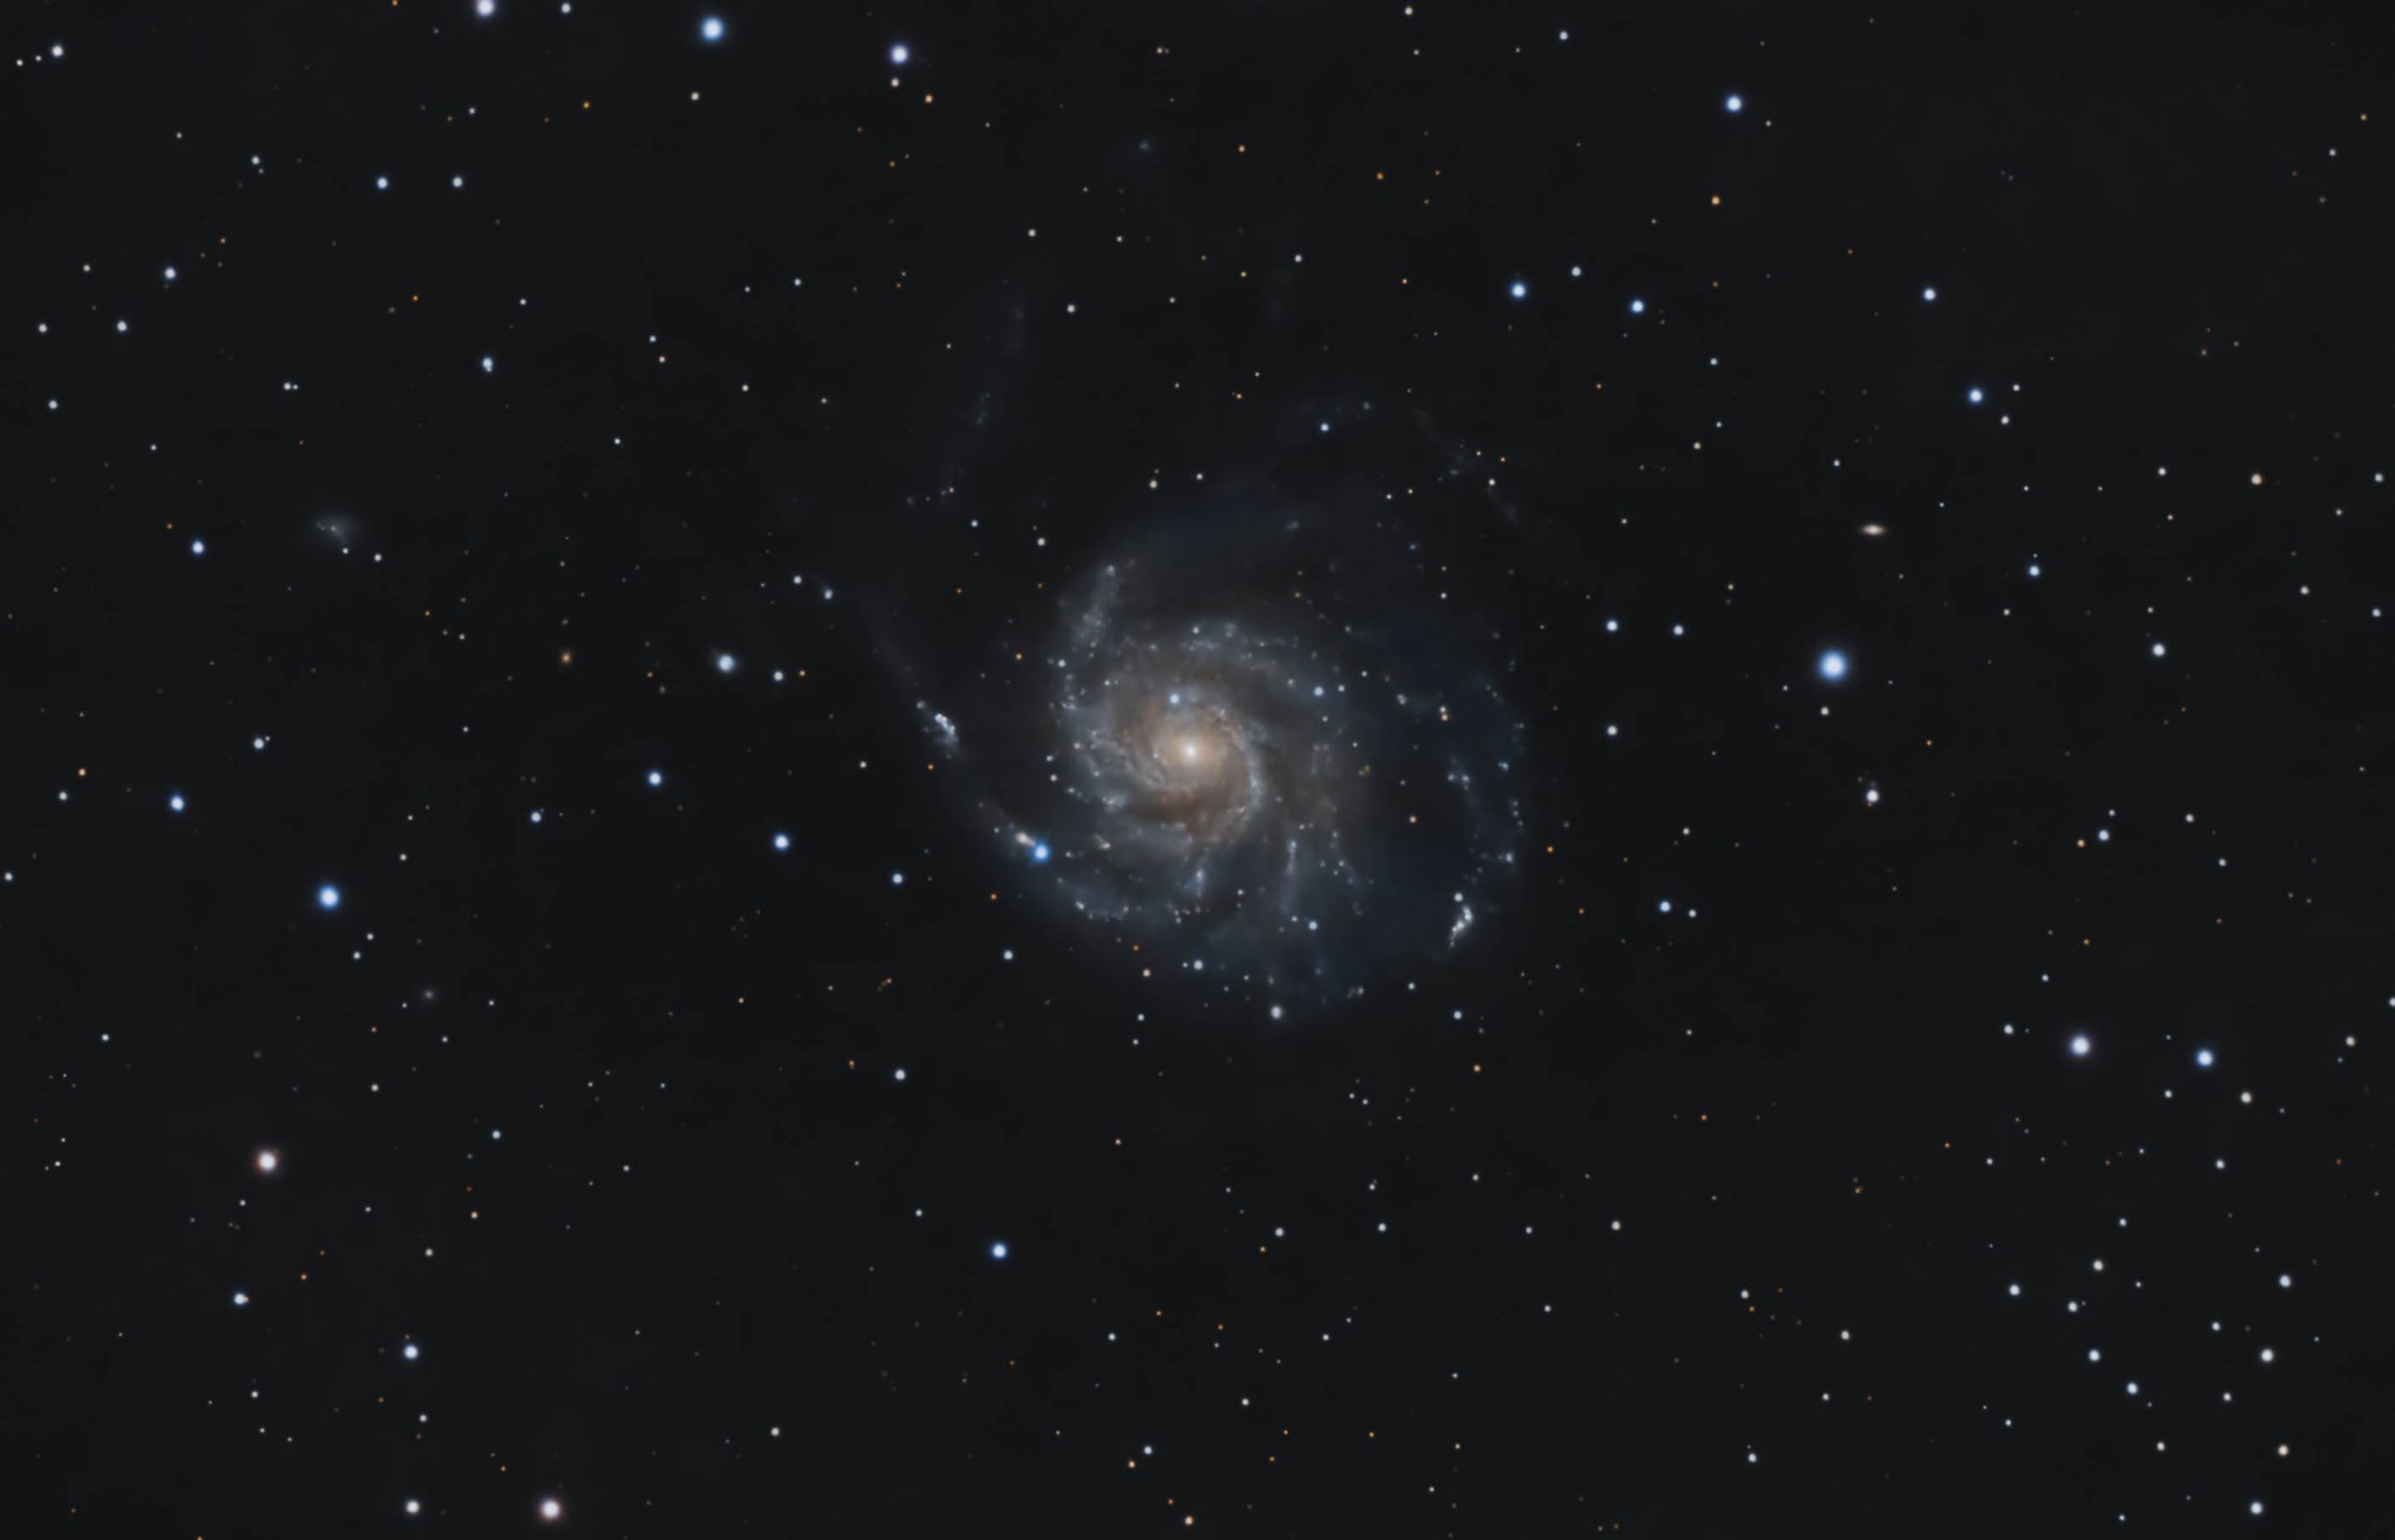
What can we observe in the sky in June: ephemeris of astral events for the month of June 2023.M101 by Susan Fortney with Stellina

Perhaps the most dramatic event of the season is the supernova discovered by Koichi Itagaki on 19th May 2023. After its discovery, the supernova, named SN 2023ixf, exploded in brightness, increasing 44 times over just three days. This supernova, which originated from the Pinwheel Galaxy (M101) located in the constellation Ursa Major (The Great Bear), is set to illuminate our night skies for a few months. Although the supernova’s luminosity is already declining, it will remain visible in Stellina and Vespera instruments throughout June, offering a rare glimpse of a star’s explosive death.

The Lagoon Nebula: A Cosmic Nursery

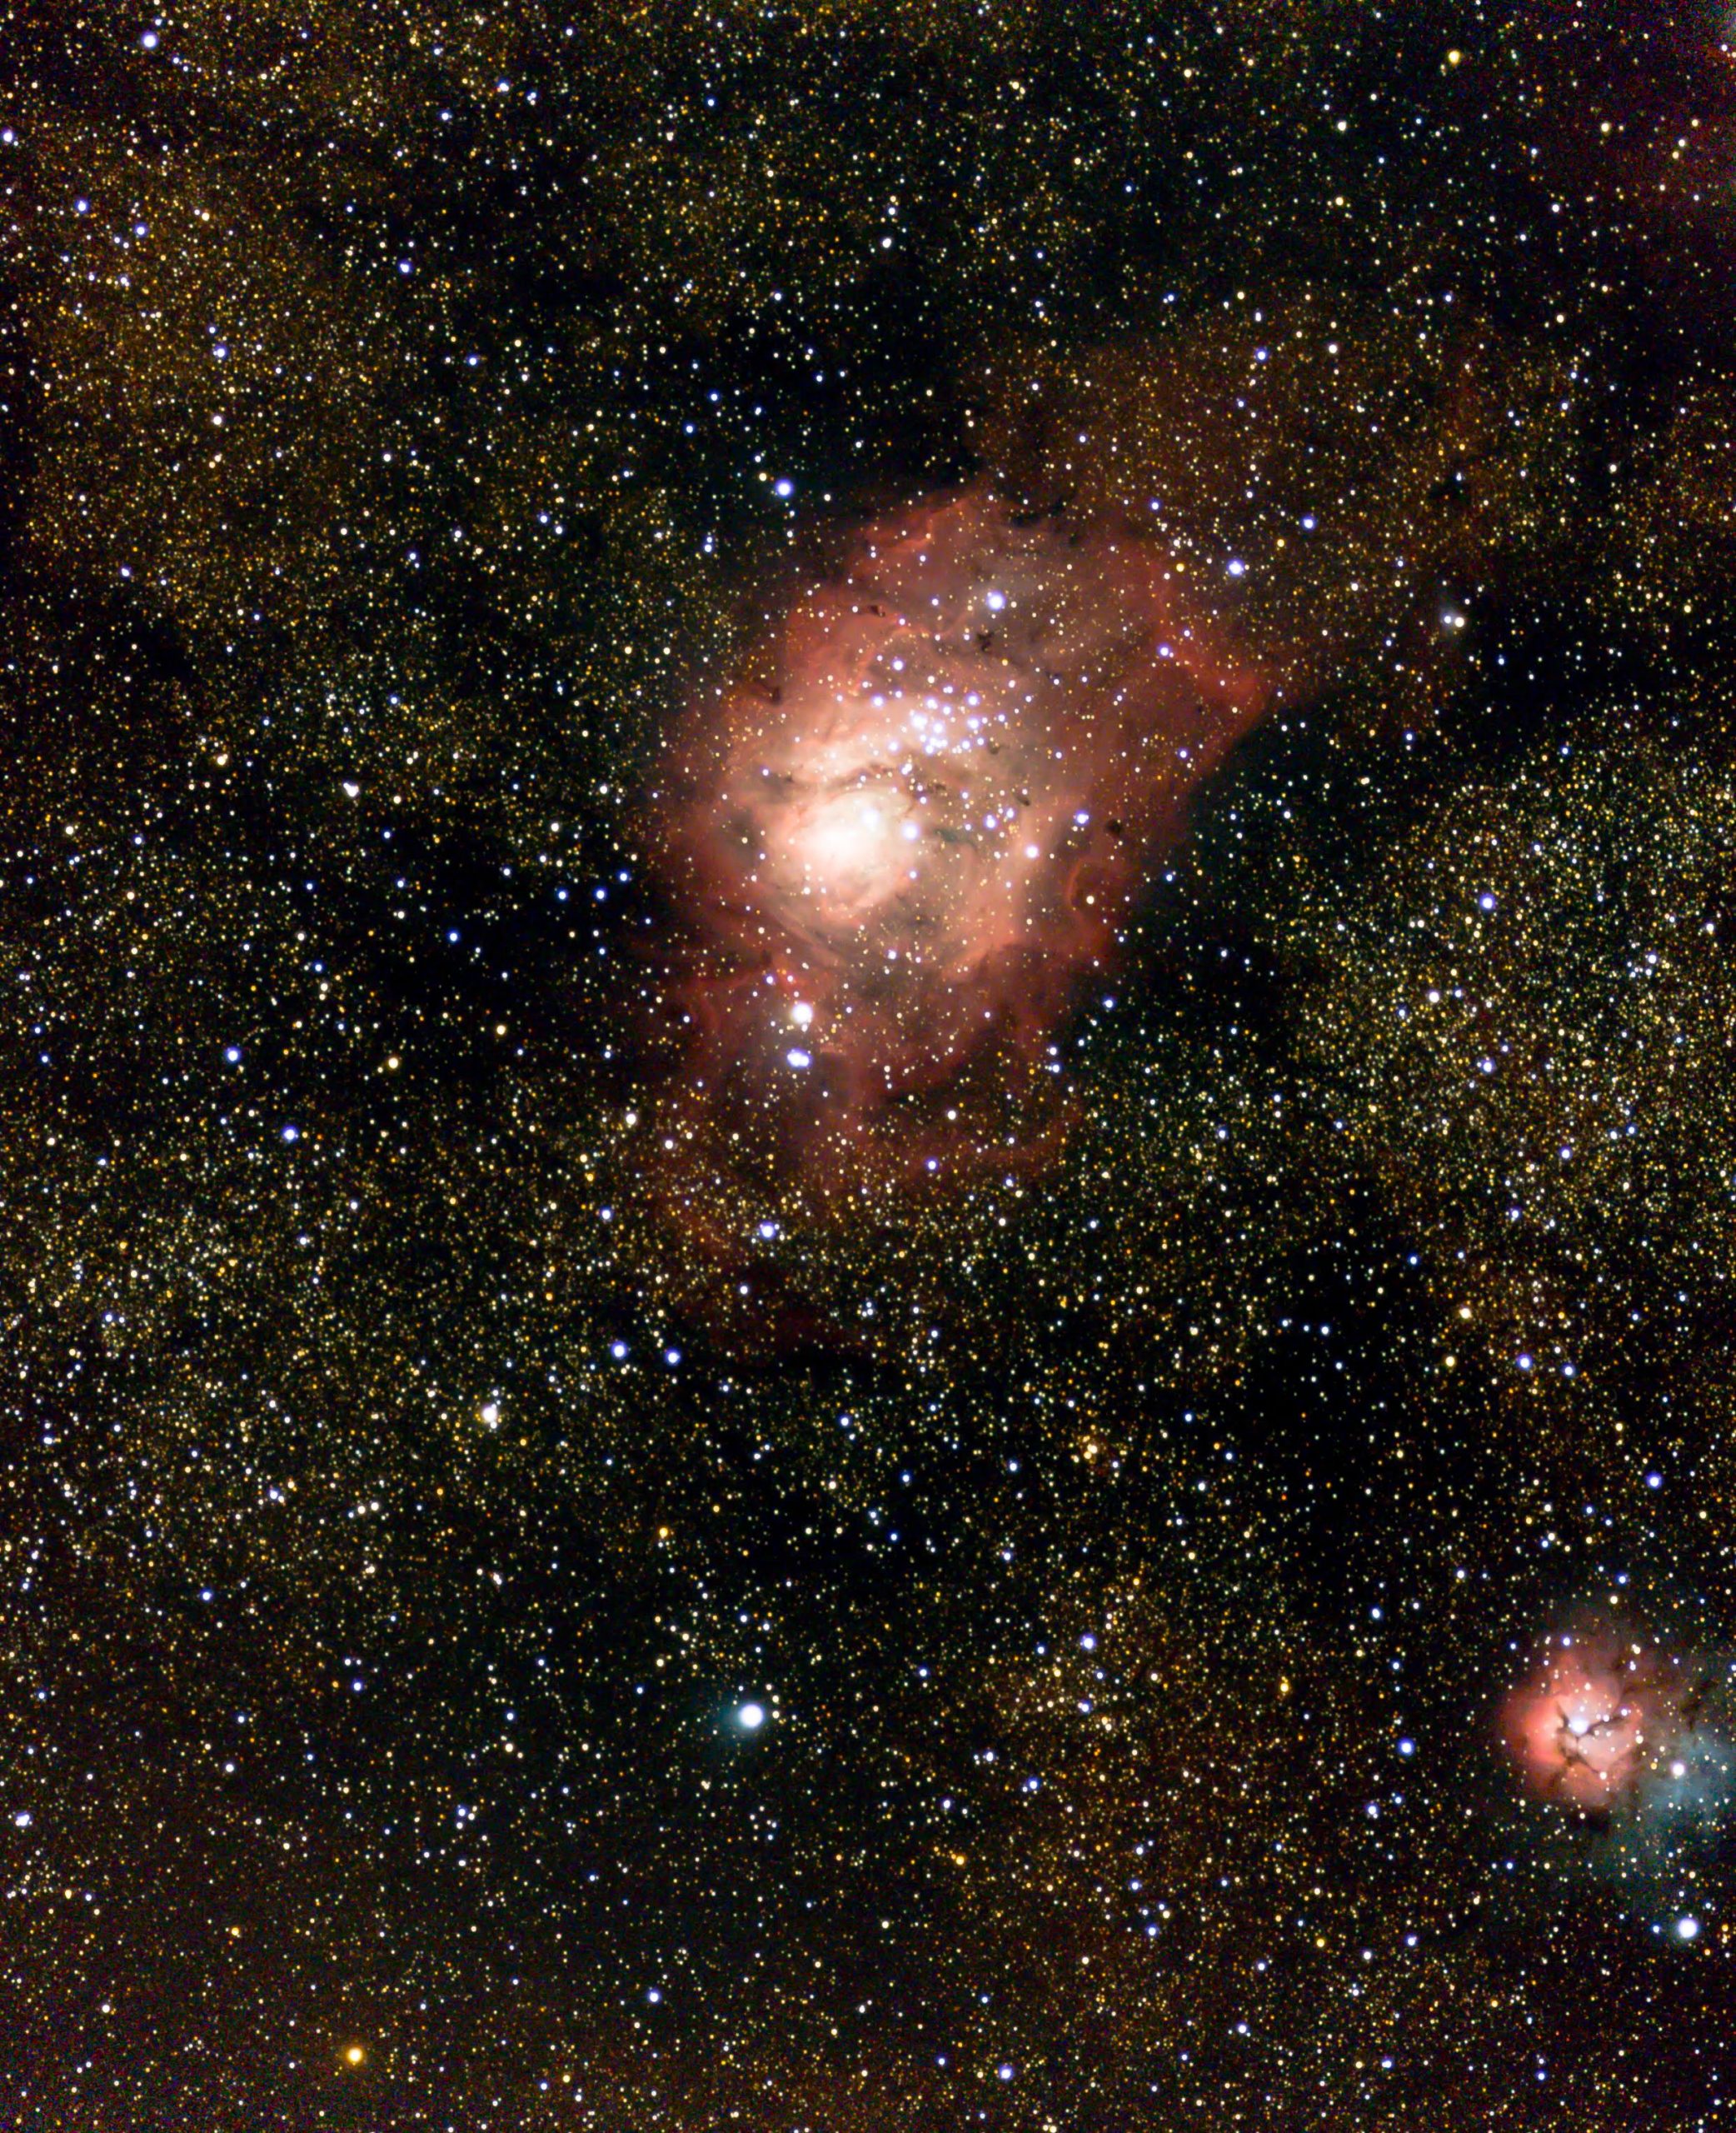
What can we observe in the sky in June: ephemeris of astral events for the month of June 2023.M8 by Peter Board

The Lagoon Nebula (M8 or NGC 6523), an expansive star-forming region in Sagittarius (The Archer), offers a stunning sight. Although dimly visible to the naked eye under favourable conditions, your Vespera or Stellina will reveal the full majesty of this celestial object. The Lagoon Nebula appears as a giant glowing cloud of interstellar gas, three times the area of the full Moon, housing an embedded open star cluster (NGC 6530). 

Small Sagittarius Star Cloud: A Stellar Congregation

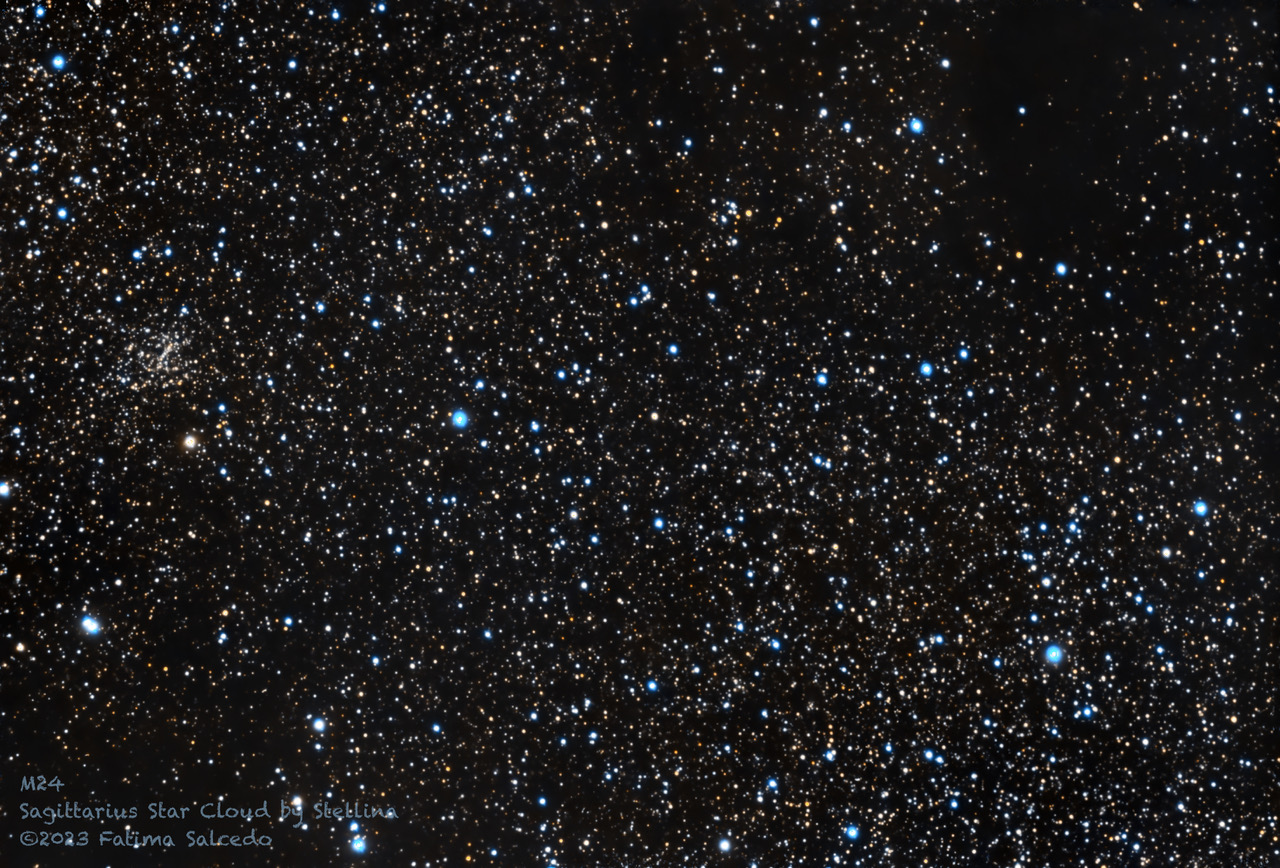
M24 by Fatima Salcedo with Stellina

Discovered by Charles Messier in 1764, the Small Sagittarius Star Cloud (M24 or IC 4715) is a mesmerising sight. Located in the Sagittarius-Carina arm of the Milky Way, it provides a view of thousands of stars through a “tunnel” in the interstellar dust. This cloud’s region reveals over a thousand stars, providing a truly awe-inspiring experience.

The Great Hercules Cluster: A Stellar Time Capsule

What can we observe in the sky in June: ephemeris of astral events for the month of June 2023.

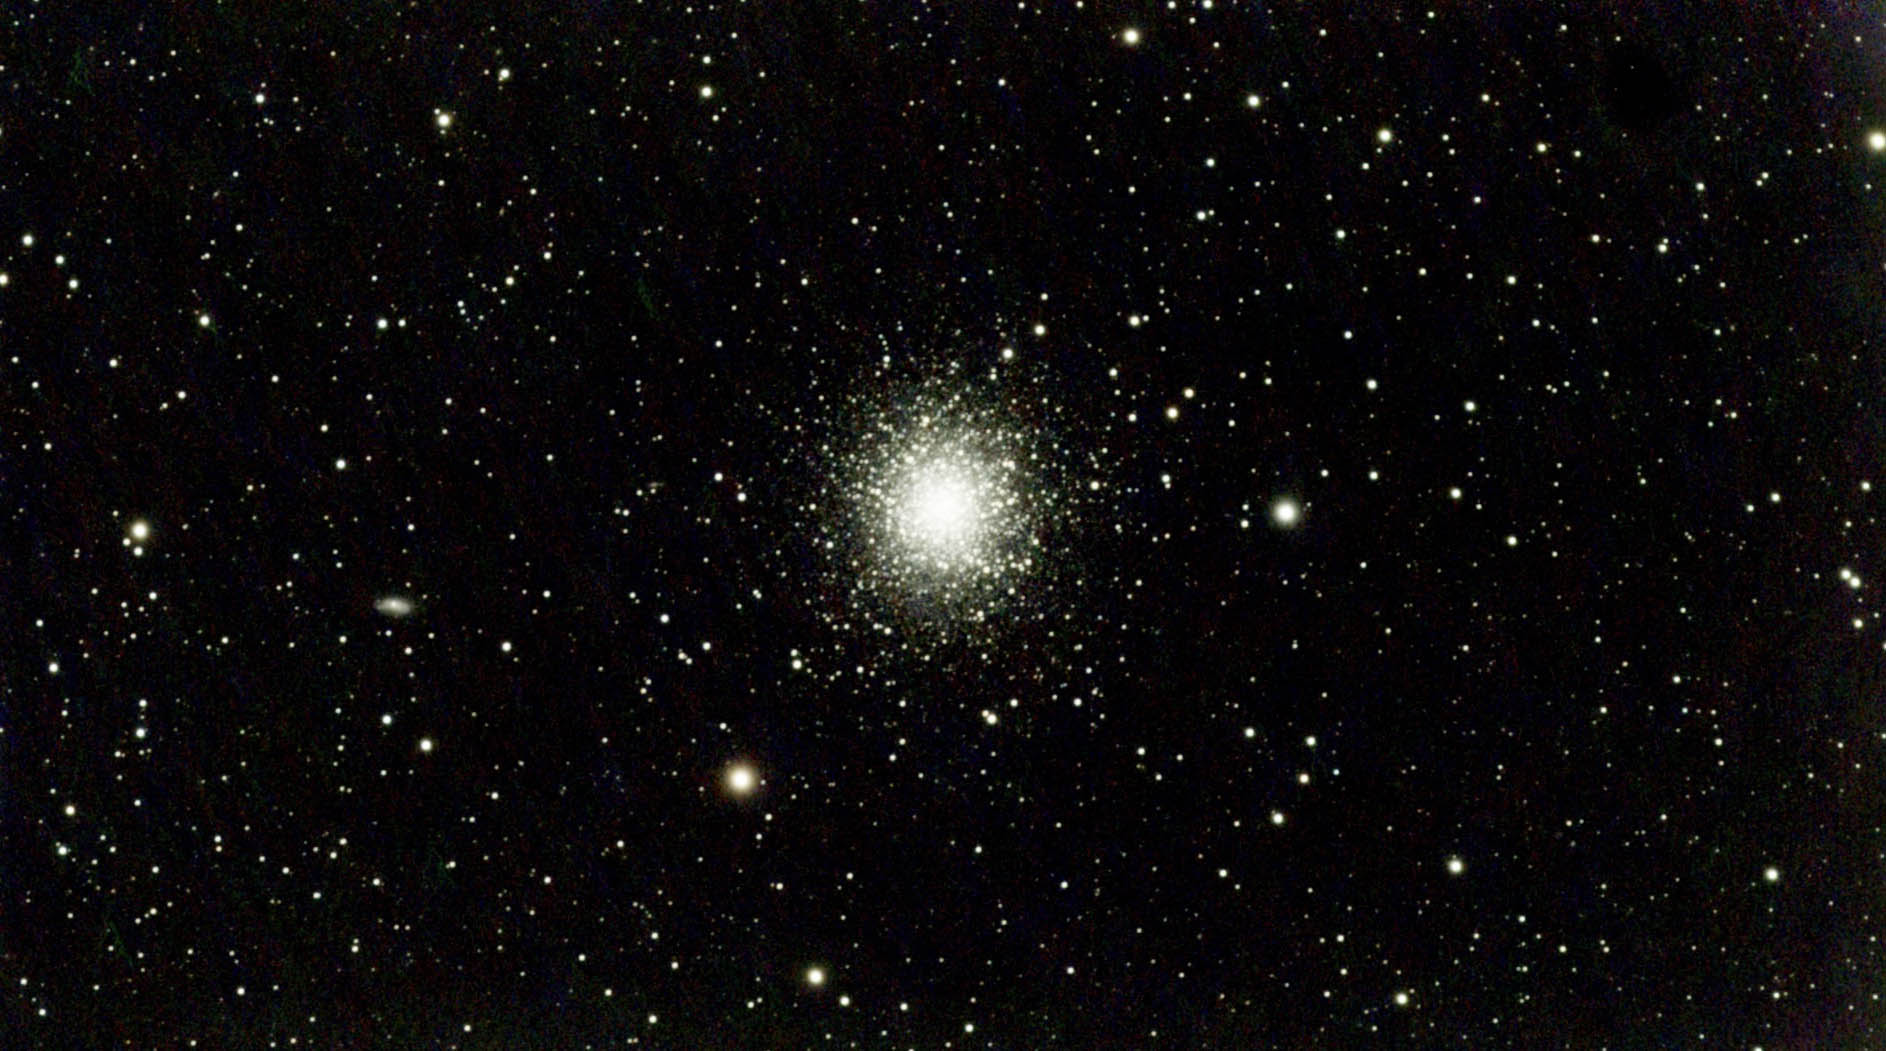
M13 (512 exp) with Vespera

The Great Hercules Cluster (M13 or NGC 6205) is a globular cluster that shines brightly in the Northern Hemisphere’s summer sky. Visible to the naked eye under optimal conditions, your Vaonis instrument will start to resolve this glittering ball into hundreds of individual stars. This cluster, containing up to a million suns approximately 12 billion years old, is a testament to the vast age and scale of our universe.

Ptolemy’s Cluster: Following the Scorpion’s Stinger

M7 by Stellina

The constellation Scorpius (The Scorpion) hosts Ptolemy’s Cluster (M7 or NGC 6475), named after the ancient Egyptian astronomer who referred to it as the ‘little cloud following the stinger of Scorpius. This large, bright open cluster of about 80 stars will be observable with your Vespera or Stellina, covering an area almost three full Moons wide.

A Close Encounter with Asteroid 488453 (1994 XD)

A celestial interloper, the Apollo-class asteroid 488453 (1994 XD), will swing by Earth, missing us by eight lunar distances early on the morning of 12th June. This half-kilometre-wide asteroid, while only visible through a telescope at its closest approach, offers an exciting opportunity for those with the necessary equipment. The asteroid will speed through the northern constellation Cepheus (The King), moving at a rate equivalent to the apparent diameter of the full Moon every 20 minutes. Observing this quick-footed celestial visitor will surely be a thrilling experience for asteroid chasers.

The month of June 2023 offers a plethora of celestial sights to behold. From a supernova remnant in a distant galaxy to the formation of new stars in the nebulae of our own Milky Way, the night sky promises to be a source of wonder and inspiration. The vast star clouds and clusters remind us of the grandeur of the universe, while the flyby of a near-Earth asteroid emphasizes the dynamic nature of our cosmic neighbourhood.

Whether you’re an experienced stargazer or a novice to the field, this month provides an excellent opportunity to step outside on clear nights and delve into the mysteries of the cosmos. So, grab your Vespera or Stellina and enjoy the celestial extravaganza of June 2023.

Observations, Tips & News, Travel journal

What can we observe in the sky in May 2023?

What can we observe in the sky in May 2023? May is going to be an exciting month for amateur astronomers. This month, we will enjoy several interesting celestial phenomena, including the Markarian’s Chain, and, for the first time in Vaonis history, we will host a one-of-a-kind collaborative project. 

Markarian’s Chain

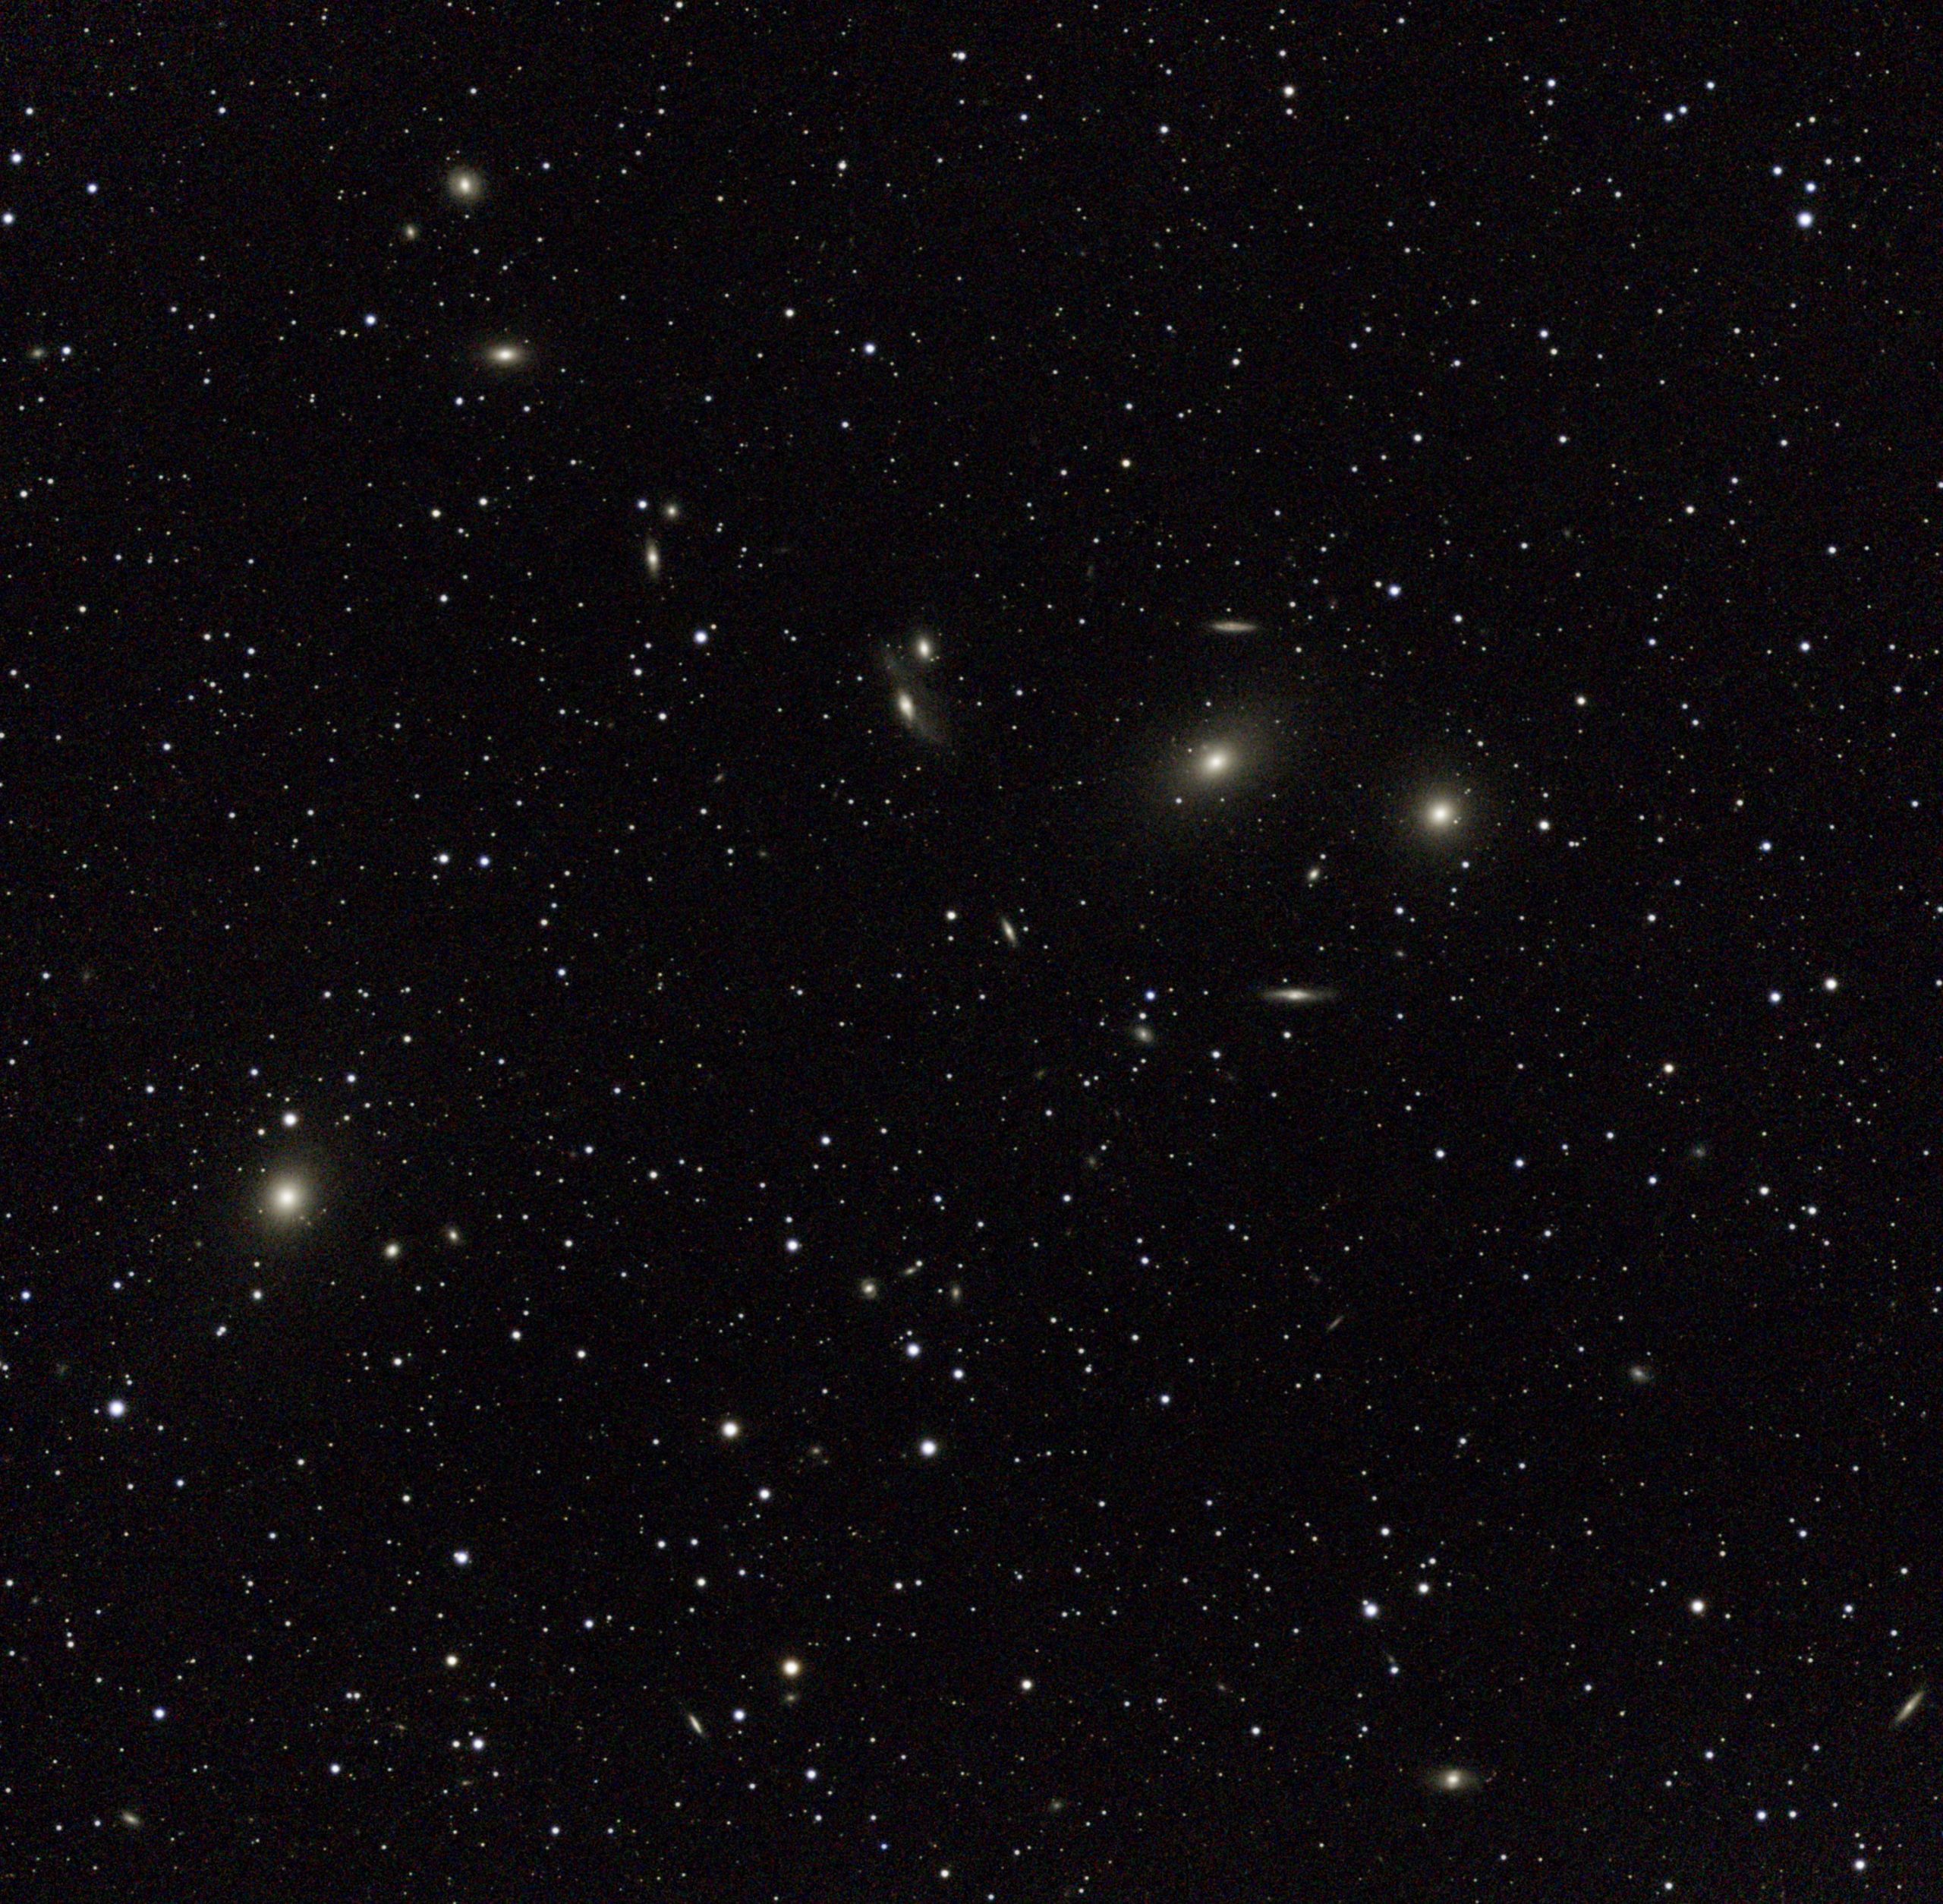
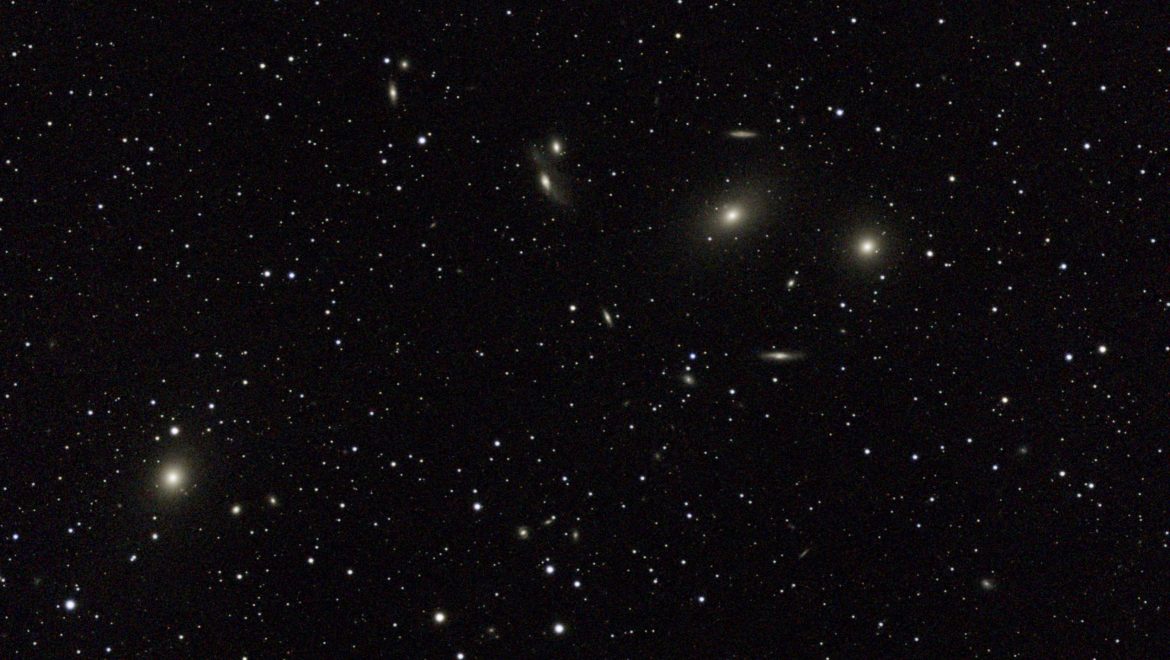
The Markarian’s Chain is a fascinating celestial phenomenon. It is a chain of galaxies located in the constellation Virgo. It takes its name from the Armenian astrophysicist Benjamin Markarian, who discovered it in 1983. This chain of galaxies is composed of twelve galaxies that have an appearance strung like pearls on a necklace. 

The best time to observe the Markarian’s Chain is when it is high in the sky, after midnight. If you are in town, don’t forget your light pollution filter for the best viewing experience.

Save The Date: let’s head to Markarian’s Chain on May 12th

On the evening of Friday, May 12th, thousands of Vespera and Stellina owners around the world are invited to point their instrument at the Markarian’s Chain to create all together the longest exposure photograph ever captured with the same gear.

Whether you’re a Stellina or a Vespera users, set your calendar and join us on this challenge.

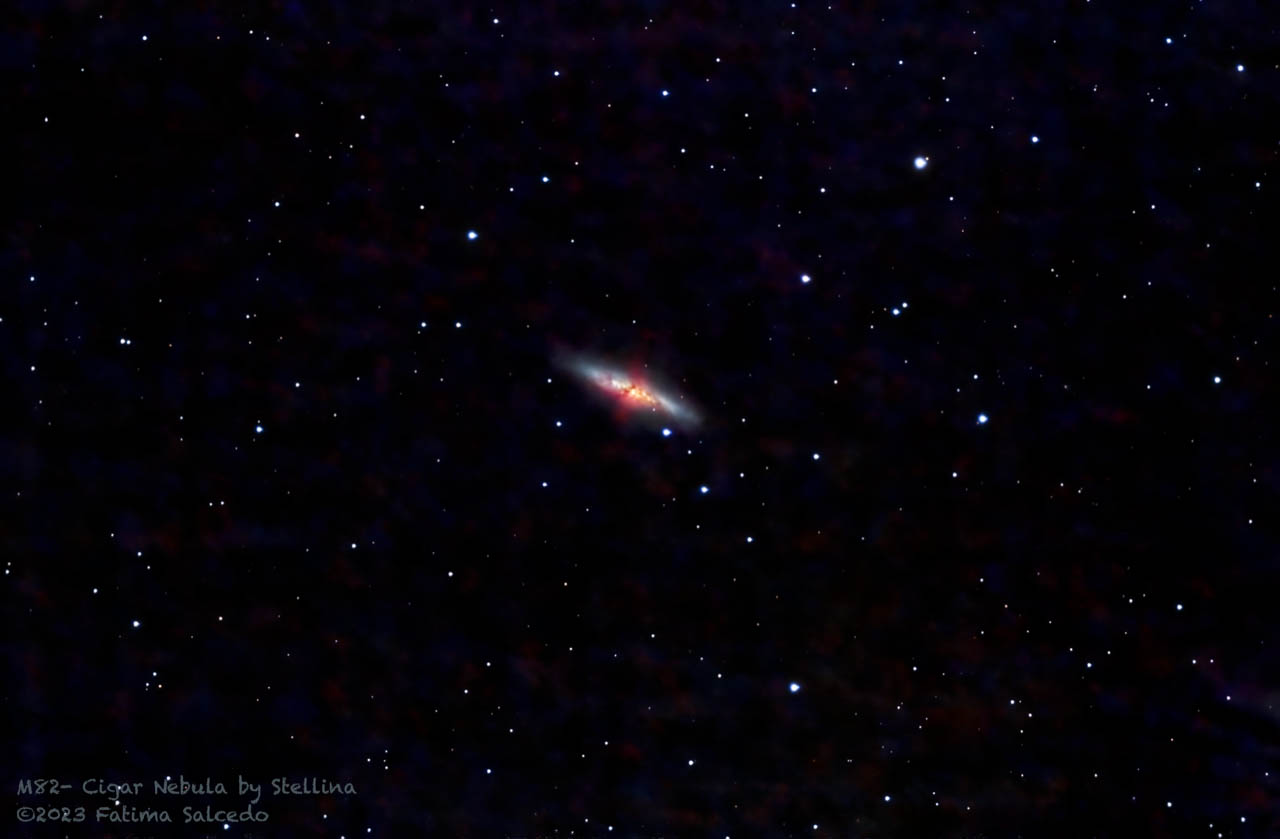
Cigar Galaxy

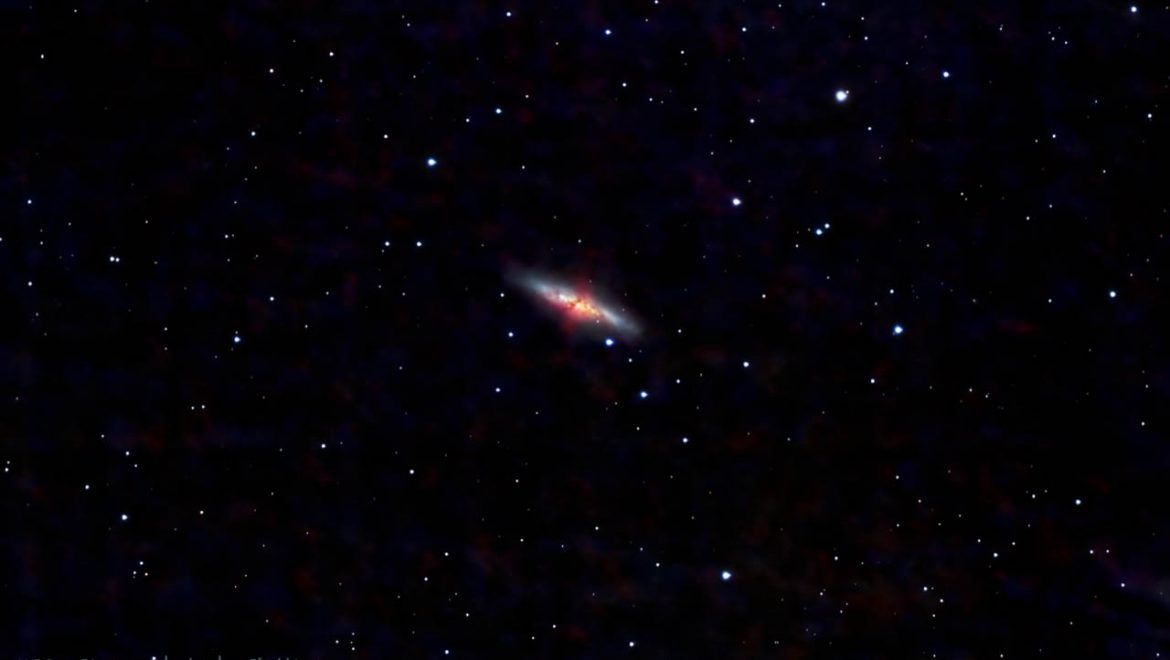
M82, also known as the Cigar Galaxy, is an irregular galaxy located about 12 million light-years from Earth, in the constellation of the Big Dipper. It is particularly remarkable because of its intense star formation activity, which makes it a starburst galaxy. This activity is mainly due to a gravitational interaction with its neighbor, the galaxy M81, which disrupted the distribution of gas and dust within M82.

What can we observe in the sky in May 2023?


The nickname “Cigar Galaxy” comes from its elongated and narrow shape, easily observed through an amateur telescope. M82 is also an important source of infrared radiation, due to the heat given off by the star forming regions and the presence of interstellar dust. Recent observations have also revealed the presence of a supermassive black hole at its center, which contributes to the emission of X-rays detectable from Earth.

The study of M82 allows us to better understand the processes of star formation and the interactions between galaxies, making this galaxy an object of major interest for astronomers and astronomy enthusiasts around the world.

To observe the Cigar Galaxy, Vespera and Stellinawill be your best assets. As for the Markarian Chain, it is advisable to choose an observation site far from the city lights, in order to obtain a dark and clear sky or to have a CLS filter.

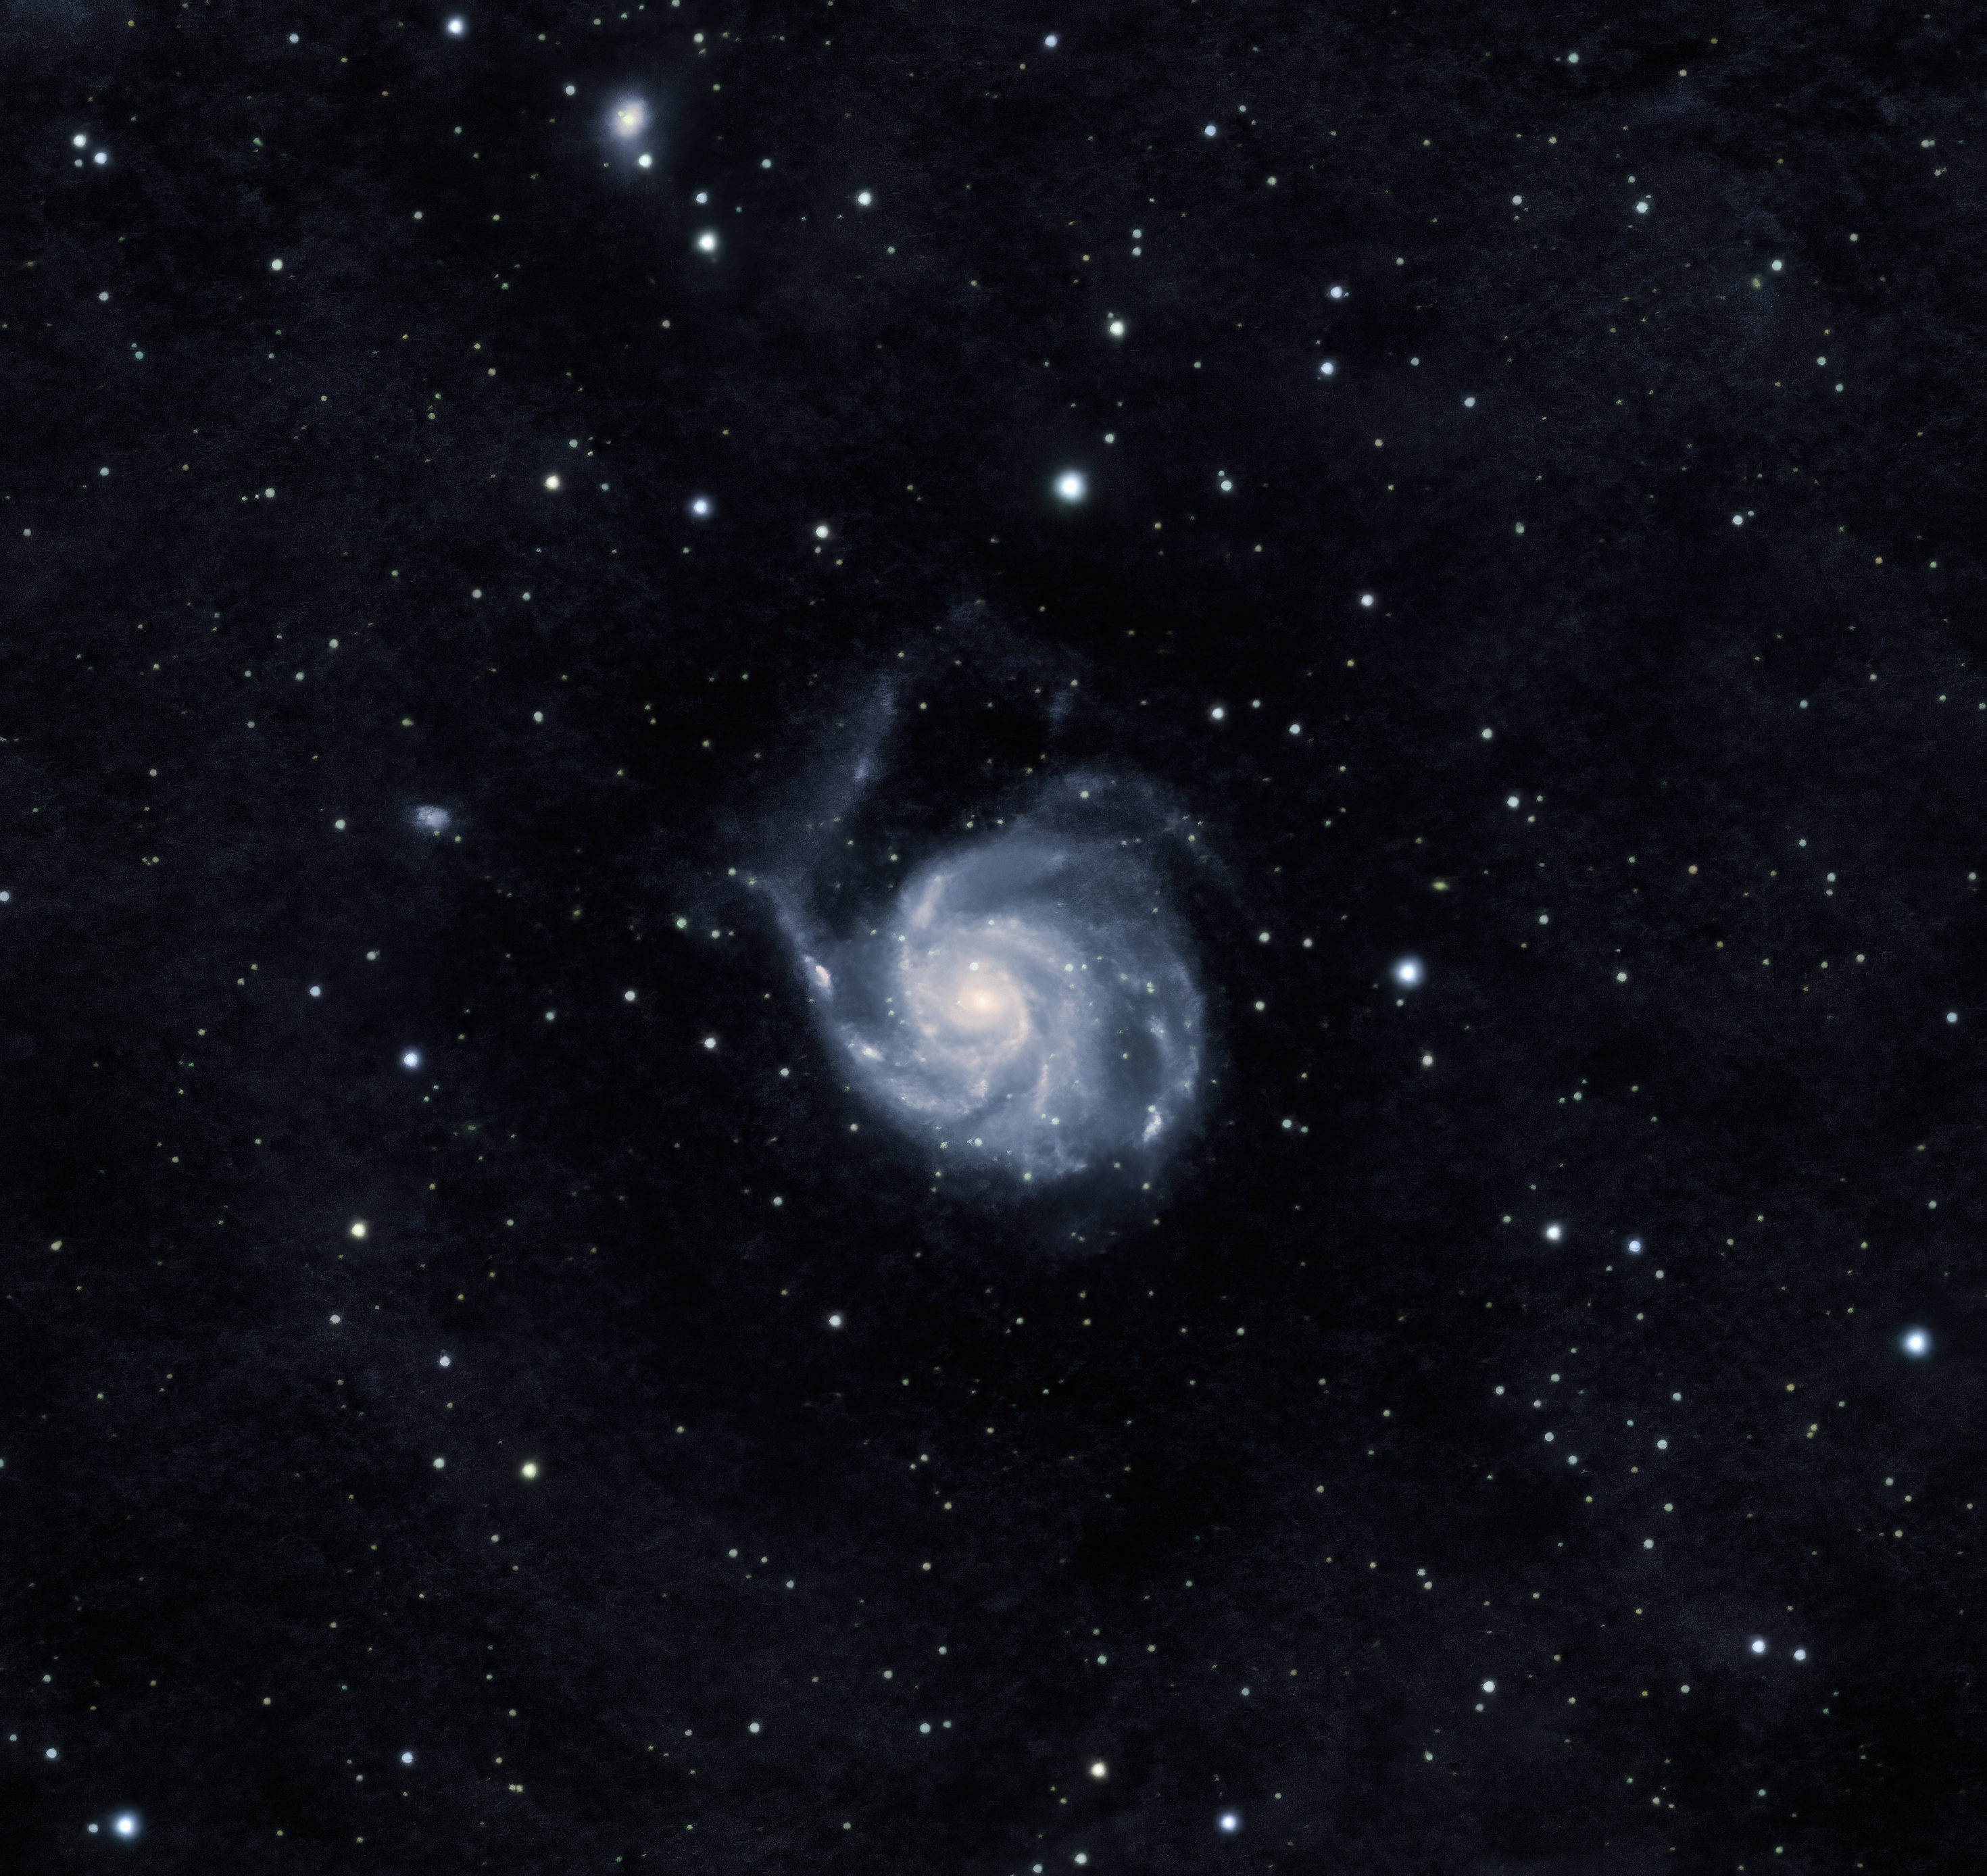
The Pinwheel galaxy

The Pinwheel Galaxy is one of the most fascinating galaxies in the cosmos. Located about 300 million light years from Earth, this galaxy is a classic example of what is called a face-on spiral galaxy. The particularity of this galaxy lies in its central bar, which crosses its oval-shaped nucleus and is bordered by extended spiral arms. It is a real spectacle for astronomers who study galaxies, because the images of the Pinwheel galaxy reveal an incredibly complex and detailed structure.

What can we observe in the sky in May 2023?

The discovery of the Pinwheel Galaxy dates back to 1773, when French astronomer Charles Messier first observed it. He catalogued it as M101 in his famous catalog of celestial objects. However, it was not until 1920 that the American astronomer Heber Curtis realized that the M101 galaxy was in fact the Pinwheel galaxy. Since then, astronomers have continued to study this galaxy, using increasingly powerful and sophisticated telescopes. Observations have revealed many fascinating details about this galaxy, such as the presence of many star-forming regions and vast clouds of gas and dust. The Pinwheel Galaxy continues to fascinate astronomers and the general public today, and it remains one of the most iconic examples of a barred spiral galaxy.

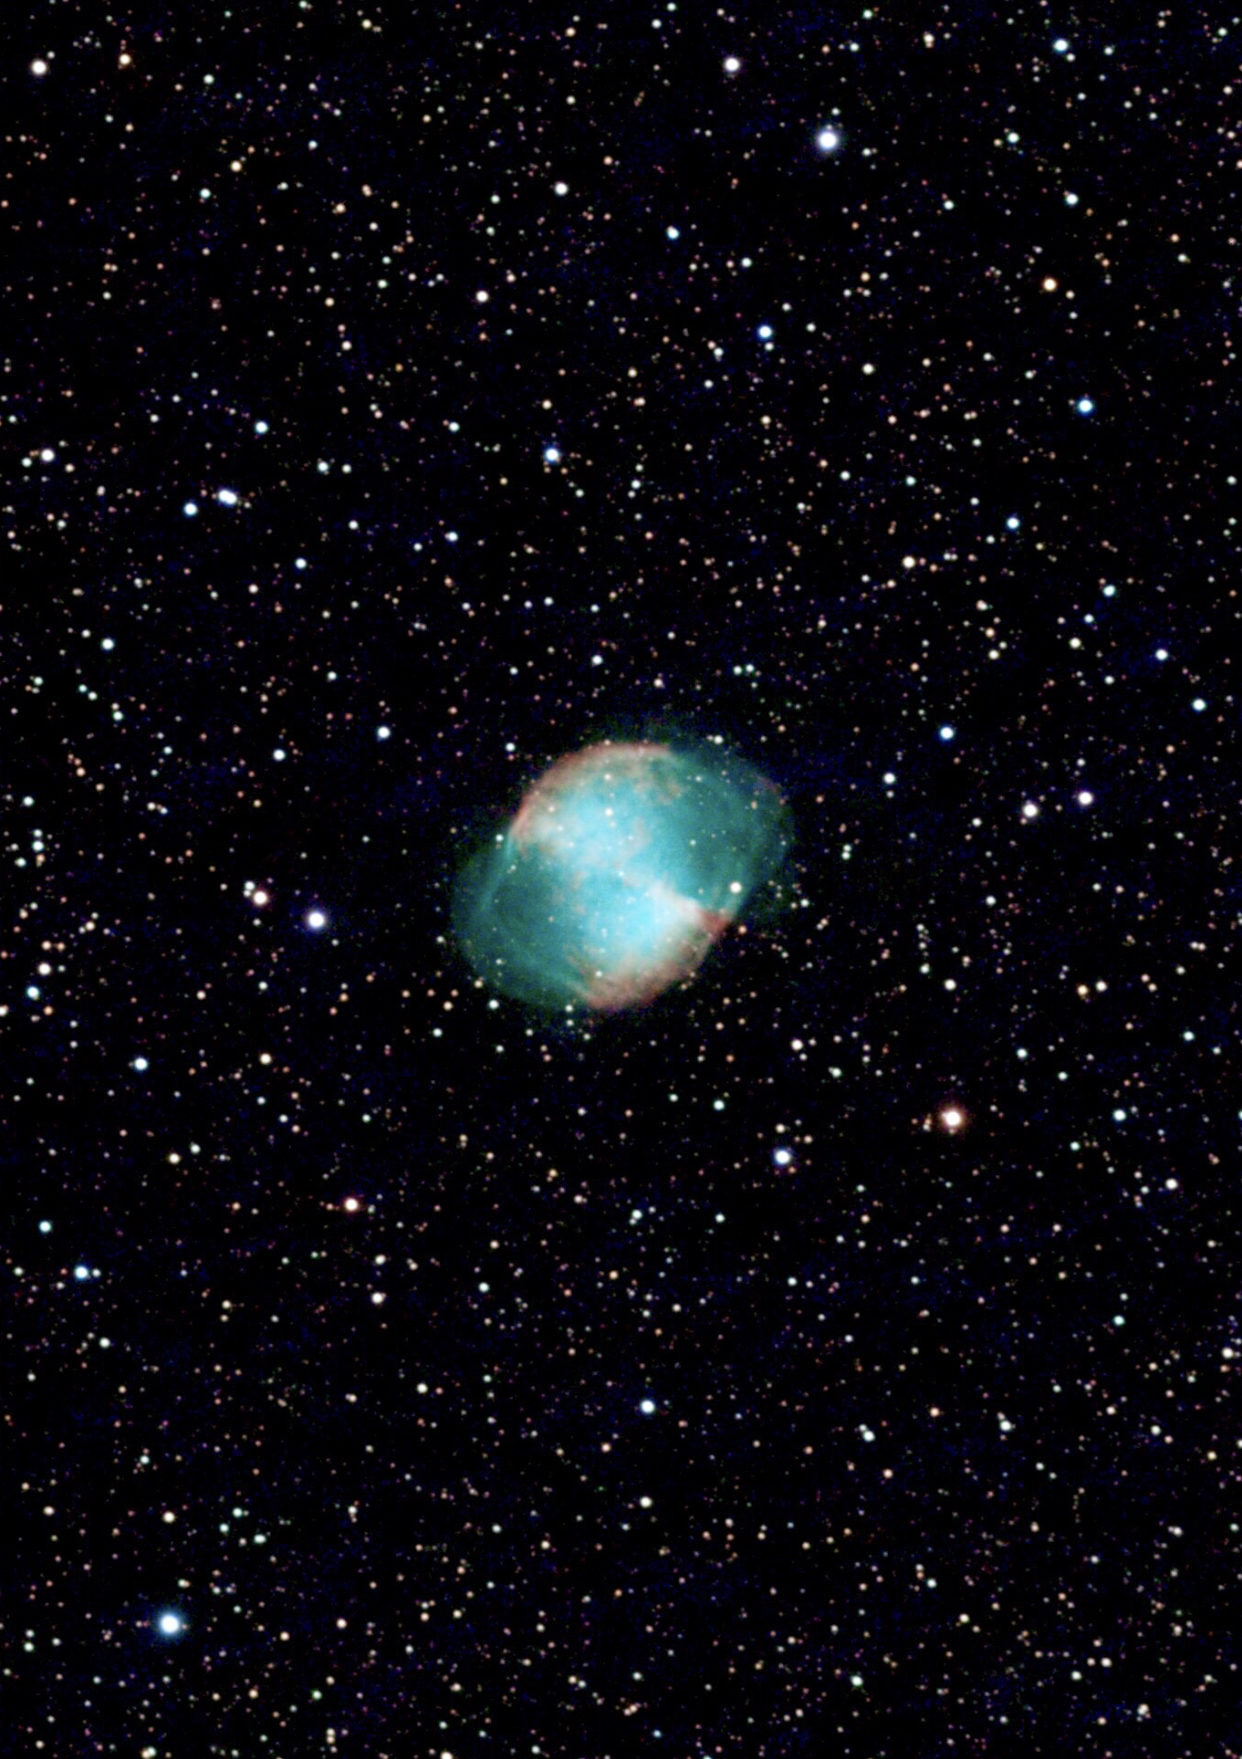
The Dumbbell Nebula

The Dumbbell Nebula is another celestial wonder to observe in May. This nebula is located in the constellation Lyra, and is also known as M27. Amateur astronomers will appreciate its barbell-like shape.

What can we observe in the sky in May 2023?

The Dumbbell Nebula is a planetary nebula, which was discovered by French astronomer Charles Messier in 1764. It is located about 1,360 light-years from Earth, and consists of gas and dust ejected by a star at the end of its life. The Dumbbell Nebula is a wonder to observe through a telescope, thanks to its bright colors and distinctive shape.

If you have a Vespera, we recommend the Dual Band filter, a narrow band interference filter that will increase the contrast between the stellar object and the sky background. Its use allows you to obtain an image of superior quality, with stars and finer details.

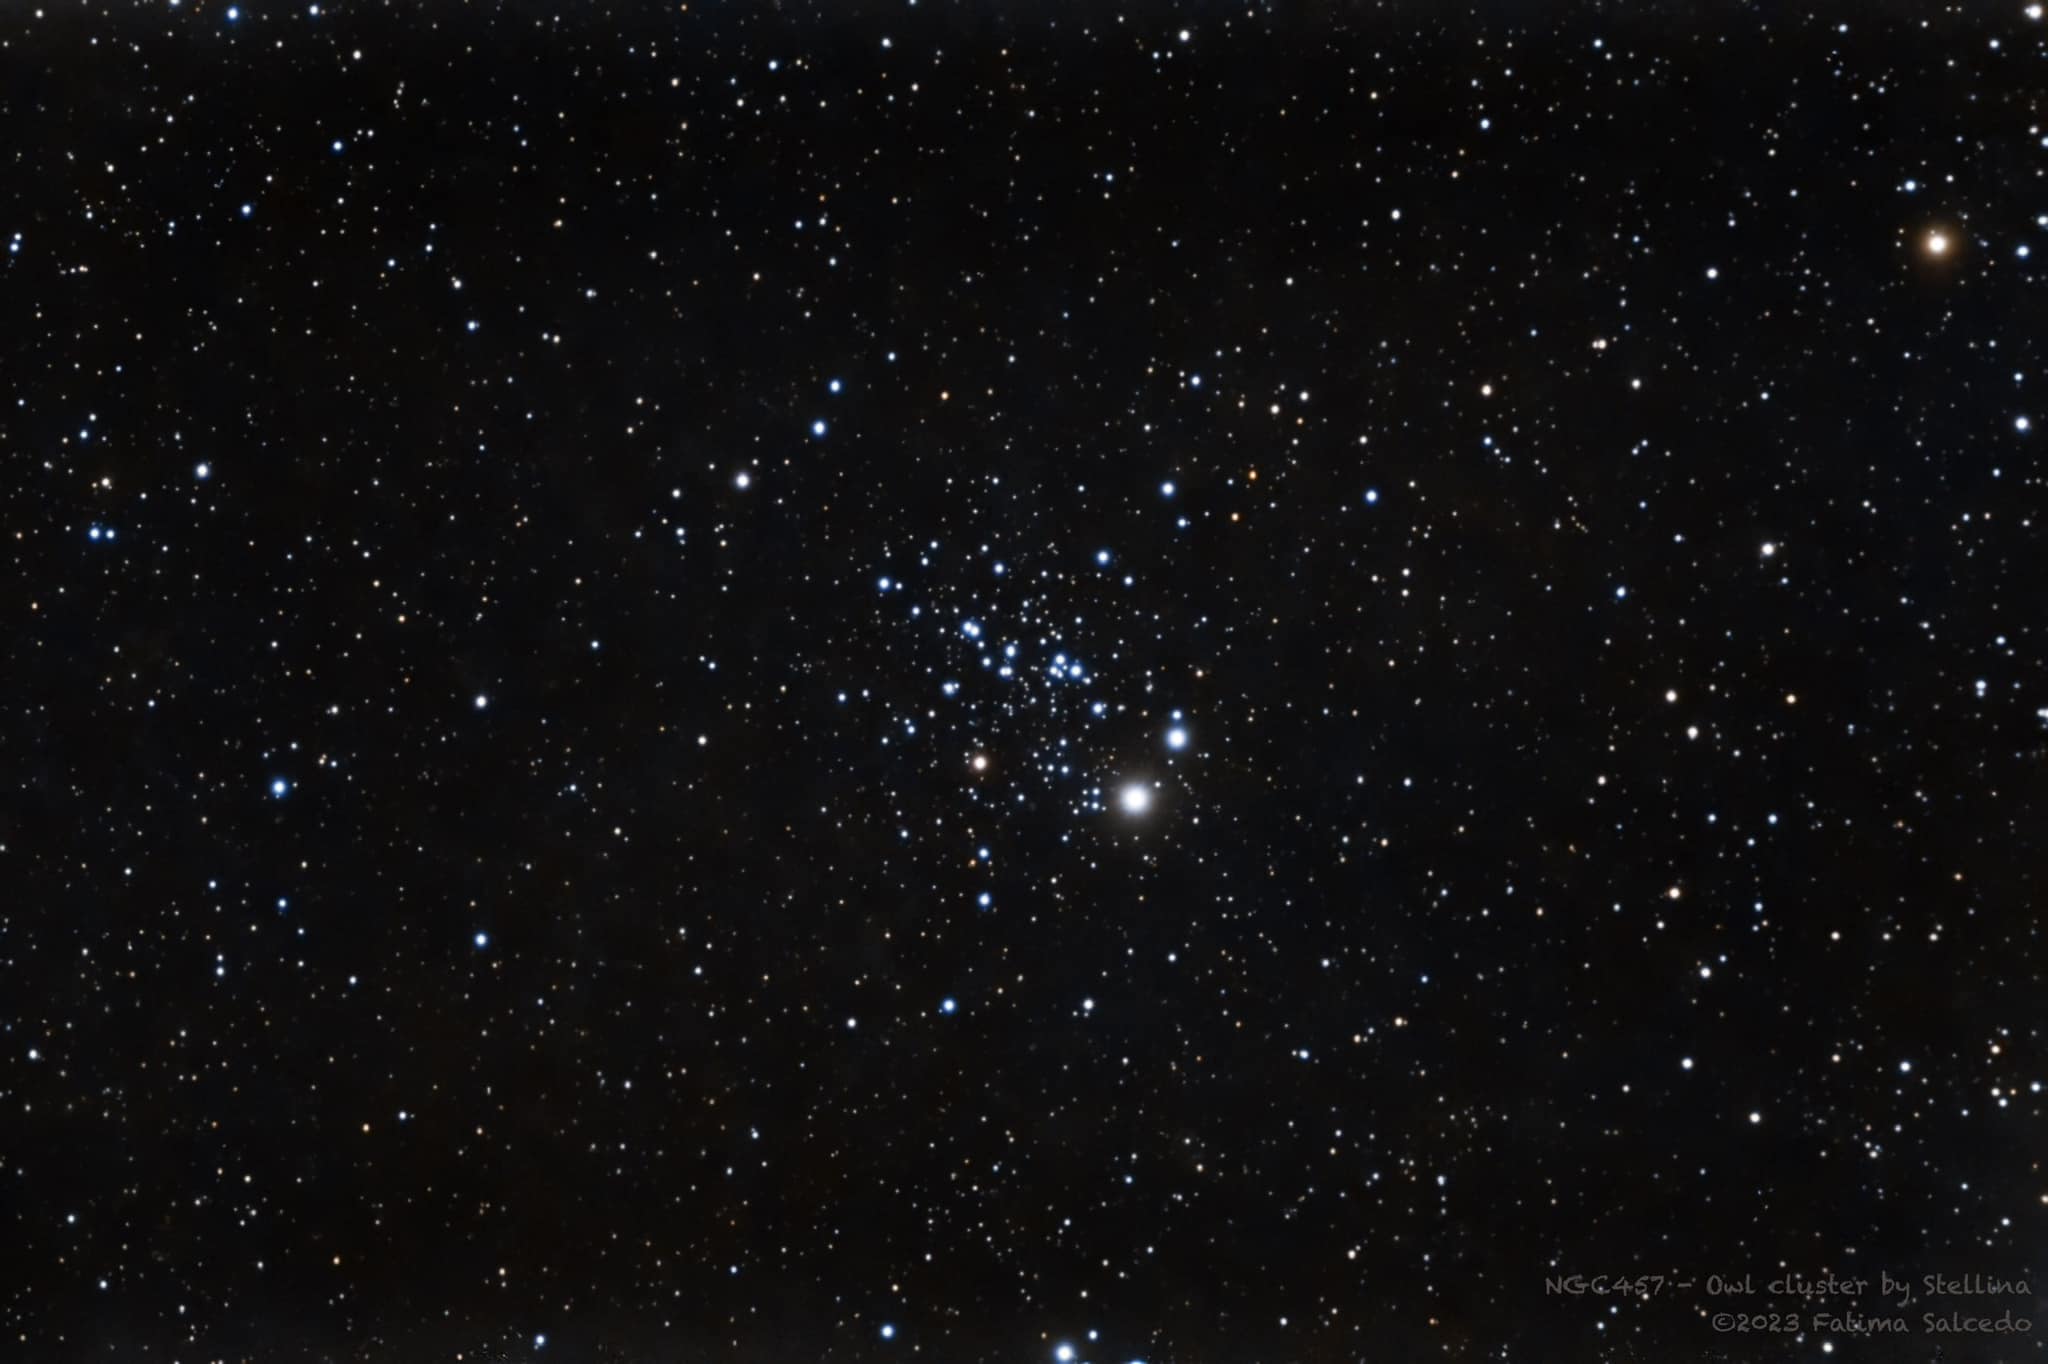
NGC457 aka the Owl Cluster

NGC 457, also known as the Owl Cluster, is an open cluster of stars located about 7,900 light-years from Earth in the constellation Cassiopeia. This picturesque cluster, discovered by British astronomer William Herschel in 1787, is particularly popular with amateur astronomers because of its amazing shape and ease of observation.

What can we observe in the sky in May 2023?

The Owl Cluster gets its name from the arrangement of its stars, which resemble the bright eyes of an owl, with two brighter stars, Phi-1 and Phi-2 Cassiopeiae, serving as the “eyes” and a set of less bright stars forming the “body”. NGC 457 contains more than 150 stars, some of which have a characteristic bluish tint, resulting from their high temperature.

When you observe NGC 457, let yourself be enchanted by this celestial dance of stars which, for thousands of years, has formed one of the most intriguing and enchanting faces of our night sky.

IC4592 Blue Horse Nebula

Located in the southern constellation Scorpius, this stunning nebula is a testament to the sheer beauty and majesty of the universe we inhabit. With its vivid hues of blue and pink, this celestial masterpiece is a feast for the eyes and a source of wonder and inspiration for stargazers and scientists alike. Whether you are an avid astronomy enthusiast or simply someone who appreciates the splendor of the cosmos, the IC4592 Blue Horse Nebula is a must-see for anyone looking to experience the awe-inspiring grandeur of the universe.

It was first discovered by the Scottish astronomer James Dunlop in the early 19th century. Dunlop was a renowned astronomer who spent much of his career studying the southern skies, and his discovery of the Blue Horse Nebula is just one example of his significant contributions to the field of astronomy.

In conclusion, the month of May offers amateur astronomers the opportunity to discover several celestial wonders, including the Markarian’s Chain, and join us in an incredible challenge! Whether you are a novice or an experienced observer, these celestial objects offer a unique opportunity to explore and appreciate the beauty of the universe around us.

Observations, Tips & News, Travel journal

Save The Date: let’s head to the Virgo Cluster on May 12th

The results are in!

Vaonis is excited to share the first ever collaborative image captured by the Vaonis community during the recent Virgo Cluster Challenge.

Despite the inclement weather, our team received over 100 entries over the weekend.

Thanks to your participation, we were able to push the limits of Vespera’s and Stellina’s capabilities, especially in detecting the faintest celestial bodies, also known as the limiting magnitude, that our instruments can perceive.

On behalf of the entire Vaonis team, we would like to thank ALL of you, challenge participants and the entire Vaonis community, for participating in this unique challenge!

Here are the results obtained by Vespera and Stellina users.

Vespera

Stellina

DOWNLOAD STELLINA FINAL TIFF VERSION

DOWNLOAD VESPERA FINAL TIFF VERSION

Save The Date: let’s head to the Virgo Cluster on May 12th! With modern technology, capturing stunning photographs of the universe has become more accessible than ever before. Today, Vaonis is inviting you to create a new world record with the longest cumulative exposure time image in 24 hours ever taken by Vaonis fast-growing community.

On May 12th, Vespera owners will point their instruments at NGC 4438 (part of the Markarian’s Chain), while Stellina owners are invited to point theirs at M60, both part of the Virgo cluster, and work together to create the longest exposure photograph ever captured with the same gear. This is a fantastic opportunity to join a pioneering community of individuals with a shared passion for astrophotography.

Join Vaonis on that special day as we set our sights on the beautiful Virgo Cluster on May 12th! In this blog post, we’ll discuss the Virgo Cluster and how you can participate in Vaonis’ exciting new challenge.


What is the Virgo Cluster?

The Virgo Cluster is a stunning and awe-inspiring phenomenon in the cosmos. Located within the constellation Virgo, this cluster is a massive collection of galaxies that contains thousands of individual members. From massive elliptical galaxies to smaller, irregular ones, the Virgo Cluster is a testament to the sheer scale and complexity of the universe. At its core lies the M87 galaxy, a behemoth that weighs in at trillions of times the mass of our Sun. The Virgo Cluster has captivated astronomers and stargazers alike with its intricate structure and breathtaking beauty. Whether you’re a seasoned astrophotographer or simply an admirer of the cosmos, the Virgo Cluster is a must-see spectacle that is sure to leave you in wonderment.

Save The Date: let’s head to the Virgo Cluster on May 12th

Vaonis’ new challenge is designed to bring together amateur astronomers from all over the world to capture a new world record with the longest cumulative exposure time image in 24 hours ever taken by Vaonis fast-growing community.

On May 12th, Vespera owners will point their instruments at NGC 4438 (part of the Markarian’s Chain), while Stellina owners are invited to point theirs at M60, both part of the Virgo Cluster, and work together to create the longest exposure photograph ever captured with the same gear.

How to Participate

Participating in Vaonis’ challenge is easy and straightforward. All you need to do is follow these simple steps:

  1. Own a Vespera or a Stellina
  2. Save the date in your calendar and set an alarm for May 12th
  3. Check if the Virgo Cluster is visible from your location using tools such as Stellarium : if you live between Olso and Cape Horn, you should be able to observe it
  4. Ensure your observation station and app are up-to-date by checking the latest releases
  5. Enable TIFF export in your Singularity app settings by following the tutorial provided by Vaonis


Stellina owners Vespera owners
  • Select Messier 60 galaxy
  • Let the observation run for at least 1 hour (stacking time)
  • Do not use the CovalENS or Reframe features
  • Find more help here
  • Select NGC 4438 (the target will be added in the next app release of May 9th)
  • If you want to have a try and observe the object before May 9th, enter the following coordinates in the manual mode:

ra: 12h27min47s dec:13°0′

  • CovalENS mode REQUIRED: change the size of the mosaic then center the square of the mosaic on NGC 4438 by keeping the field 2.8° x 2.0°, without changing the default position, nor rotate

Once you have captured your image, save it in TIFF format and send the file to photo@vaonis.com before May 14th, along with your full name, email address, and location. 

Join the Community

Join the dedicated event on the mySingularity Facebook group to meet other participants and get advice. You can also browse the FAQ for Vespera and Stellina section to get answers to any questions you may have. Joining the community can be a great way to learn more about astrophotography and connect with other astronomy enthusiasts.

Vaonis’ new challenge promises to be a unique and exciting experience for amateur astronomers all over the world. By participating in the challenge, you’ll have the opportunity to capture a stunning photograph of the Virgo Cluster and potentially be a part of a new world record. With simple instructions and plenty of resources provided by Vaonis, this is a great opportunity for amateur astronomers of all levels to come together and capture the beauty of the universe. 

Don’t miss out on this exciting opportunity and join the challenge today!


Observations, Tips & News, Travel journal

Complete guide to observing eclipses

Passionate about astronomy and in particular our star and satellite, we are delighted to present a comprehensive guide to eclipse viewing, highlighting each of our previous blog posts, and share with you our expertise on eclipse viewing through a series of six detailed articles.

What is an eclipse?

In our first article “What is an eclipse?” we explained in detail the different kinds of eclipses and their mechanism, covering the different types of solar and lunar eclipses.

CLICK HERE TO READ OUR ARTICLE

Guide complet sur l’observation des éclipses


The best places to observe the total solar eclipse of 2024

Our second article, “The best places to observe the total solar eclipse of 2024”, provided you with valuable information on the most recommended places to observe this exceptional event. We discussed the criteria to consider when choosing your viewing location, the most suitable areas and the precautions to take for a successful viewing.

CLICK HERE TO READ OUR ARTICLE

Watching the sun with Vespera and Stellina

If you are looking to use our observing stations to observe an eclipse, our third article “Observing the sun with Vespera and Stellina” gave you detailed information about our products and their use for solar observation, especially solar eclipses. We presented the advantages of our telescopes, Vespera and Stellina, as well as their respective solar filters, and how to use them to obtain exceptional quality images.

CLICK HERE TO READ OUR ARTICLE

Duration and frequency of solar eclipses

In our fourth article “Duration and frequency of solar eclipses”, we have deepened the concepts of periodicity and frequency of solar eclipses. We also explained which factors influence the occurrence of eclipses.

CLICK HERE TO READ OUR ARTICLE

Guide complet sur l’observation des éclipses

Stellina and its solar filter

Tips for viewing a solar eclipse

Our fifth article “Tips for Viewing a Solar Eclipse” provided you with important tips for safely viewing and enjoying the solar eclipse. We covered eye health aspects, precautions to take to avoid accidents, as well as proper Vespera and Stellina equipment to use for a successful viewing.

CLICK HERE TO READ OUR ARTICLE


Between penumbra and totality band, where to observe a solar eclipse

Finally, our sixth article “Path Of Totality, Umbra And Penumbra” introduced you to the different zones to observe during a solar eclipse and how to choose the best place for the observation. We also explained the difference between the totality band and the penumbra zone, and how they affect the observation of the solar eclipse.

CLICK HERE TO READ OUR ARTICLE

We hope these articles help you better understand eclipses and how to observe them successfully. Feel free to explore our website to discover our observing stations and their accessories and the latest news in astronomical observation by subscribing to our newsletter.

Observations, Tips & News, Travel journal

What can we observe in the sky in April 2023?

What can we observe in the sky in April 2023?

April 2023 is an exciting time for stargazers as there are several celestial objects to observe in the night sky. From galaxies to star clusters, nebulas and eclipses, the Universe offers an abundance of beautiful and mesmerizing astronomical wonders to explore.

In this blog post, we’ll take a closer look at five of the most interesting objects to observe in the sky during April 2023.

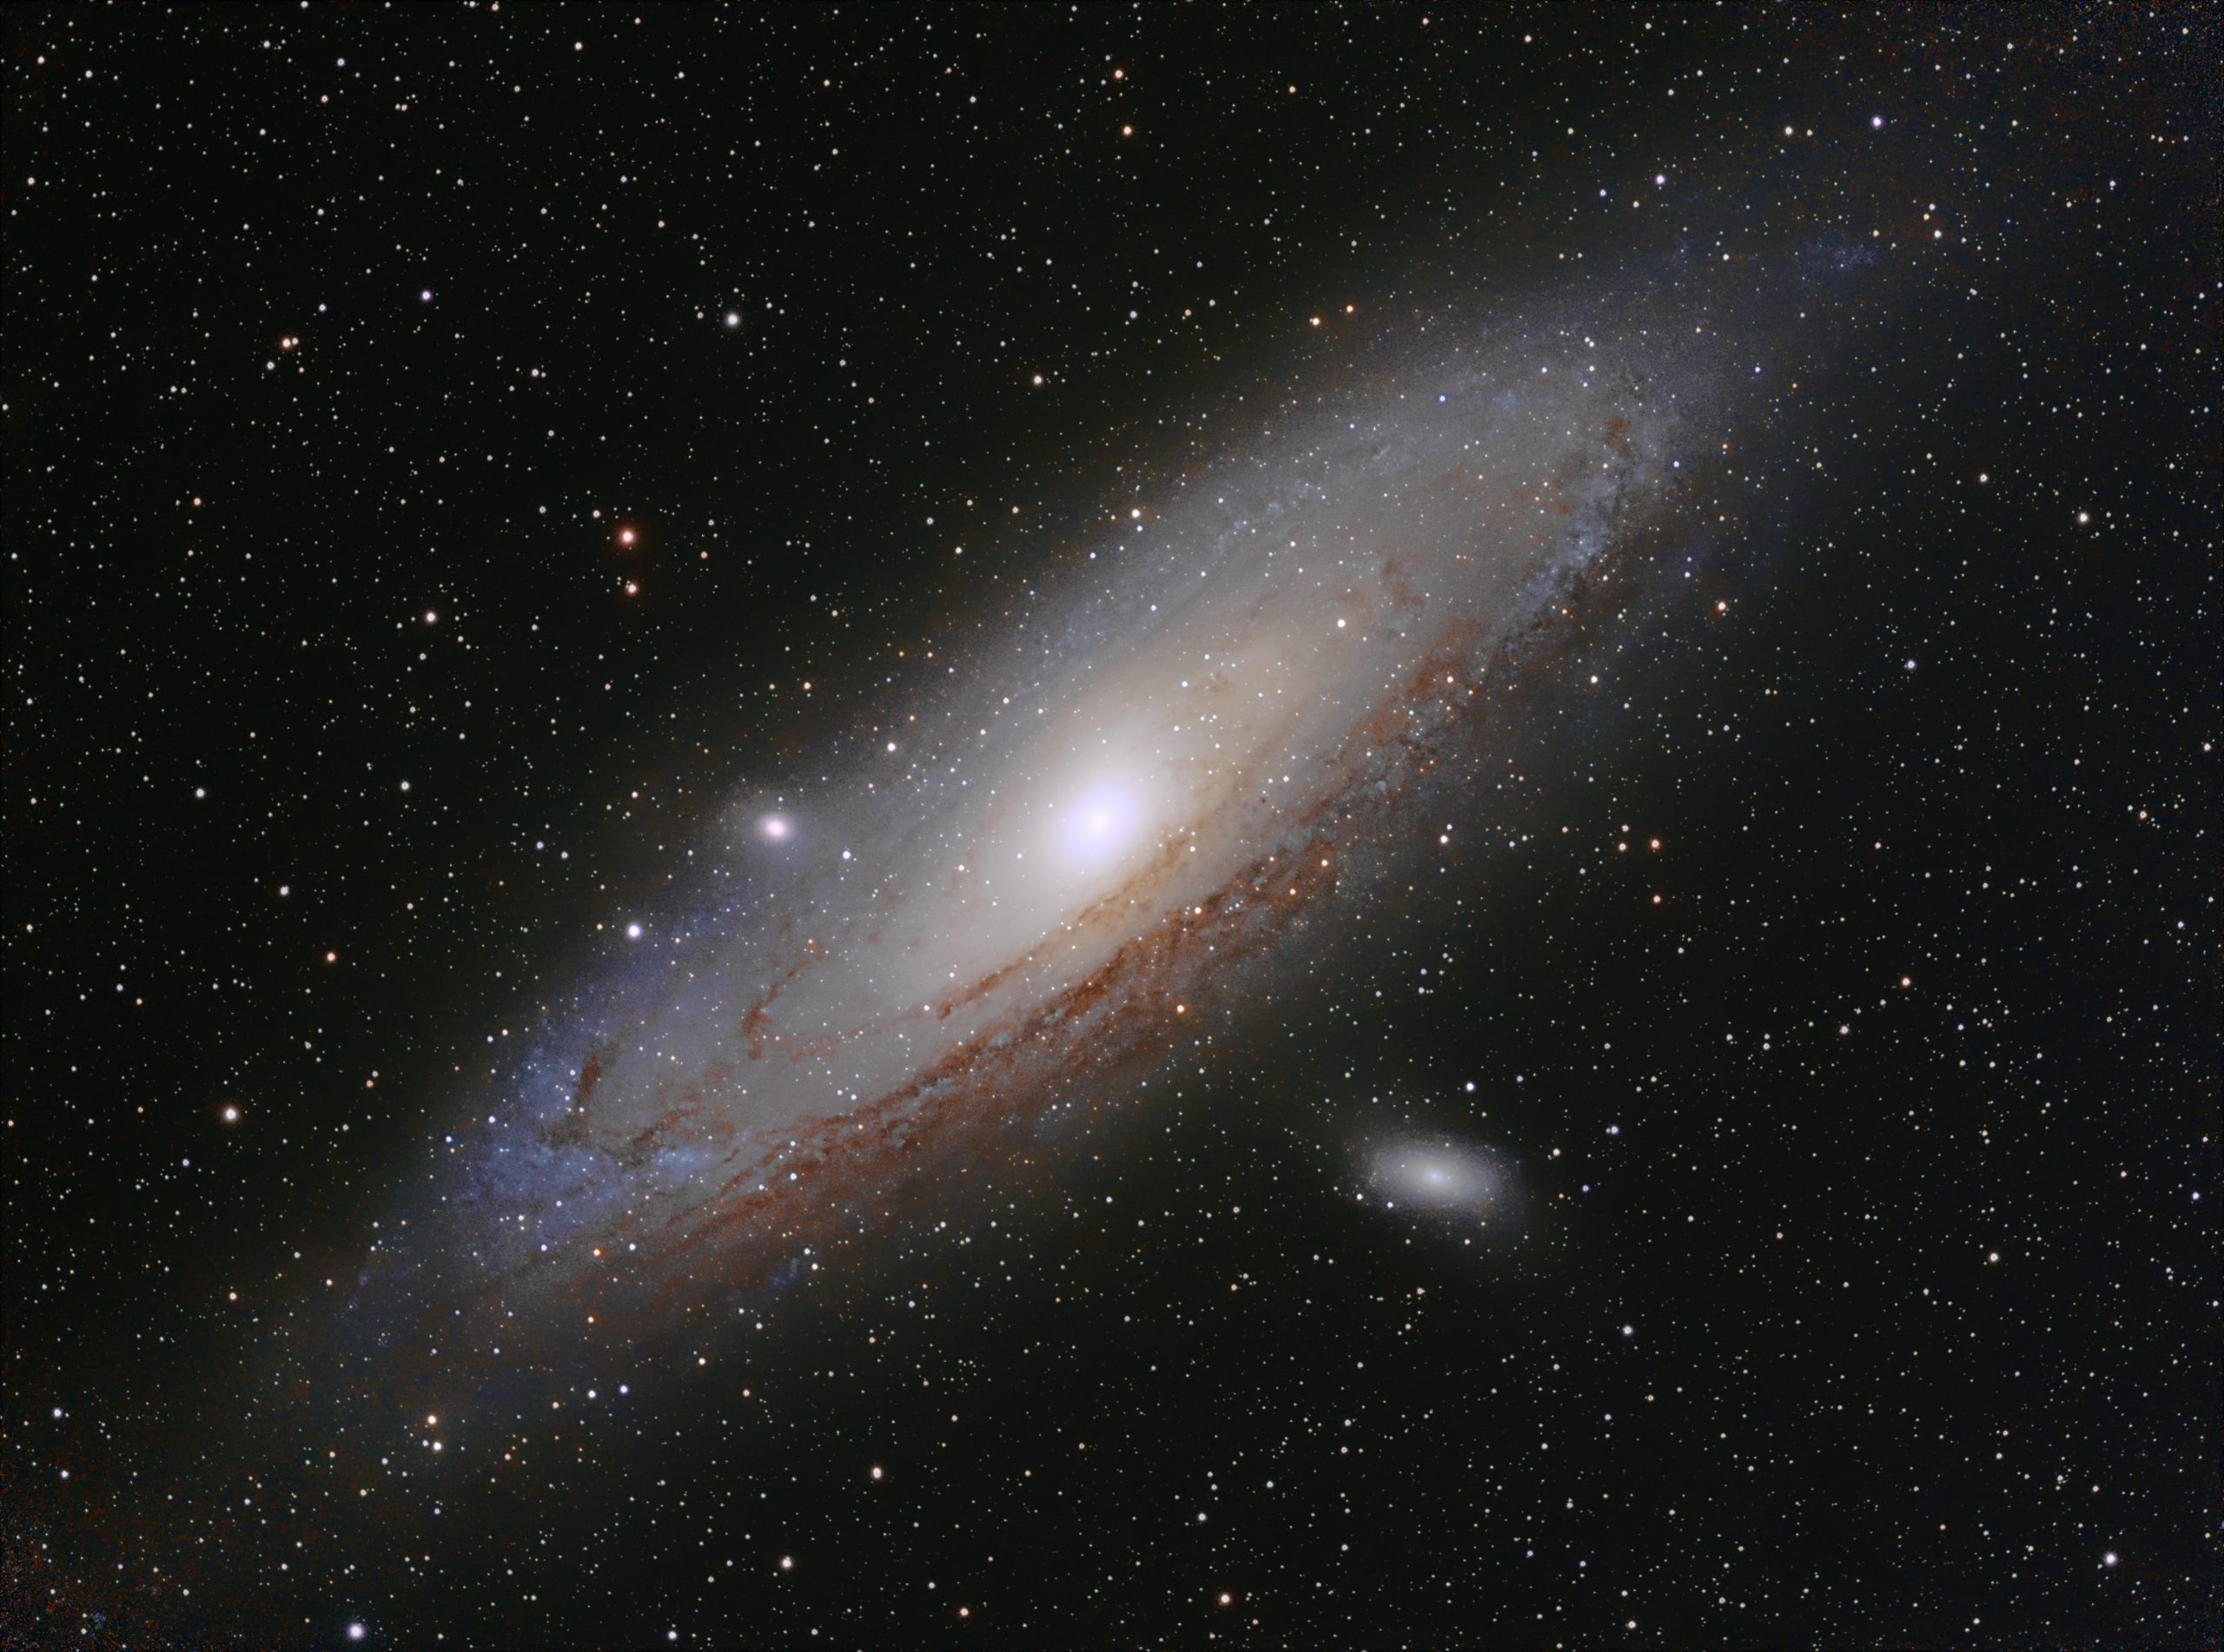
The Andromeda Galaxy

The Andromeda Galaxy, also known as M31, is a spiral galaxy located approximately 2.5 million light-years away from Earth. It is the closest galaxy to our Milky Way and can be seen with the naked eye on a clear night away from light pollution. It appears as a faint fuzzy patch in the constellation Andromeda. With a telescope, you can see its spiral arms and its bright core. The Andromeda Galaxy is a beautiful sight and is worth observing in April.

Taken with Vespera by Sébastien Aubry using our CovalENS technology

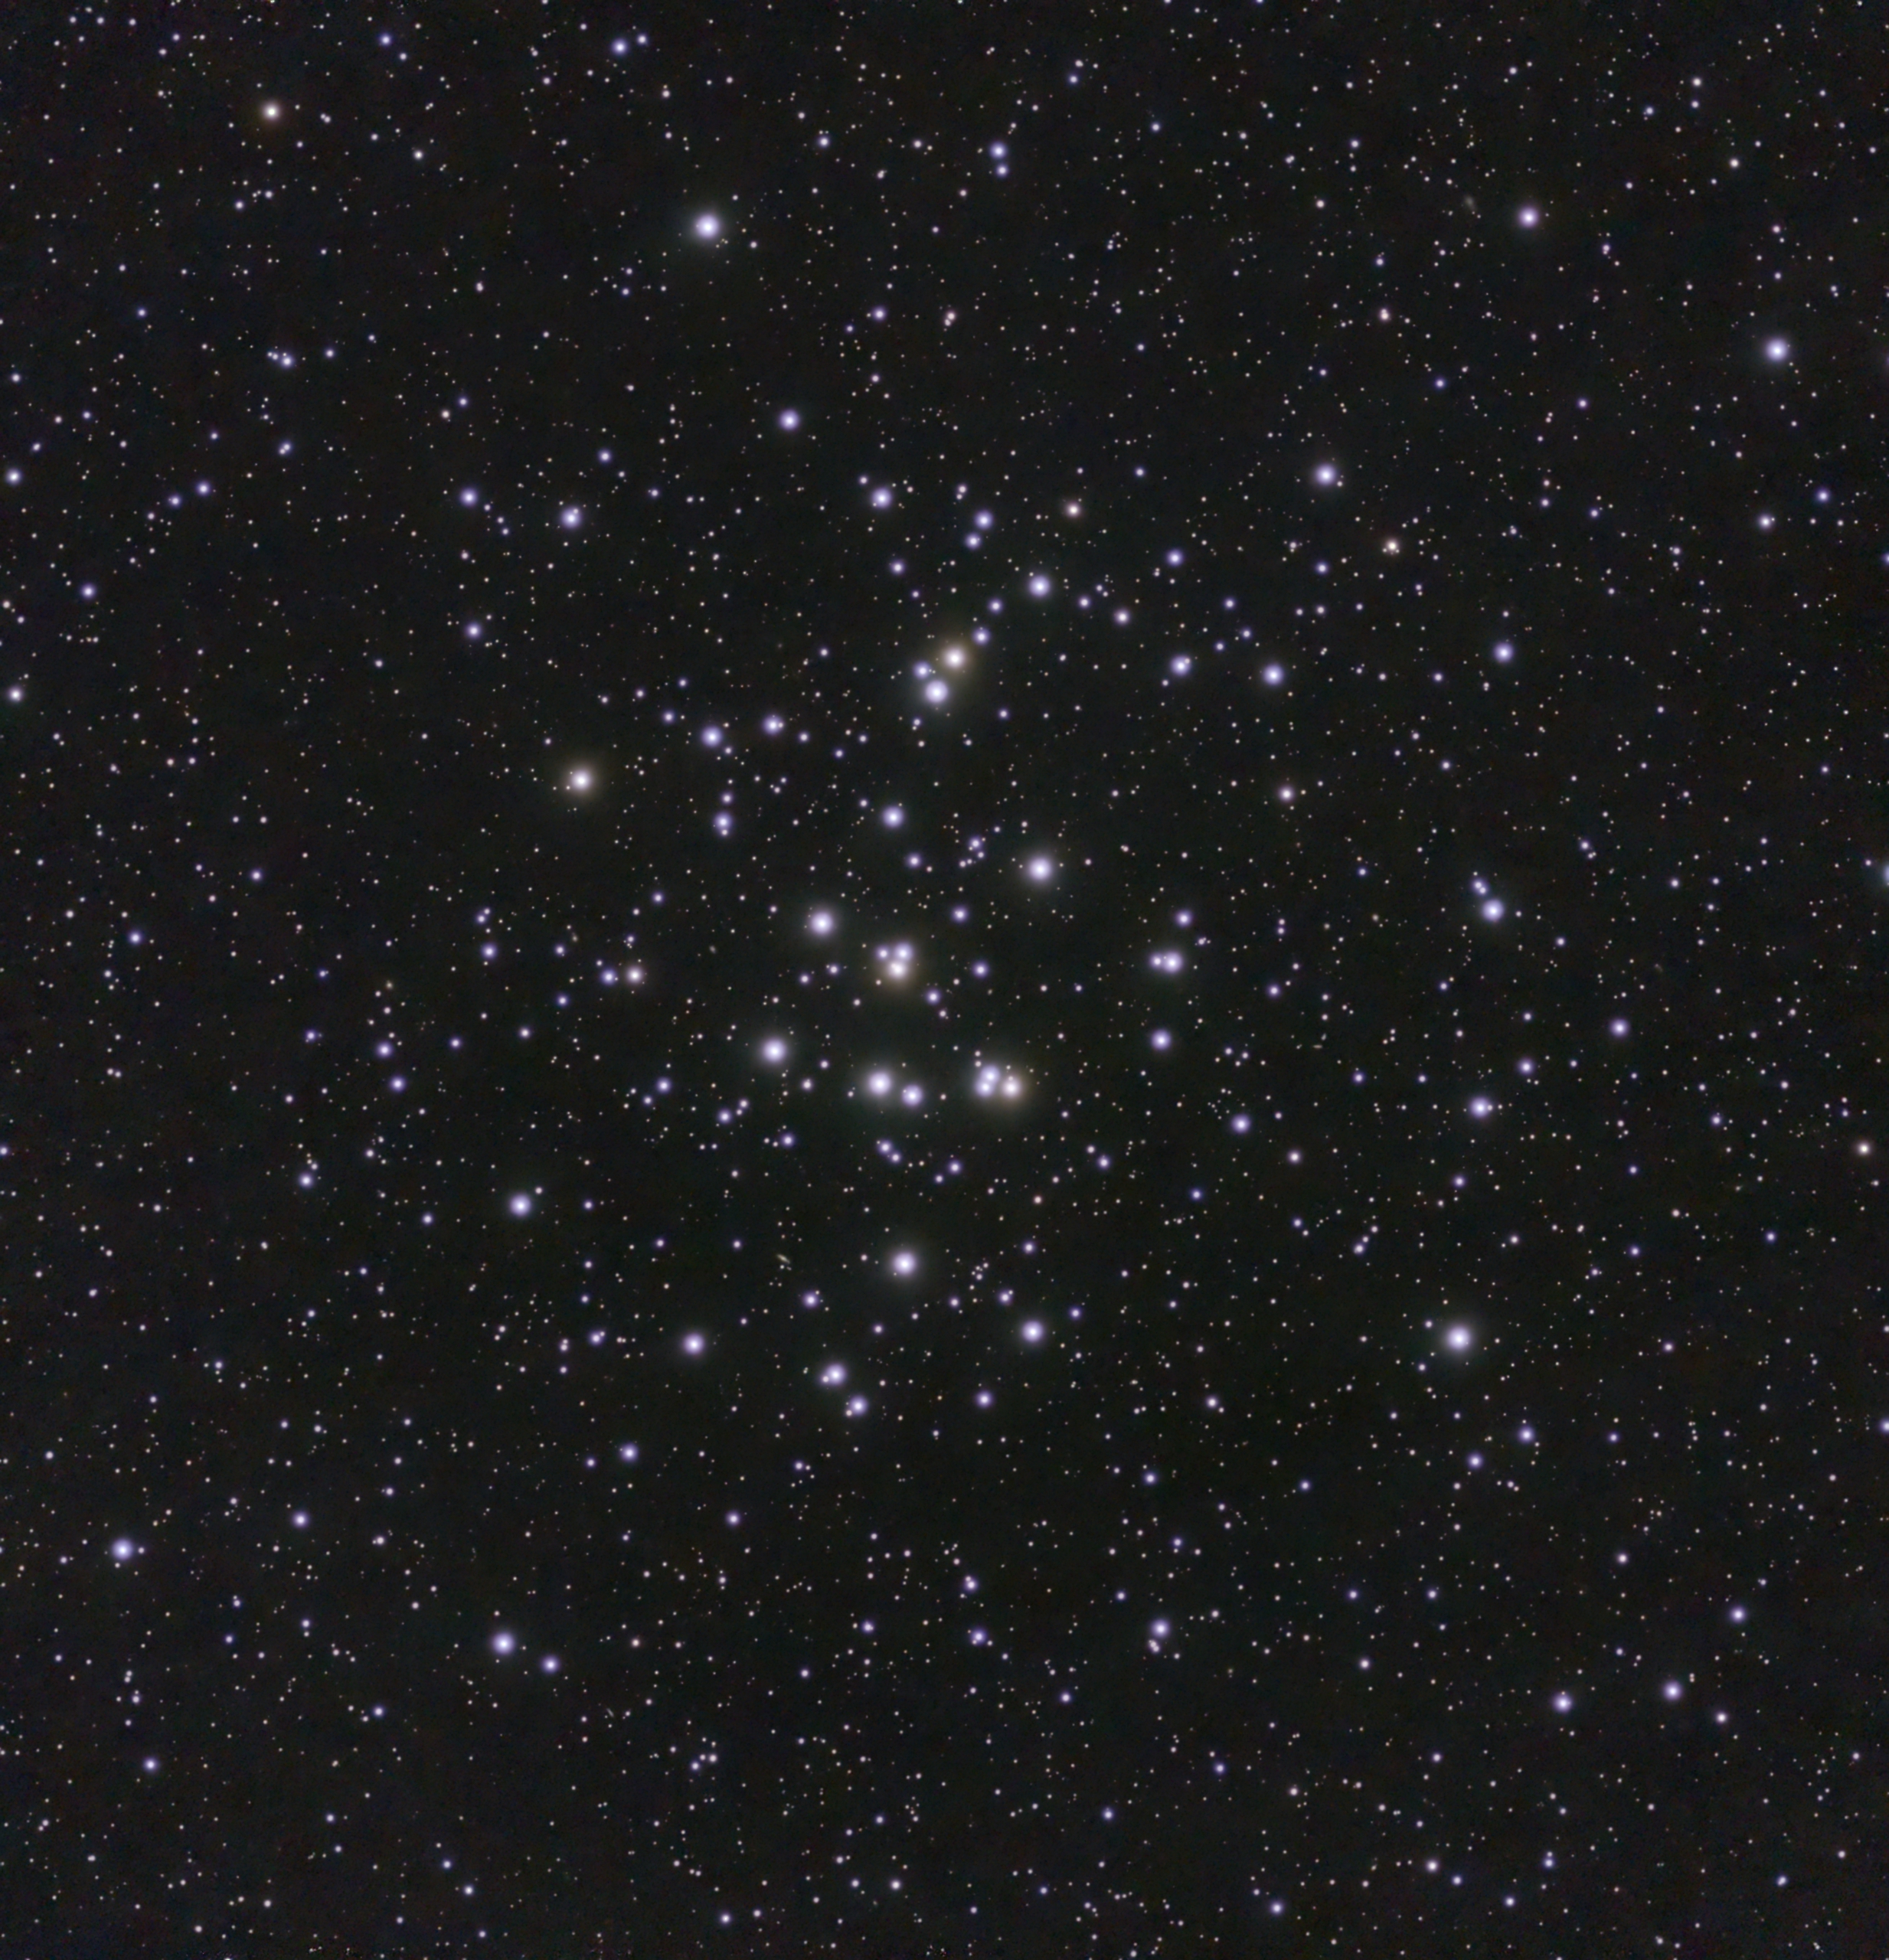
The Beehive Cluster

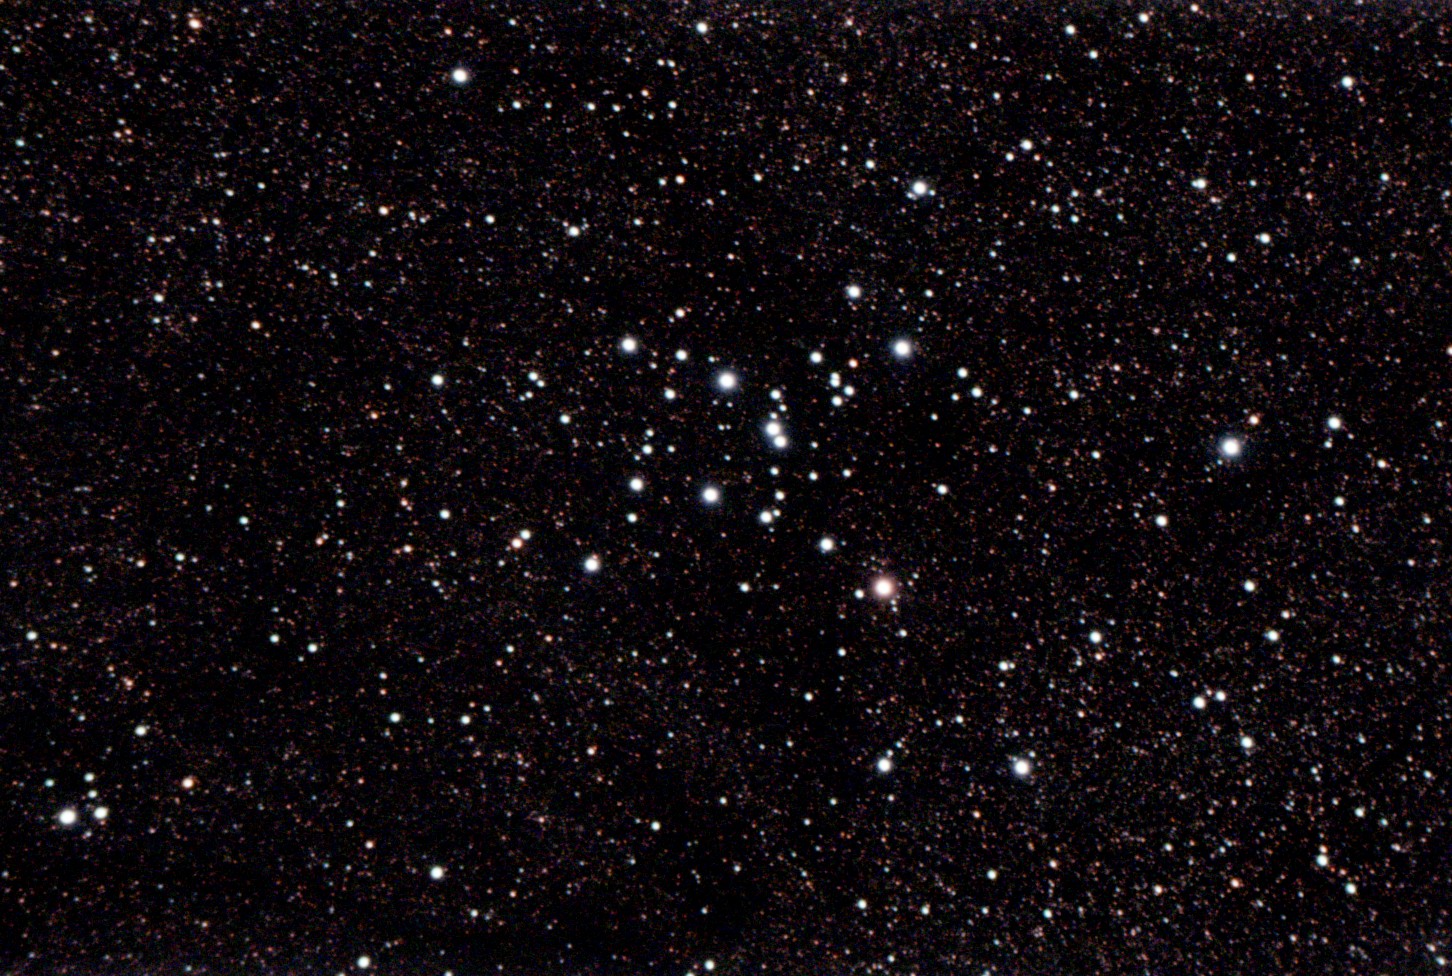
The Beehive Cluster, also known as M44, is an open cluster located in the constellation Cancer. It is visible to the naked eye as a small fuzzy patch. With a telescope, you can see its many stars that sparkle like diamonds. The Beehive Cluster is one of the nearest and brightest open clusters to Earth. It is a beautiful sight and worth observing in April.

Taken with Vespera by Ray B.

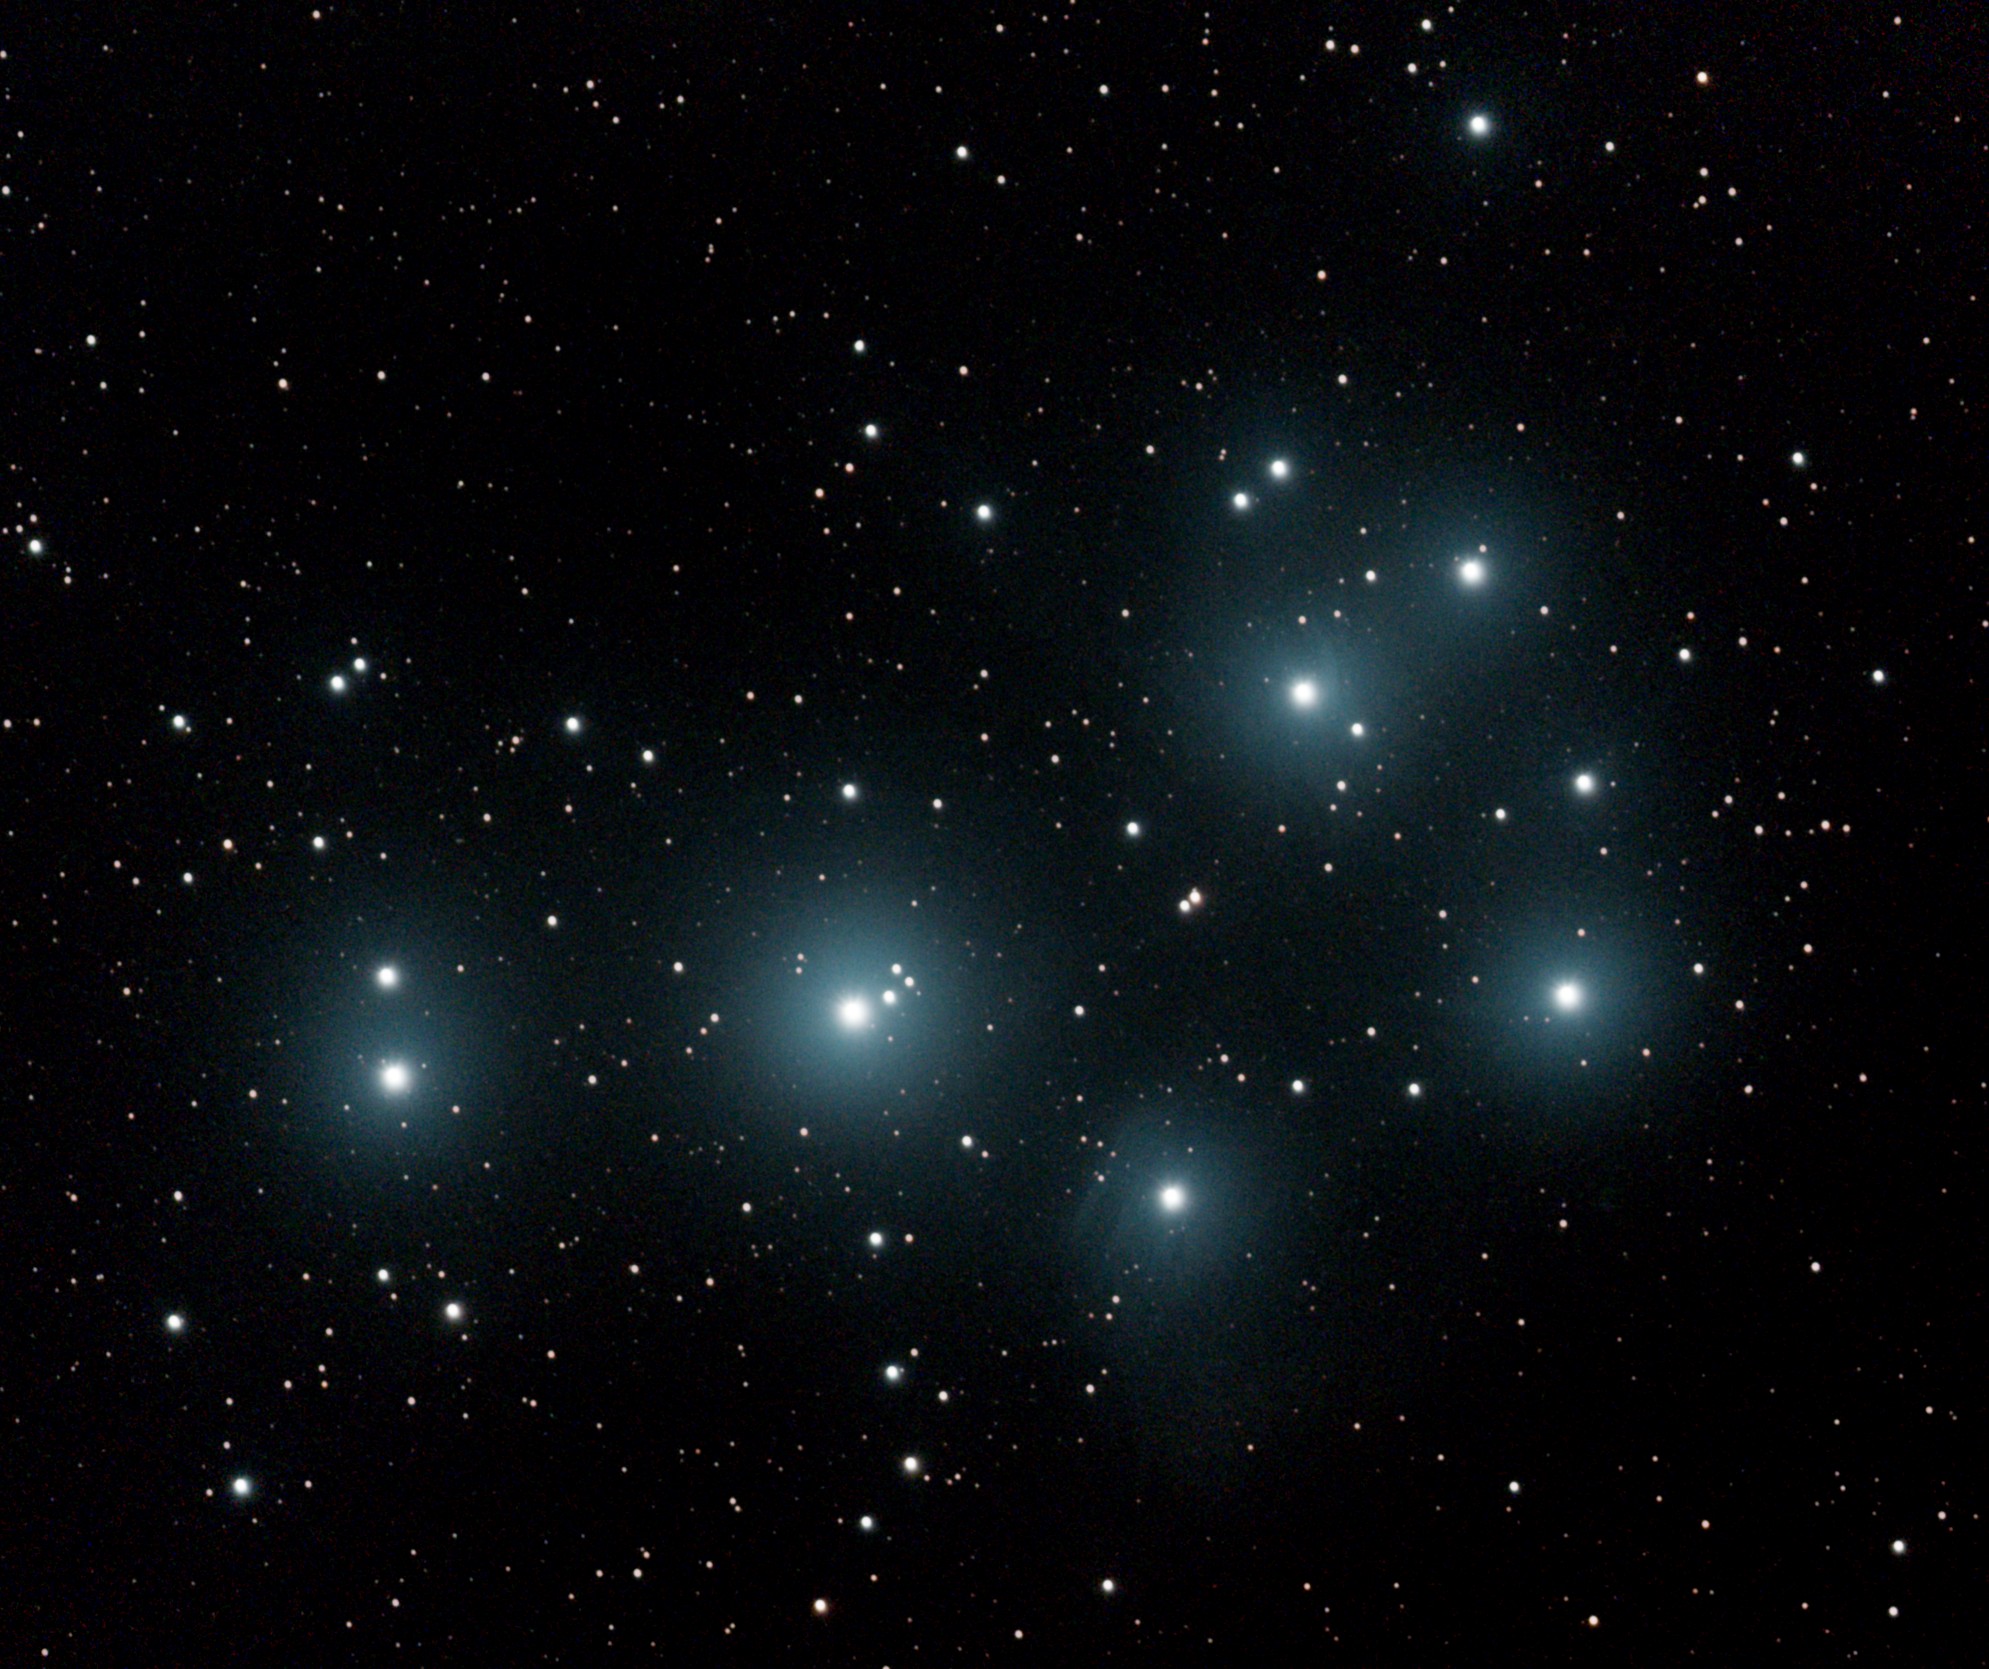
The Pleiades

The Pleiades, also known as the Seven Sisters, is an open star cluster located in the constellation Taurus. It is visible to the naked eye as a small cluster of stars. With a telescope, you can see its many stars, gas, and dust clouds. The Pleiades is one of the most famous and easily recognized open clusters in the night sky. It is an excellent target for beginners and experienced stargazers alike.

Taken with Vespera using our CovalENS technology

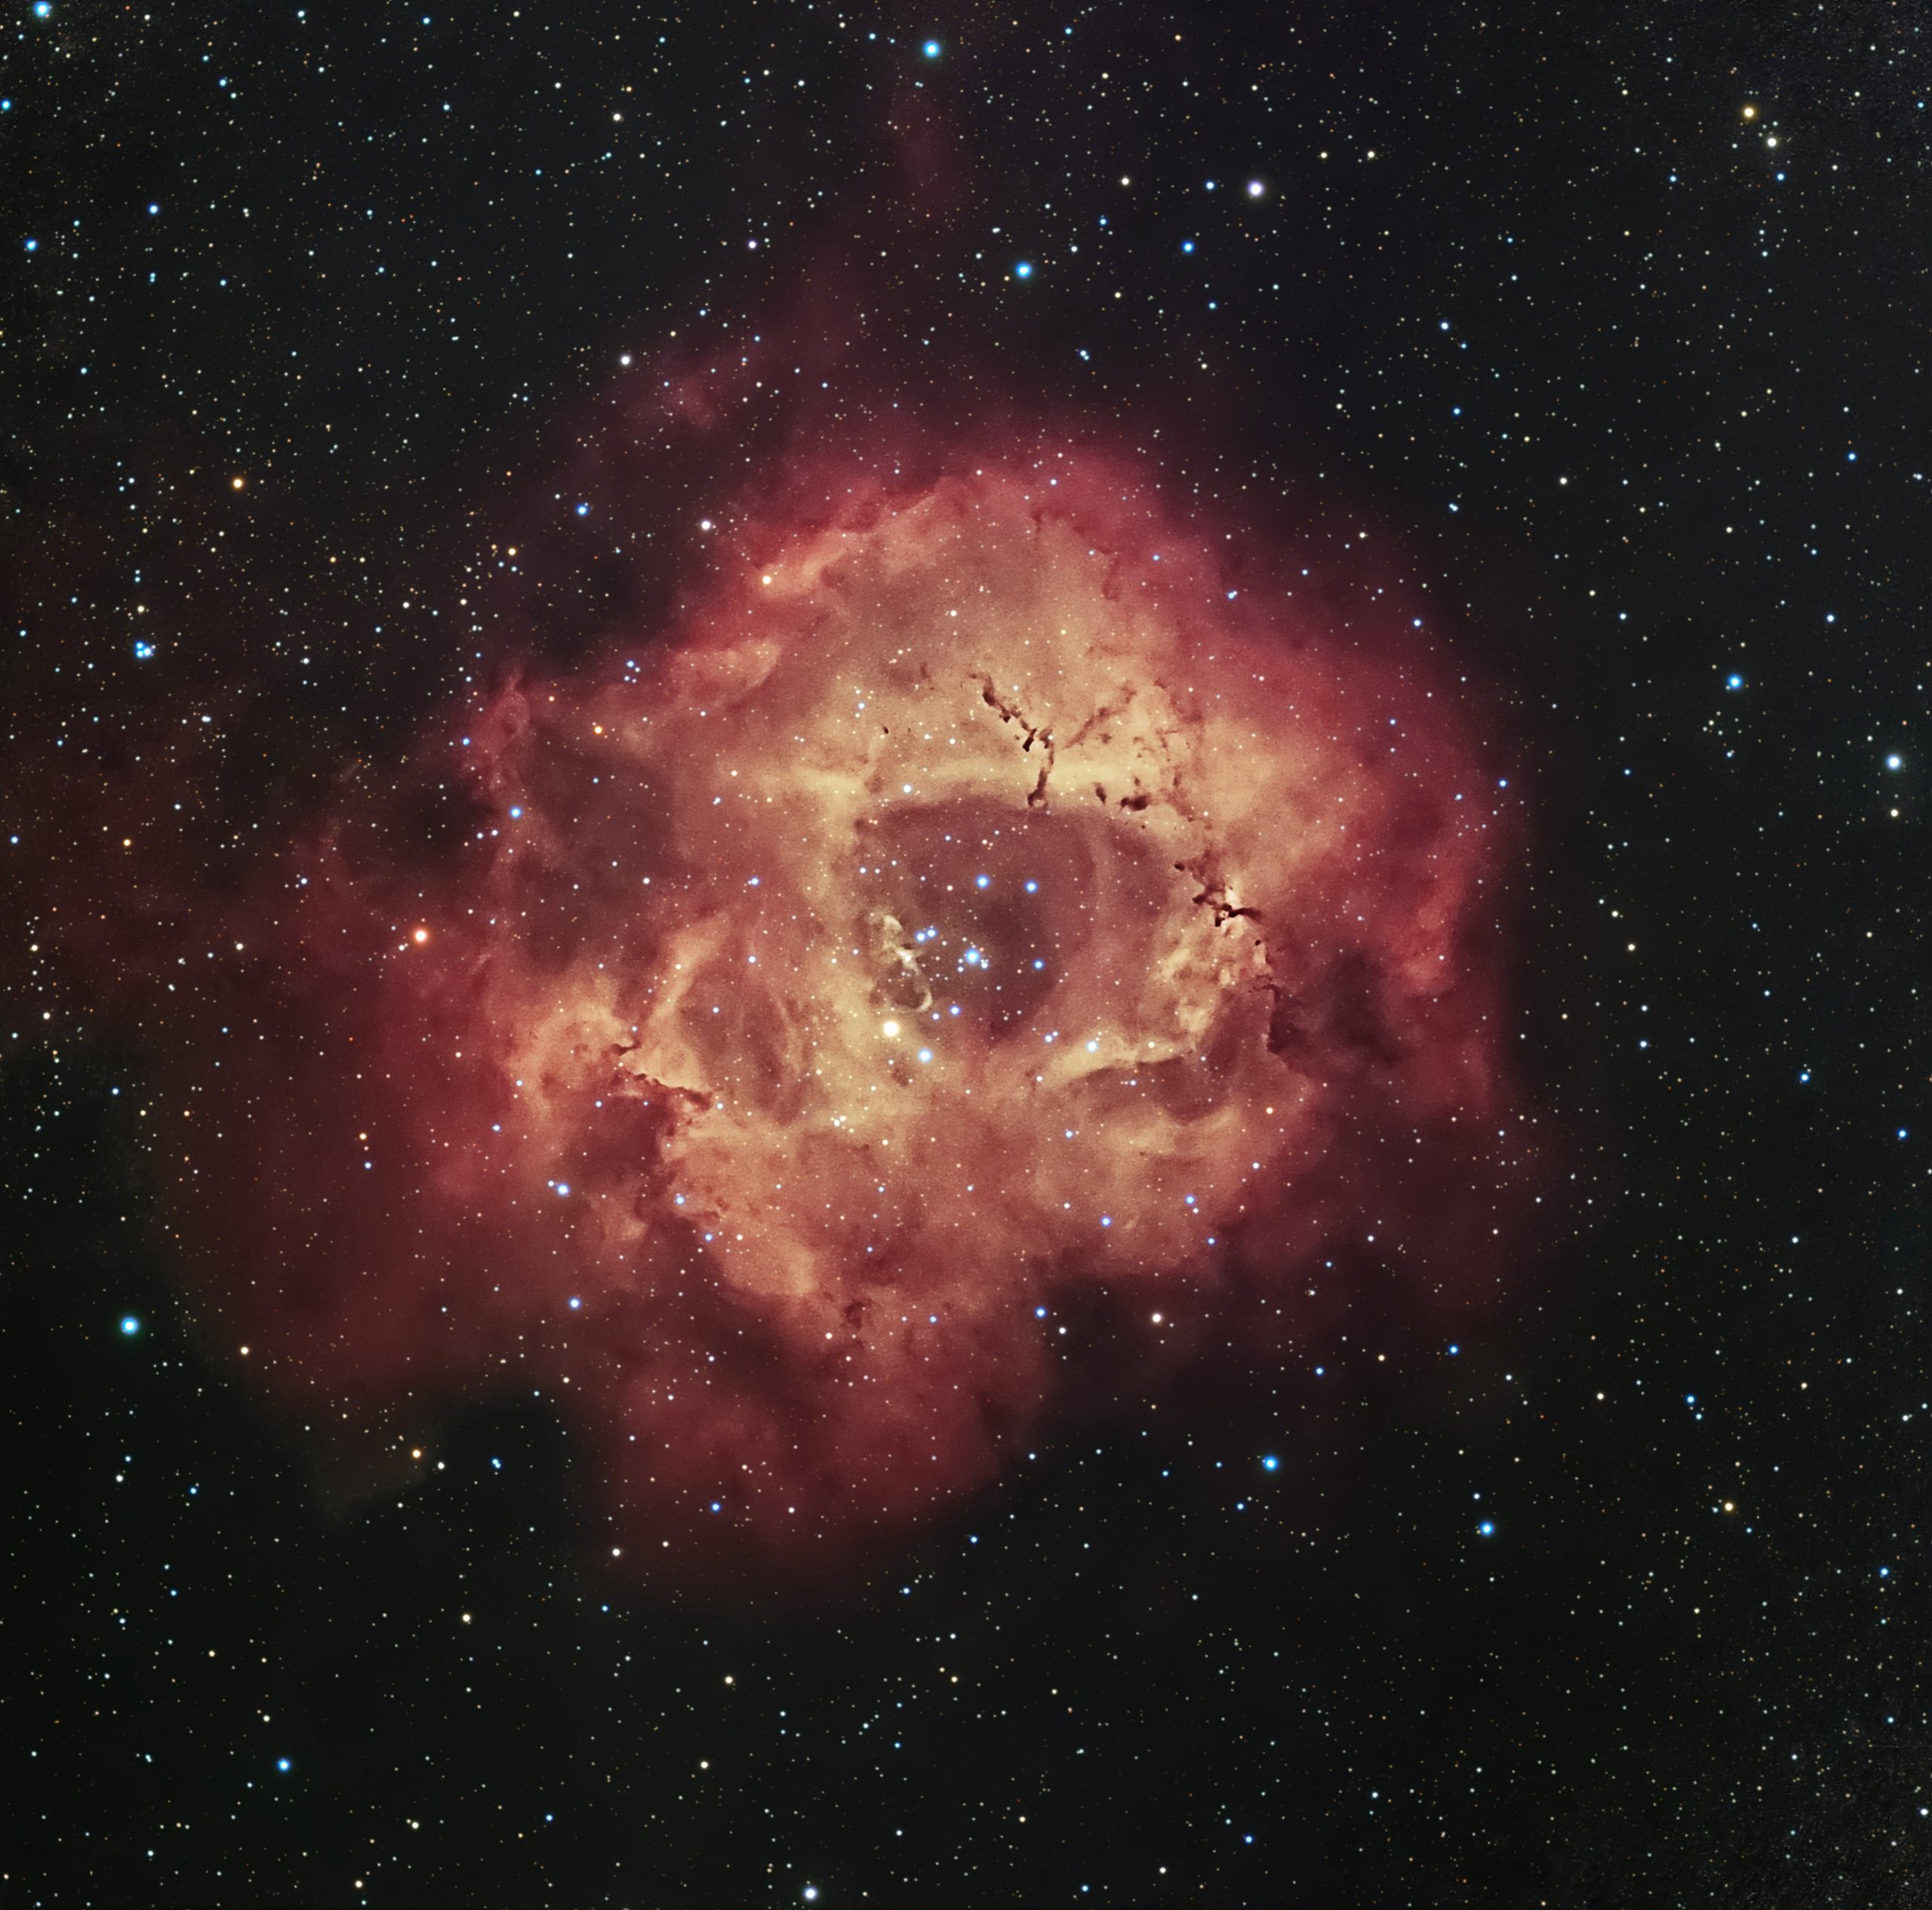
The Rosette Nebula

The Rosette Nebula, also known as NGC 2237, is a beautiful emission nebula located in the constellation Monoceros. This large, circular nebula appears as a faint, reddish-pink cloud and is visible with a telescope. It gets its name from its rose-like shape and intricate details, which make it a popular target for astrophotographers. The Rosette Nebula is an awe-inspiring object to observe and is definitely worth checking out in April 2023.

Taken with Vespera using our CovalENS technology

Eclipse in the Southern Hemisphere: Hybrid Solar Eclipse

On April 20, a total solar eclipse sweeps over the North West Cape, a remote peninsula of Western Australia. It’s also visible from parts of East Timor and the Indonesian province of West Papua. 

What is a hybrid solar eclipse? A hybrid solar eclipse, also known as an annular-total eclipse, is a rare type of solar eclipse that occurs when the Moon’s shadow passes over the Earth, but the apparent size of the Moon is not large enough to completely cover the Sun.

Make sure to order your Vespera solar filter and read this article about solar osbervations before you observe from your corner of the world!

Conclusion

April 2023 is an excellent time for stargazers to explore the southern hemisphere and observe some of the most beautiful and fascinating objects in the night sky and witness the eclipse!

If you’re interested in exploring the night sky, why not try stargazing this April? All you need is a clear night and Vespera.

For more tips and advice on stargazing, visit our website.

Happy stargazing!

Observations, Tips & News, Travel journal

Best places to watch the 2024 total Solar Eclipse

Want to know about the best places to watch the 2024 total Solar Eclipse?

The 2024 total solar eclipse is shaping up to be one of the most exciting astronomical events of the decade, and millions of people around the world are eagerly planning their trips to witness this once-in-a-lifetime spectacle. If you’re looking for the best places to watch the 2024 total solar eclipse, you’ve come to the right place. In this article, we’ll explore some of the top destinations for eclipse viewing and provide tips on how to make the most of your experience.

Best places to watch the 2024 total Solar Eclipse

Sources : The SkyLive

Mexico

For those looking to venture outside of the United States, Mexico is actually the best option. The eclipse will pass over several cities in the country, including Mazatlan, Los Pozos, and Torreon. These locations offer a unique opportunity to combine eclipse viewing with a vacation in a beautiful and vibrant country.

Texas

If you’re looking for a prime viewing spot for the 2024 total solar eclipse, Texas is an excellent choice. The eclipse will pass over the northern part of the state, offering spectacular views for those in the path of totality. Some of the best locations to watch the eclipse in Texas include Eagle Pass, Uvalde, and Lampasas. Just be sure to book your accommodations well in advance, as these cities are likely to be popular destinations for eclipse chasers.

Indiana

If you’re looking for a destination in the Midwest, Indiana is a great choice. The path of totality will cross the state from the southwest corner to the northeast corner, with several cities offering excellent viewing opportunities. Indianapolis, the state capital, is a particularly good option, as it is located near the center of the path of totality.

Ohio

Ohio is another great option for eclipse viewing, as the state will experience totality for several minutes. The eclipse will pass over the northwest to northeast corner of the state, with the town of Lima being one of the best places to watch. 

Canada

Finally, if you’re looking for a destination in Canada, the eastern provinces will be in the path of totality for the 2024 eclipse. St. John’s, the capital of Newfoundland and Labrador, is a particularly good choice, as it will experience totality for nearly three minutes.

Solar eclipse observation with Vespera

Some recommendations for your Eclipse observations

Here are a few recommendations we have before you get ready to pack for this once-in-a-lifetime tripe.

  1. Whether you own a Vespera or a Stellina, don’t forget to order your Vespera Solar Filter or Stellina Solar Filter to ensure an optimum observation.
  2.  Read our article about “Observing the Sun with Vespera and Stellina” on our blog so that you know exactly how your instrument works with its associated filter
  3. Read our article “Tips To View A Solar Eclipse” to get our best tips for eclipse observations


Affinity Photo image processing
Observations, Tips & News, Travel journal

Affinity Photo image processing tutorial

New 2023 version

How to process Stellina and Vespera Raw Images with Affinity Photo

Did you know that you can now export the images of your observations in a 16-bit TIFF format? This raw file allows you to apply your own image processing settings and edit the images at your convenience. By doing so, you will get better image quality and personalize the results without the hassle of stacking files yourself on astrophotography software. This tutorial explains how to process raw images with Affinity Photo, being suitable for beginners who wish to learn astronomical image processing techniques.


CONTENTS

  1. Introduction
    1. Requirements.
    2. About the technique used in this tutorial
  2. Processing steps
    1. Tone stretching.
    2. Noise reduction.
    3. Details enhancement.
    4. Star reduction
    5. Color grading
    6. Final touch
  3. Can we proceed further?

Affinity Photo image processing: how to process Stellina and Vespera raw images | introduction

Requirements: Affinity Photo software

Affinity Photo image processing: here’s a tutorial on how to process Stellina and Vespera raw images with Affinity Photo to optimize your astrophotography skills.

Affinity Photo is a raster graphics editor similar to Photoshop. It can export and read Photoshop files (.psd) but is more accessible than Photoshop because of its price, and its interface is more user-friendly. It’s available for Windows and macOS systems. An iPad version is also available.

Affinity photo is packed with features dedicated to astronomical photos, such as native support for FITS images and stacking with the use of calibration images.

The price is about 50€/$50 for a one-time purchase.

While this tutorial is made with Affinity Photo version 2, all the actions presented can also be performed with version 1. The screenshots differ mainly in the new design of the icons. For those of you using Photoshop, most of the features are similar to what you’ll see below.

The screenshot below (fig. 2) shows the main elements of the Affinity Photo interface that we will use.
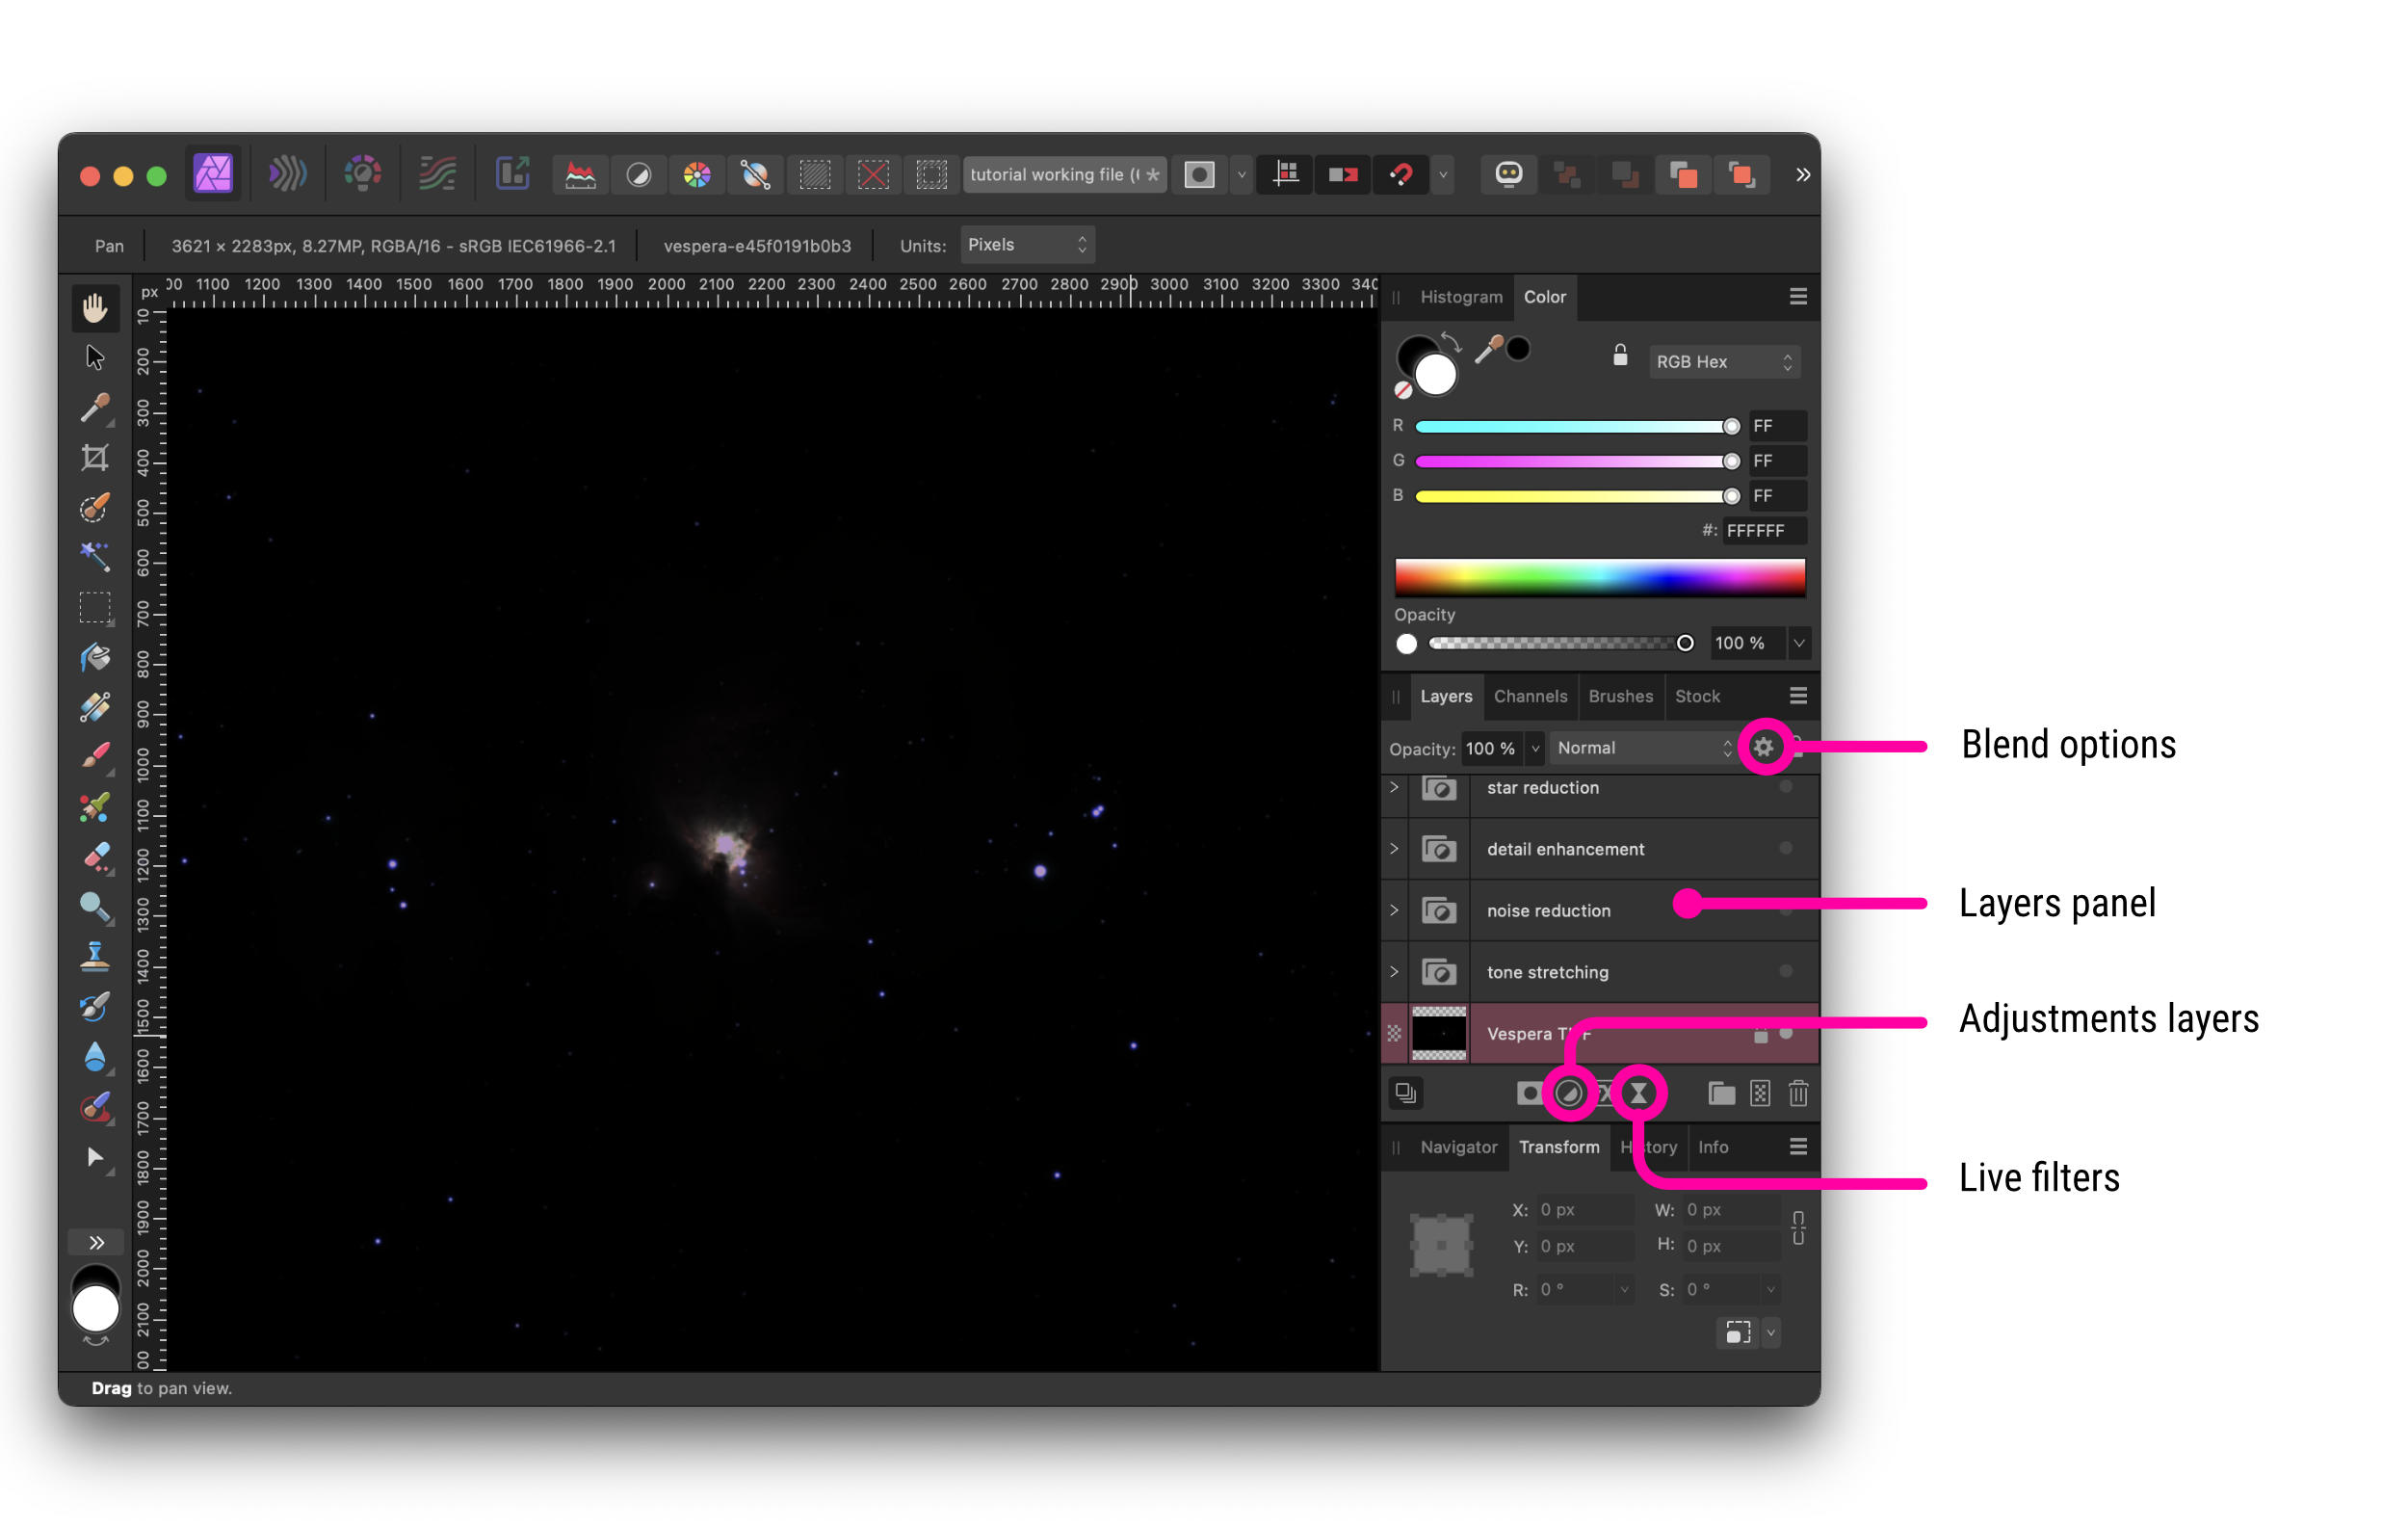
How to process Stellina and Vespera Raw Images with Affinity Photo

Fig. 2 – Affinity photo interface.

Affinity Photo image processing: how to process Stellina and Vespera raw images with Affinity Photo | the example file

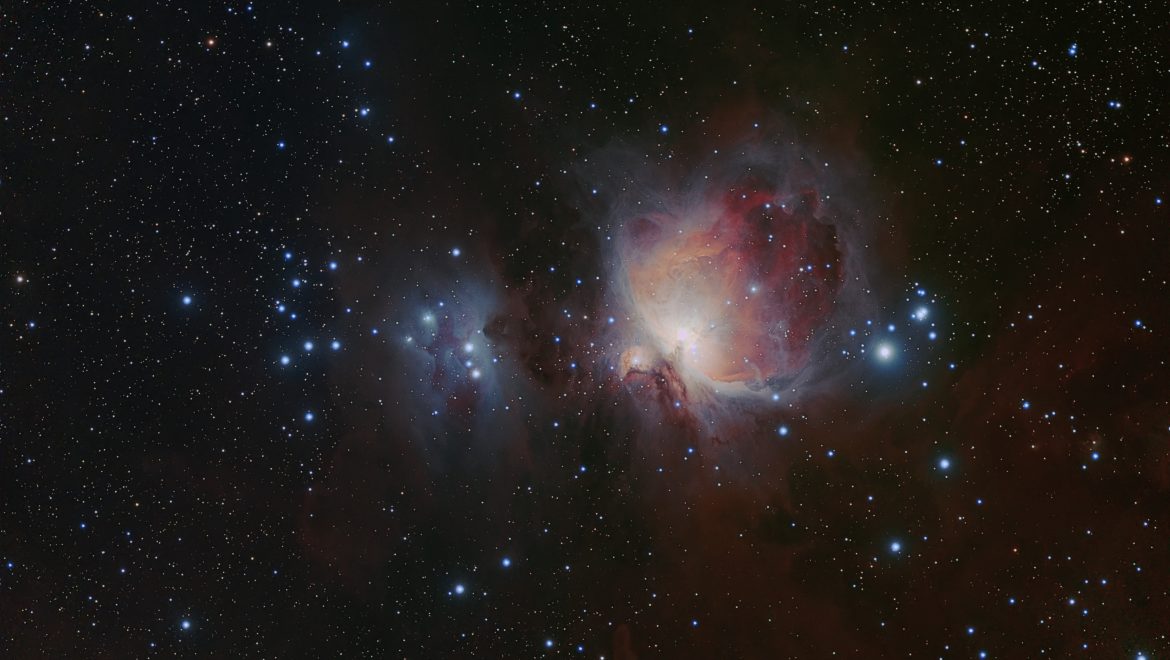
This tutorial is based on an image of the famous Orion Nebula (M42). You can download the original TIFF file (as you would retrieve it during your observation) by clicking here.
This image was captured with Vespera using our CovalENS mosaic mode, with the integration of 900 exposures of 10s (2h30 in total).

You can of course apply this tutorial to your own images. To do so, you need to make a TIFF export of the images you capture (read this article to learn more).

The better the image captured, the better the final result of the process. You may want to read the 14 tips for optimizing the performance of your observation station.

About the technique used in this tutorial

There is no unique way to process an astronomical image. The vast array of software available on the market and their various functionalities offer many ways to achieve a result.

Note that the settings required to process a particular celestial object may significantly differ depending on whether they are nebulae, galaxies, or star clusters. Celestial objects can show very different characteristics, even within their category. The advantage of manual processing over Stellina’s or Vespera’s automatic processing is precisely to allow for the treatment of objects differently depending on their features. It is important to understand that this article is not about strictly following the step-by-step tutorial, but rather understanding the notions related to image processing and being able to apply the concepts to other cases.

Affinity Photo image processing tutorial: Non-destructive processing

Most of the actions described in this tutorial are non-destructive. At any point in the process, it is possible to easily go back to previous settings, adjust them and get the result in real-time while preserving the rest of your work. The original image remains available without being directly altered.
This method offers more flexibility but also requires a more powerful computer configuration.
If at any stage of processing, your computer becomes too slow, you can “flatten” the result (i.e. merge all the processing stages) and then proceed.

Affinity Photo image processing: processing steps

Step 1: Tone stretching

At first glance, the TIFF file may confuse you (see figure 2): the image appears almost completely dark. Actually, the signal does exist. What we can see at this point is basically the heart of the nebula and the brightest stars. To show the whole nebula, it is necessary to “stretch” the dark tone part of the histogram of the image. This step is called tone stretching.

How to better understand the role of tone stretching

The range of shades that a computer screen can display (the dynamic) is much smaller than that of the TIFF file (256 levels per color for the screen vs. 65536 levels per color for the TIFF file). This is why we only see the very bright parts of the image on our screens.
Nebulae and galaxies are much less bright than the brightest stars. In astrophotography, it is the dark part of the image that we want to highlight.
The “tone stretching” allows for emphasis the dark tones compared to light tones.

Once you have opened the image with Affinity Photo, pay attention to the panels on the right (see figure 2). Make sure the “Layers” panel is visible.

Like most image processing software, Affinity Photo is based on a system of superimposed layers to compose the final image. Some layers may contain an image, while others contain adjustment layers whose effect affects all the visible underlying layers.

To achieve the “tone stretching”, we will use adjustment layers.

  • At the bottom of the layers panel, click the “adjustments” icon (fig. 2). In the pop-up menu, choose “levels”.

A new panel shows a histogram of the image (the signal distribution across the image) as well as the available controls. The histogram shows that the majority of the signal in the image is located in dark tones (left part of the histogram).
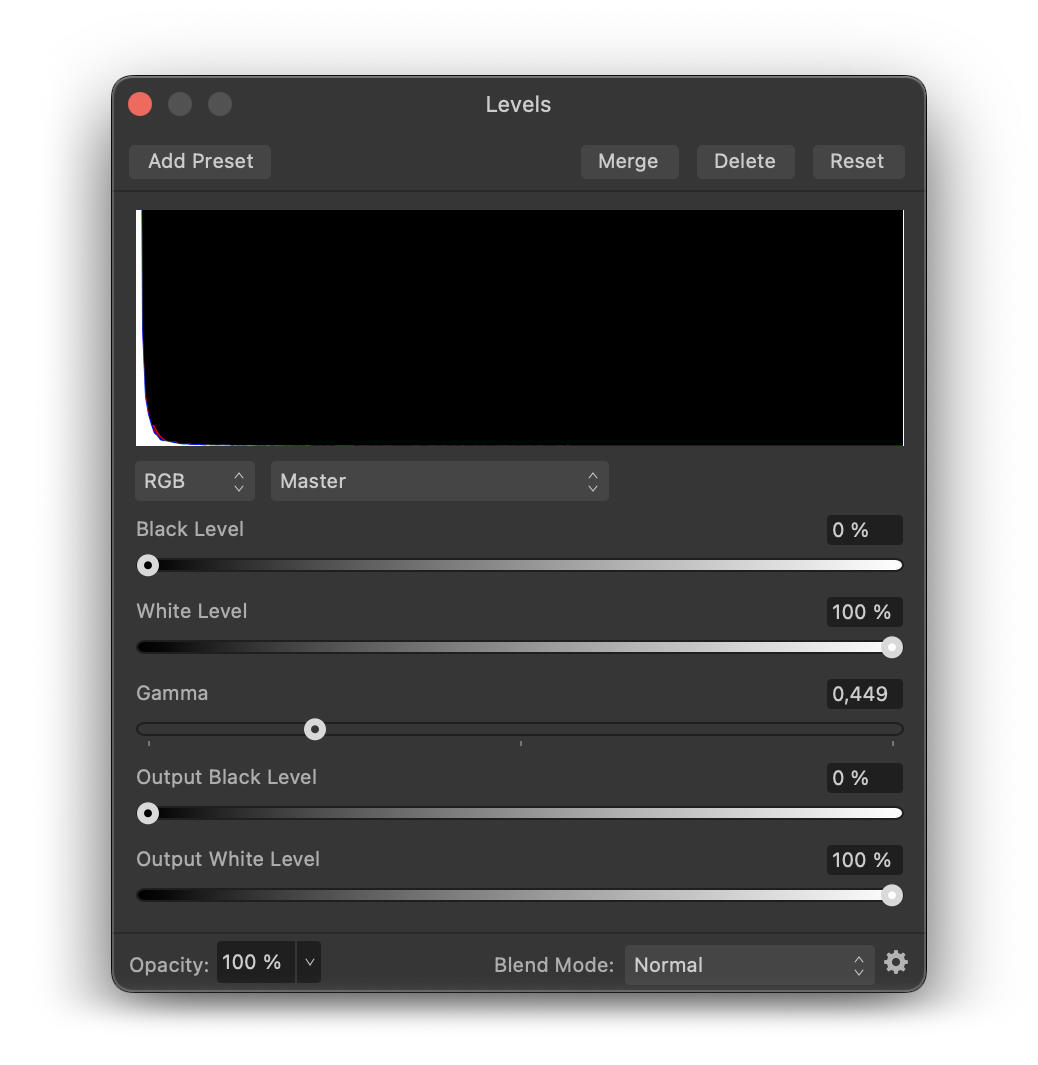
How to process Stellina and Vespera Raw Images with Affinity Photo

fig. 3 – gamma setting

  • Bring the “gamma” slider to the left to emphasize the darker tones until the nebula appears but without getting the sky background too bright. For this image, I recommend setting the gamma to 0.45 (if you apply this tutorial to another image, the setting will probably be different).

Let’s proceed with another tool to make the nebula pop without increasing the brightness of the sky background.

  • Make sure the Level adjustment layer is selected and click again on the “adjustments” icon at the bottom of the layers palette. Then choose “curves” from the list.

A new layer appears on top of the layer “Levels adjustment” and a new panel displays the corresponding controls (fig. 4, left part).
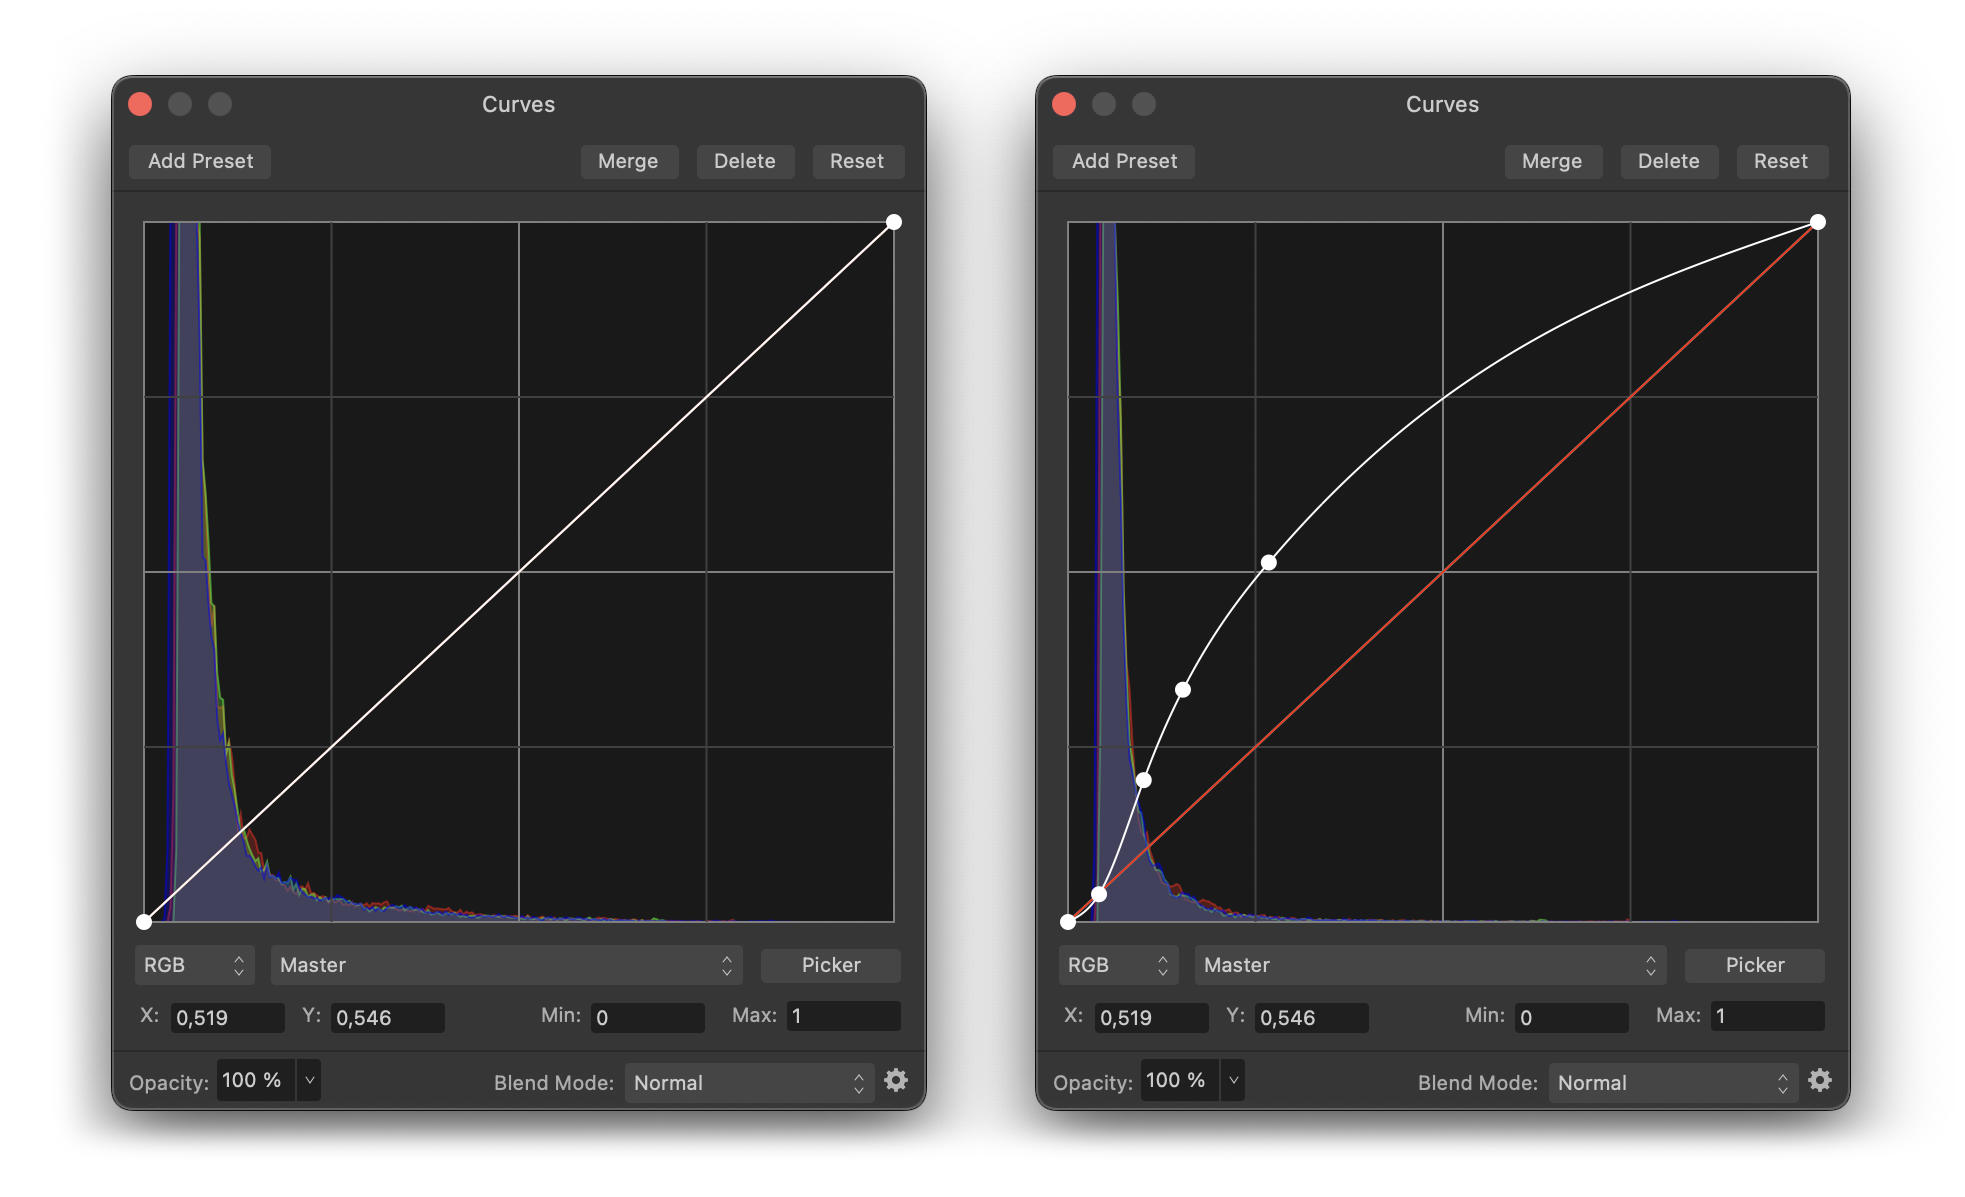
How to process Stellina and Vespera Raw Images with Affinity Photo

Fig. 4 – The curves adjustment tool

How to better understand tone curves

The tone curve graph allows you to selectively increase or decrease the brightness of the image areas according to the brightness they already have. For example, you can decide to increase the brightness of dark areas without changing the brightness of areas that are bright enough.

The left side of the graph (Figure 6 on the left) stands for the very dark tones, called shadows (or blacks), while the right side refers to the very light tones ( “whites”). In between are the dark mid-tones and the light mid-tones.

The vertical axis of the graph shows the brightness value for each tone: minimum (black) at the bottom, and maximum (white) at the top. At first, the curve that runs through the graph consistently indicates that the shadows (on the left) are extremely faint, and the highlights on the right are very bright.


By clicking on the curve, you can change its shape in order to increase the brightness level of certain tones without affecting others.
For our purpose, we want to increase the brightness of the nebulosities without increasing the highlights (to avoid “overexposing” them) or the black tones (so as not to make the sky background too bright).

  • Click the curve on the dark tones side to add a control point. Then move it upward to increase the brightness of that tone range.

The darker parts come out more but the very bright areas become burnt. We need to add another control point on the curve to bring the brightness of the highlights back to their original values.

  • Add the required control points to the curve so that it adopts a shape similar to Figure 4 on the right.

We are now tempted to make the nebulosities pop out even more. Rather than readjusting the tone curve we’ve just set, adding a second layer of “curve adjustment” may be better to proceed gradually.

  • Click on the “adjustments” icon at the bottom of the layers palette and choose “curves”.
  • Add control points on the new tone curve (fig. 5) in order to highlight the nebula while preserving the sky background and the very bright parts.
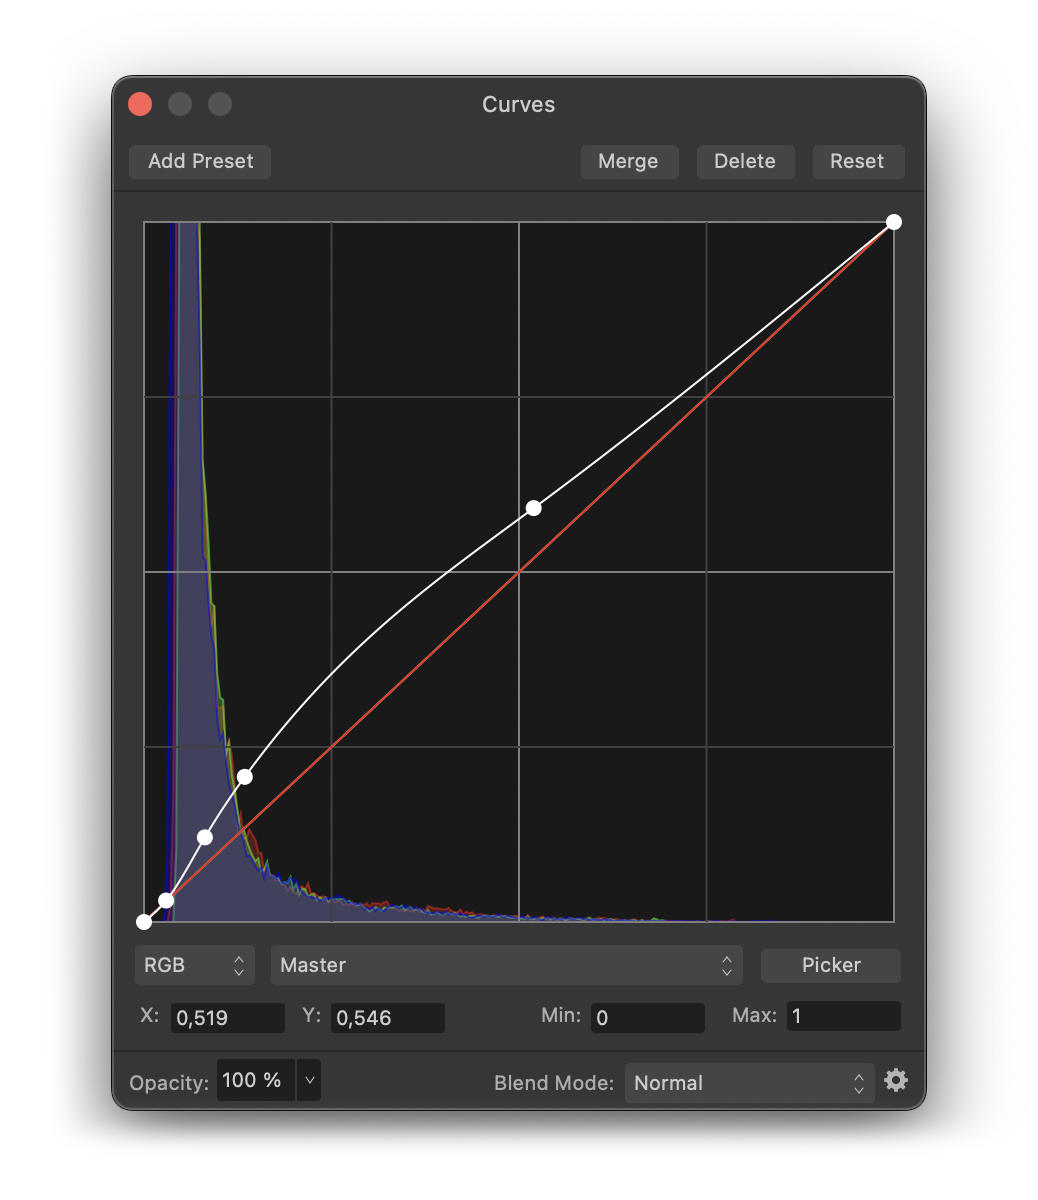
How to process Stellina and Vespera Raw Images with Affinity Photo

Fig. 5 – second setting of the tone curve.

Here is the result you should get at the end of this step, compared to the starting image.

Step 2: Noise reduction

While zooming in on the image, we observe the presence of “noise”. The noise is this kind of granulation that appears mainly in the dark areas of the image.
The noise is distributed randomly and evenly across the image. It is less noticeable in the bright areas because the weaker light intensity of the noise is overpowered by the strong “signal” of the bright areas.

How to better understand the causes of image noise

Noise is initially present on any image captured by an electronic device. It can be produced by the image sensor and circuitry of a digital camera. It’s possible to limit the noise generated by the sensor by cooling it. This is why some experienced astrophotographers and professional astronomers use cooled cameras.

When processing an image, the various manipulations performed to bring out the details also have the negative side effect of bringing out the noise.
Let’s reduce it before it becomes too damaging for the following manipulations.

  • At the bottom of the layers palette, click on the “live filters” icon and choose “denoise” from the list
  • A new layer appears in the layers panel. Make sure it is on top of the layer stack. Otherwise, drag it over the “Curve Settings” layer.

Let’s start by reducing the color noise.

If you zoom in on a part of the image where only the sky background is visible, you see that what should be a dark grey area is actually a juxtaposition of pixels of different colors (Fig. 7 left)

How to process Stellina and Vespera Raw Images with Affinity Photo

Fig. 7 – Details of the noise on the sky background before and after applying the color noise reduction.

  • Make sure the colors contribution slider is set to 100% and drag the Color slider slightly towards the right. For this image, you can use a setting of 6%.

If you look again in detail at the sky background, you can see that we now get a juxtaposition of gray pixels (fig. 7, right part)

Now, let’s tackle the luminance noise. Instead of making the adjustment in the active live filter layer, let’s create a new one (in order to apply a more specific adjustment)

  • Click again on the “live filters” icon and choose “denoise”.
  • Make sure the “Luminance Contribution” slider is set to 100%, the “Color” slider to 0%, and the “Luminance Detail” to 50%, and then drag the “Luminance” slider to the right to reduce the noise in the image.

The higher the “Luminance” value, the less noise there will be in the image. Be careful, however. Drastically reducing noise also reduces the details in the image. You need to find the right compromise.

For this example, I suggest setting the “Luminance” slider to 12%.

Noise reduction has been applied to the entire image. However, we’ve found that the noise was less noticeable in the light areas. It would be interesting to apply noise reduction only in the darker areas and thus keep all the details in the lighter areas.

We can achieve this result by controlling the blending options of the “Noise Reduction” layer. We can indeed indicate that the light areas of the “Noise Reduction” layer become “transparent” and let the underneath information pass through without modifications.

  • Make sure that the top layer “noise reduction” is selected. At the top of the layer panel, click on the “blend options” icon (see fig. 2).

The settings panel that appears shows two graphs that look like the tone curve graph we are familiar with. They work in a similar way. Let’s focus on the left-hand graph “Source layer ranges”. This allows specifying the tone ranges to which the filter will be applied (if you are working with version 2 of affinity photo, you can use the new “Luminosity range mask” instead).
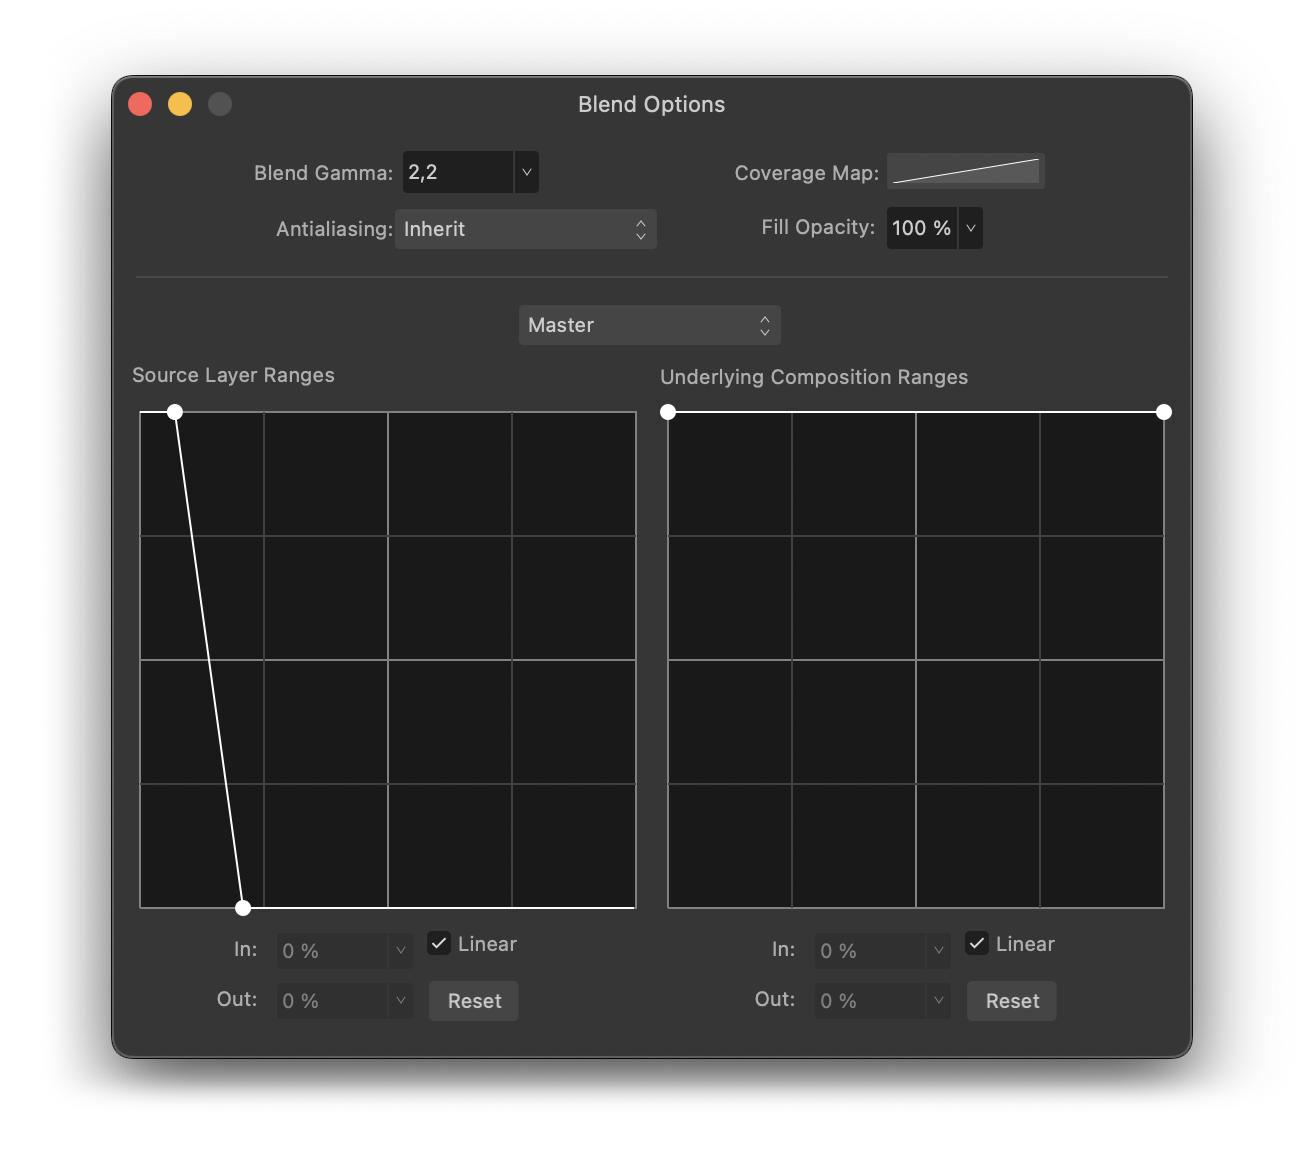
affinity-photo-tutorial-tiff

Fig. 8 – Blending options for noise reduction.

  • Click on the control point at the top right of the graph (the one corresponding to the whites) and drag it down.
  • Once completely at the bottom, drag it to the left and check in the image how the noise evolves to find the right setting.

The noise reduction layer no longer affects highlights.

  • To make sure that the “noise reduction” layer affects all the very dark areas, move the control point at the top left of the curve (shadows) slightly to the right.

The graph should look similar to the illustration above (fig. 8).

Step 3: Details enhancement

Now that we have removed the noise from the image, we can bring out even more of the very faint nebulosity below the M42 nebula and around the “running man” nebula without too much altering the quality of the rendering.

  • Add a new “curves adjustment” layer. We have to operate in a subtle and localized way on the tonal zone corresponding to these weak nebulosities.
  • In the curve setting panel, click on “picker” at the bottom right.
  • In the image, click on an area with very subtle nebulosities and while holding the click, drag the mouse cursor upward very gently. This will add a control point in the “curve setting”.
  • Drag the control point upwards to highlight the relevant part of the image.
  • Add 2 more control points on either side and drag them downward, so that the rest of the curve returns to its original position as shown in figure 9 below.
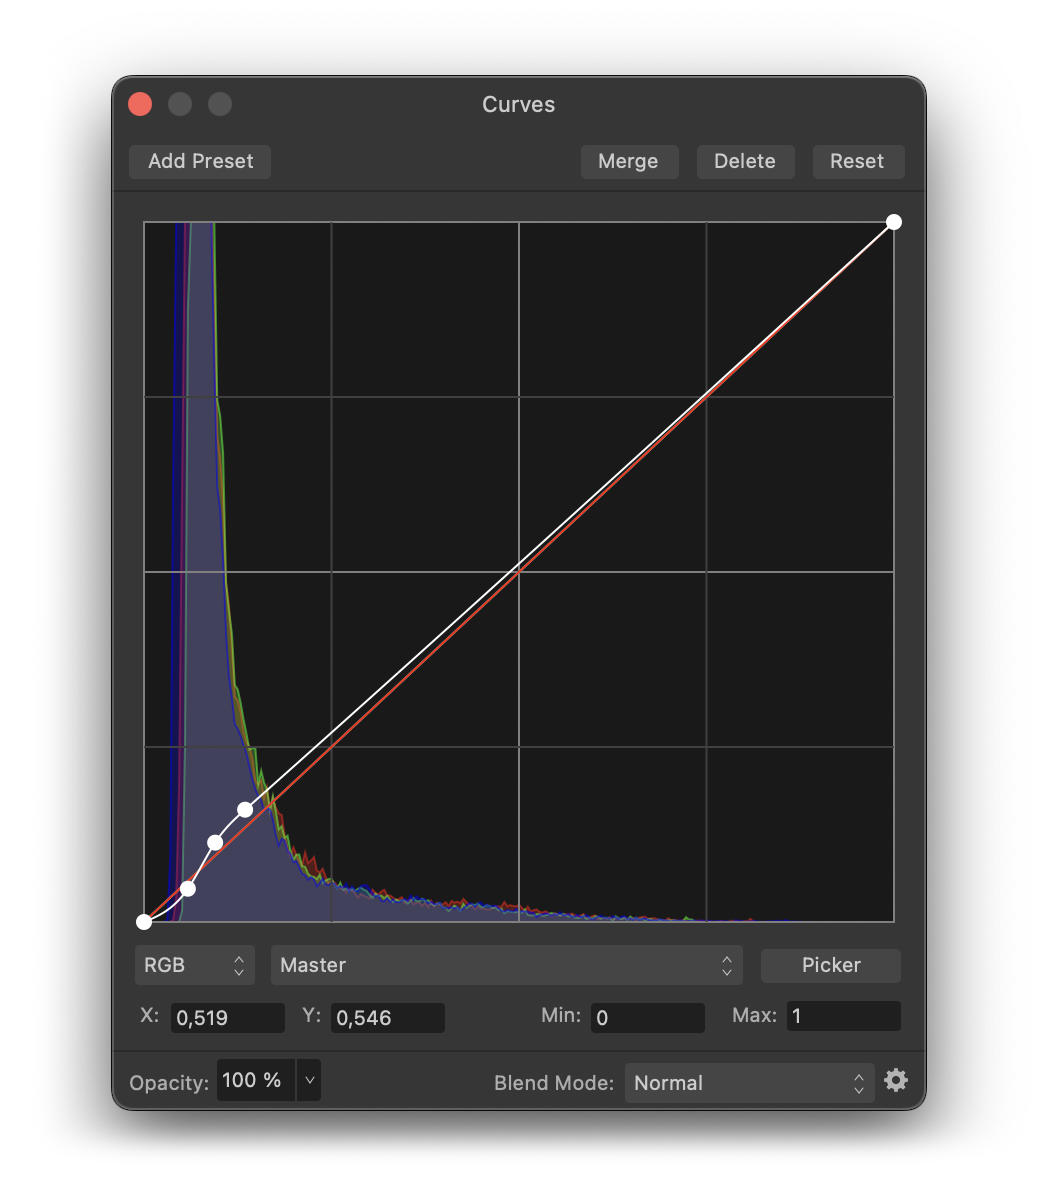
How to process Stellina and Vespera Raw Images with Affinity Photo

Fig. 9 – Tone curve settings.

Now, let’s enhance the details and the sharpness of the image.

Affinity Photo has three main tools for this: the “Clarity” setting, the “Unsharp Mask” and the “High Pass” filter. We are going to use the latter as it has the fewest undesirable side effects.

  • At the bottom of the layers panel, click on “Live Filters” (fig. 2) and choose “High Pass” from the list.
  • Make sure the new layer is placed at the top of the layer stack.

The “high-pass” filter affects a certain scale of details depending on the setting we choose. In order to act on different scales of details, we are going to apply this filter several times starting with the finest details.
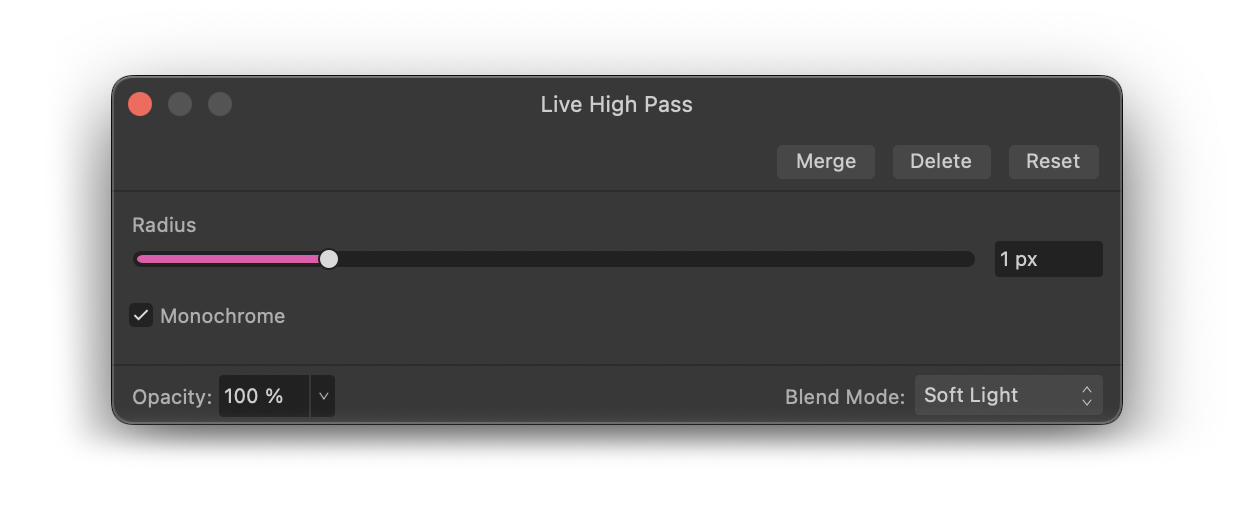
affinity-photo-tutorial-tiff

Fig. 10 – High pass filter

  • In the “live high-pass” filter settings panel (fig. 10), set the radius to 1 pixel and check the “monochrome” box, then set the blend mode to “soft light”.

The effect on the image is subtle yet noticeable. It is necessary to be particularly careful when sharpening details as this has the side effect of also increasing the noise in the image.

To accentuate the effect, let’s apply the filter again with the same settings:

  • Right-click on the name of the layer “high-pass” in the layer panel then choose “duplicate”.
  • Perform the same operation once again to get a third “high-pass” layer with a radius setting of 1 pixel (make sure that the new layer is placed at the top of the layer stack).

Now, let’s tackle the larger scale details.

  • Duplicate the top “high pass” layer again (make sure it is placed at the top of the layer stack) then double-click on it to open its settings panel.
  • Set the radius to 2 pixels.
  • Duplicate this layer twice to accentuate the effect.

Finally, let’s work on details at an even higher scale.

  • Once again, duplicate the “high pass” layer located at the top of the layer stack.
  • Open its settings panel and set the radius to 4 pixels.
  • Duplicate this layer one last time to increase the effect.

You should now get 8 “high pass” layers.

This step is complete. The figure below shows the evolution of the image between the beginning and the end of step 3.

Step 4: Star reduction

The detail sharpening has the side effect of highlighting the stars. This is an unwanted result as we want to highlight the nebula.

  • Click on the “live filters” icon at the bottom of the layers panel and choose “minimum blur”.
  • Set the radius to 1 pixel and check the “circular” box.

We note that the effect is too dramatic. Most of the small stars have disappeared but above all, the details in the nebula are completely distorted.

  • To fix this, set the opacity of the “minimal blur” live filter to 25%.
  • Duplicate the “minimal blur” layer twice.

This step is complete. The figure below compares the image between the beginning and the end of step 4.

Step 5 : Color grading

Here comes the most creative step that allows you to personalize your image with Affinity Photo.

For the moment, the Orion Nebula is quite pale compared to the images we are used to. Let’s bring out the colors, then adjust them to get a look that suits us.

  • Click on the “adjustments” icon at the bottom of the layers panel and choose “Vibrance”. Make sure the new layer is at the top of the layer stack.
  • In the corresponding new panel, bring “vibrance” and “saturation” sliders all the way up.

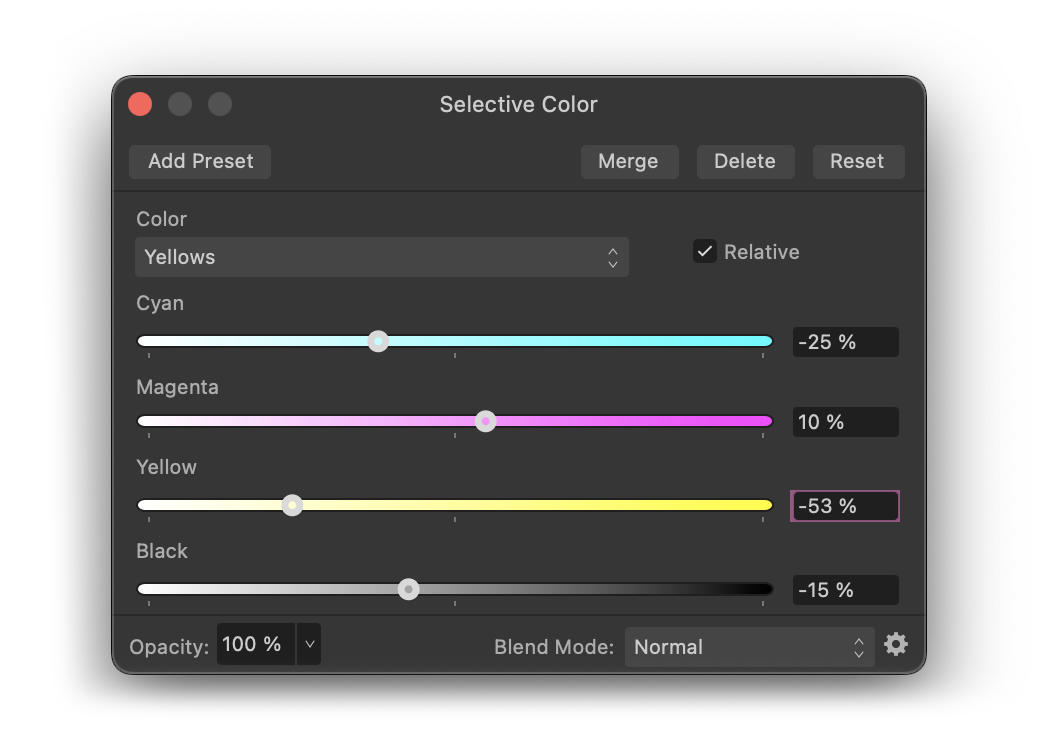
Now, let’s take advantage of the “selective color” tool to target an alter specific color. First, let’s add color contrast to the faintest nebulosities (below M42 and around “Running Man”).

  • Click on “adjustments” at the bottom of the layers panel and choose “Selective Color” (make sure the new layer is at the top of the layer stack).
  • In the color menu, select “yellow” to alter the yellow tones.
  • Bring the cyan slider to -25%, the magenta to 10%, the yellow to -55% and the black to -15% (fig. 13 below).
How to process Stellina and Vespera Raw Images with Affinity Photo

Fig. 13 Selective color correction.

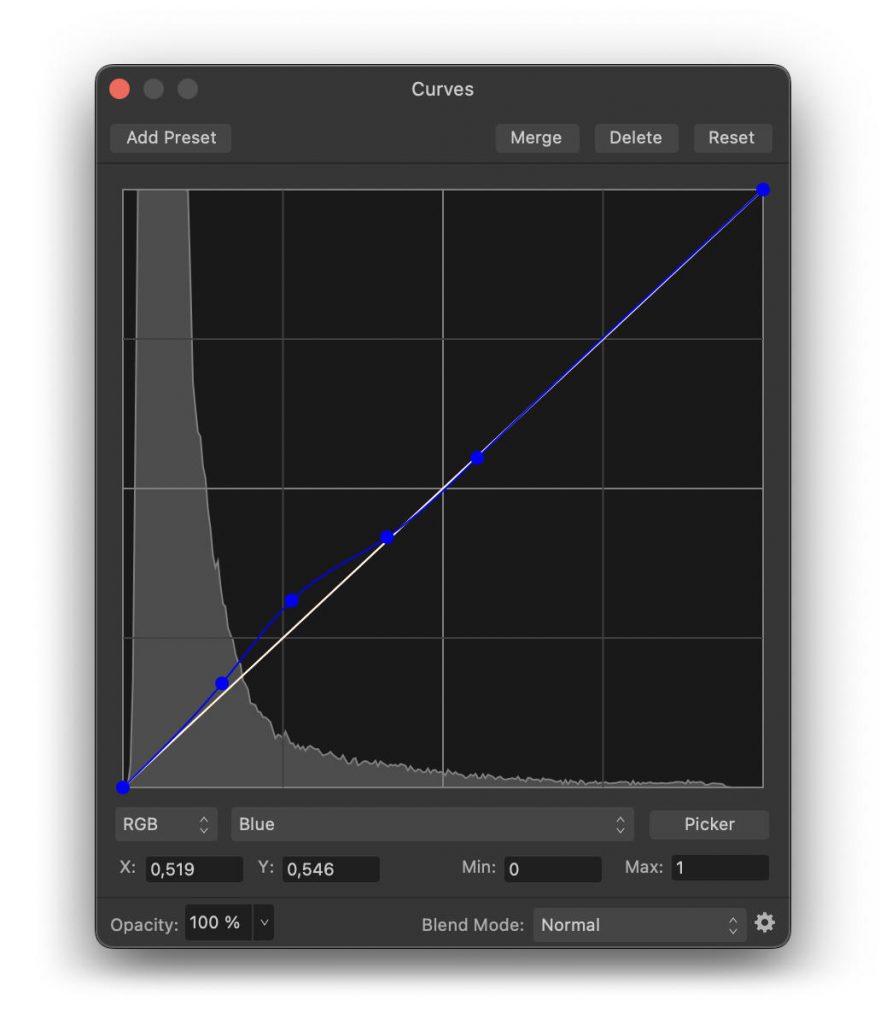
We are now going to highlight the blue areas with the help of the “curves” tool that we have already used previously.

  • Click on “adjustments” at the bottom of the layers palette and choose “Curves” (make sure the new layer is placed at the top of the layer stack).
  • In the “curve” settings panel, choose the “blue” channel in the main (master) drop-down menu.
  • Add control points on the blue curve and change their positions as shown in the figure below (Fig. 14) to emphasize the blue signal on the nebulae.
Affinity Photo image processing

Fig. 14 – Adjustment of the blue tone curve.

Let’s improve the effect with a “selective color” setting.

  • Click on the “adjustments” icon and choose “selective color”.
  • Select “blue” in the “color” menu.
  • Set cyan to 100% and yellow to 25%.

Now let’s work with the red shades.

  • Add a new “selective color” adjustment layer as above.
  • Select “red” from the color menu.
  • Set the cyan to -20%, magenta to 30%, and yellow to 80%.
  • In order to accentuate the result even more, duplicate this last “selective color” adjustment layer.

The values given above for color correction are examples and it is up to you to define how you want the nebula to look.

This step is complete. The figure below compares the image between the beginning and the end of step 5.

Step 6: Final touch

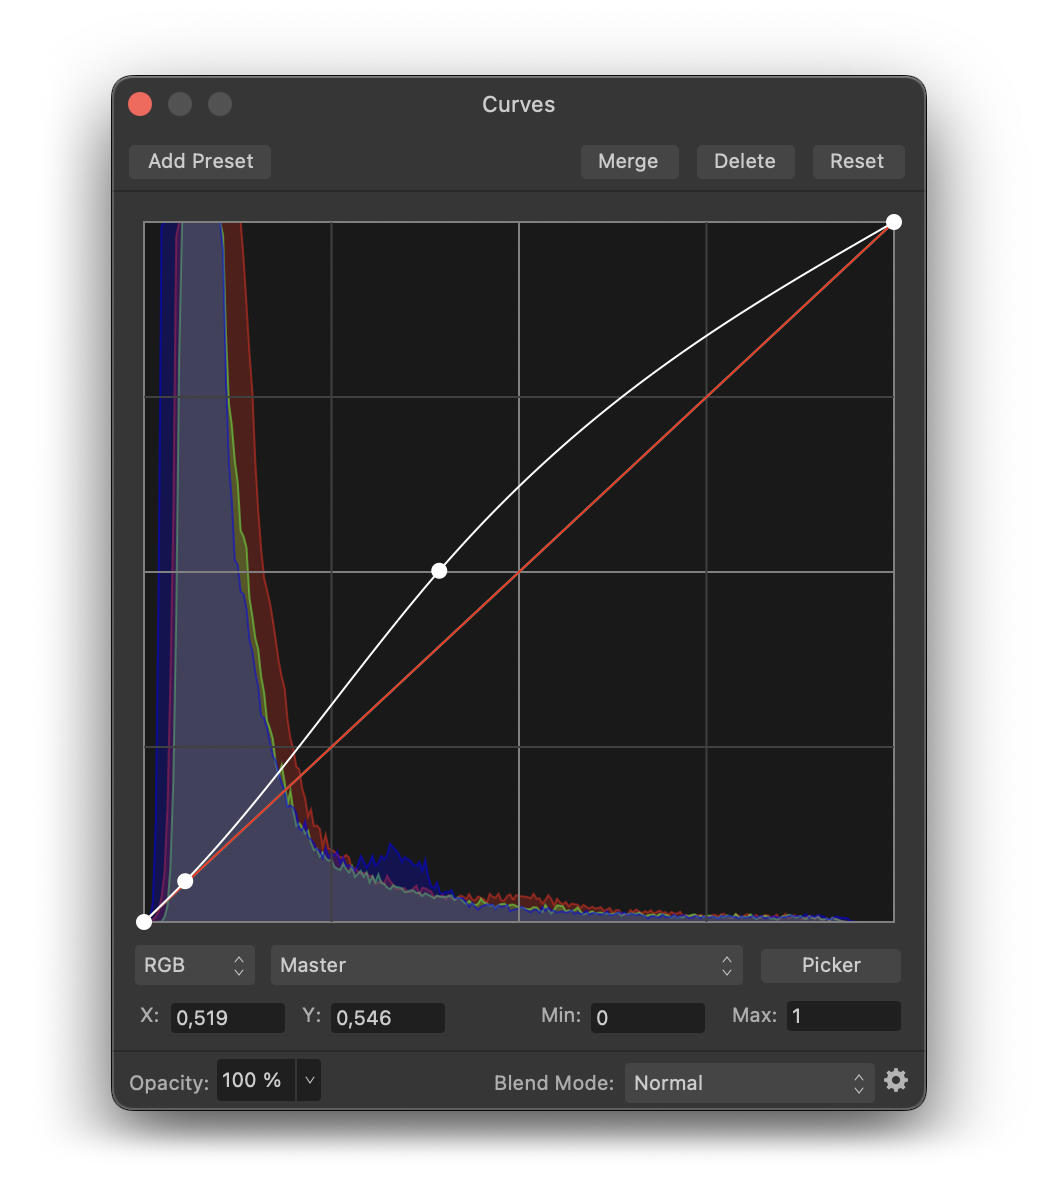
To finish the processing of this image, let’s apply a final adjustment “curves” to increase the overall brightness of the image while preserving the sky background and very bright areas.

  • Click on the “adjustments” icon and choose “curves” from the list (make sure it’s placed at the top of the layer stack).
  • Add control points to the curve to increase the brightness of the mid-tones as shown in Figure 16 below.
affinity-photo-tutorial-tiff

Fig. 16 – Final adjustment of the tone curve.

Examining the image, we can see on the left side that the sky background has a slight magenta cast. To fix this, we are going to use a specific Affinity Photo feature dedicated to astrophotography.

To use this feature, we must first generate a new layer with the result of all the adjustments we have made so far.

  • Right-click on the layer at the top of the layer stack and choose “merge visible” from the menu.
  • Make sure the newly created layer is selected.
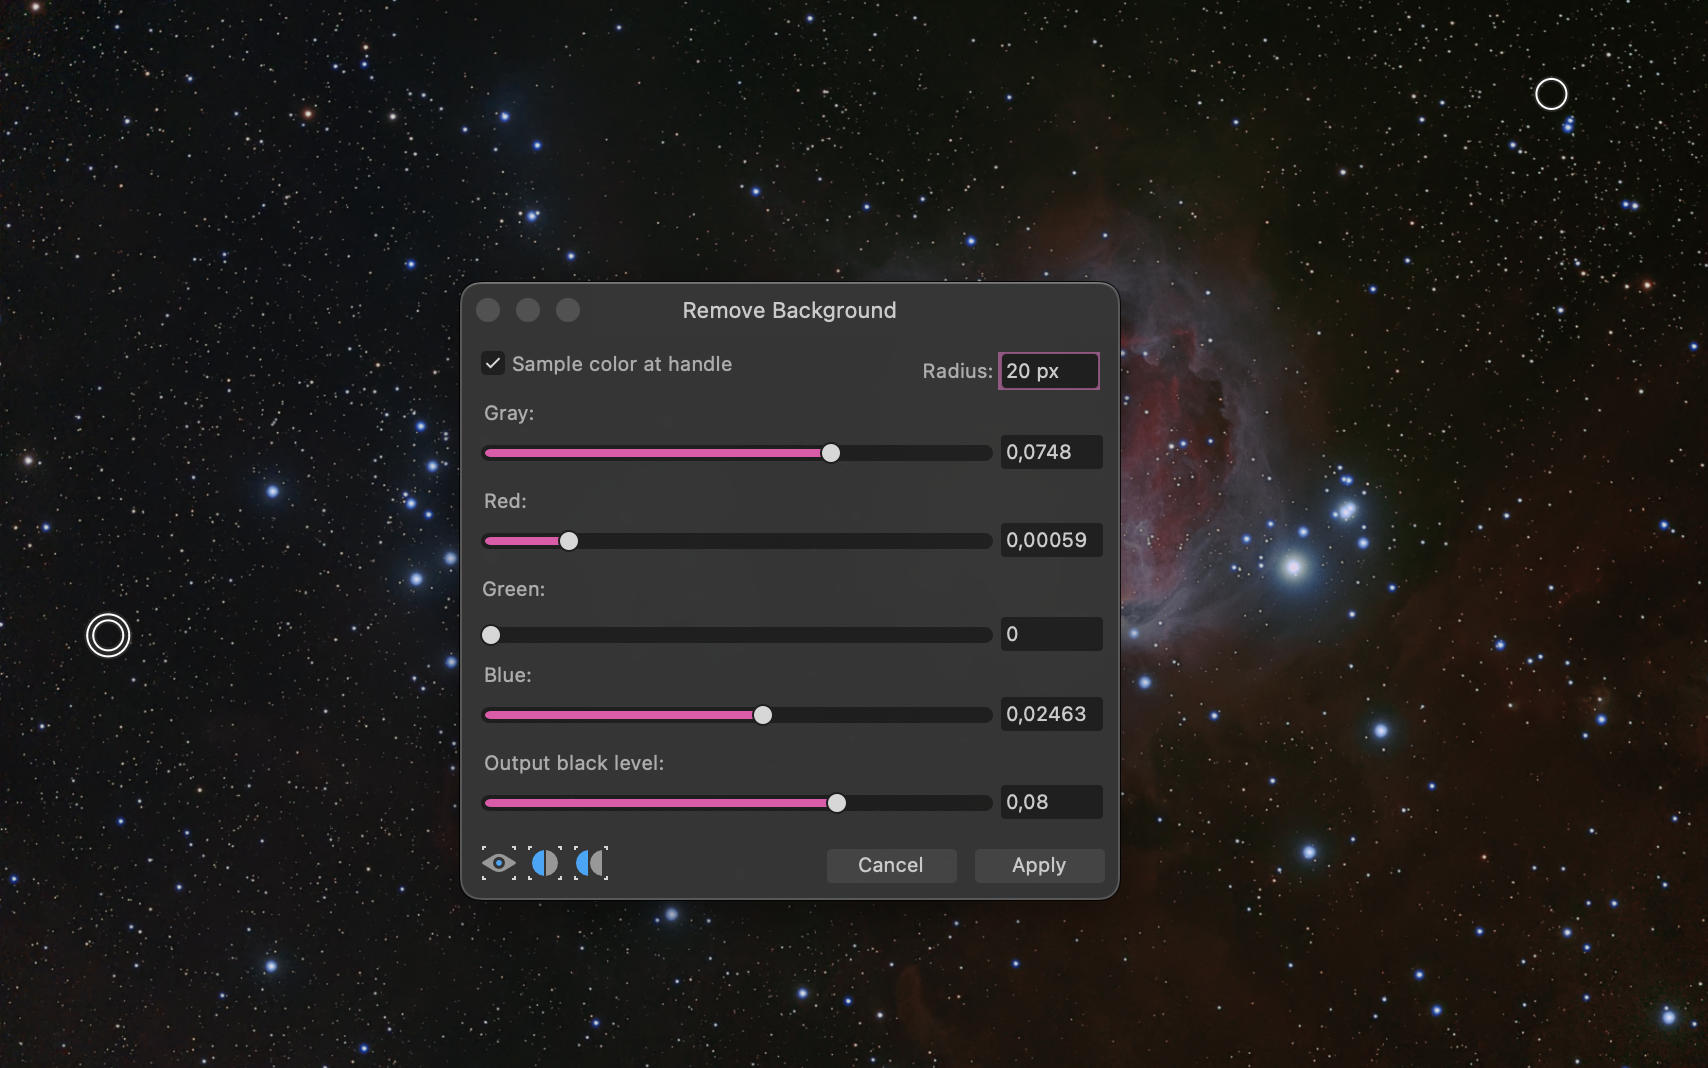
  • In the main menu “filters” of Affinity photo, choose “astrophotography”, then “remove background”.
  • In the new panel, set the “radius” to 20 px.

At the center of the image, you can see a handle in the form of two small concentric circles.

  • Move this handle to the right of the image on an area where only the sky background is present, i.e. without stars or nebulas.
  • In the “remove background” panel, check “sample color at handle”.
  • Click on the image to create a second handle this time in the upper right part of the image where only the sky background is visible.
  • In the “remove background” panel, adjust the “output black level” slider to set the intensity of the background gradient removal.
  • Click “apply”.

A value too low will make the faint nebulosities disappear. So you have to find the right compromise to soften the magenta background gradient while keeping all the details. For this example, I recommend a value of 0.08 for the “output black level”.
Affinity Photo image processing:

Fig. 17 – Removal of the sky background gradient.

This step is complete. You can see the final result in figure 1 at the beginning of this tutorial. The original file of the final result is also available in the tutorial files for download.

Affinity Photo image processing: shall we proceed further?

We can now consider the processing of the Orion Nebula image from the 16-bit TIFF export of Vespera to Affinity Photo as complete. We have managed to get a more detailed, brighter, and more colorful image.

It’s tempting to go further and accentuate the details and colors even more. The real question is: should you do it?

When it comes to image processing, there are no laws or rules. However, the processing is often considered successful when the image retains a natural appearance. By further processing, you will certainly increase the detail, but the image may look less natural. Also, keep in mind that by further processing you will also accentuate the defects in the image.

Remember that each celestial object is different and will require customized settings. You will improve your skills by practicing and also asking for advice from other astrophotographers.

Feel free to share the results of your work on social networks and in the Facebook group “My Singularity by Vaonis”.

If you have been working with a non-destructive process, it is easy to adjust the settings of the intermediate steps to try to achieve a result that suits you better.

We hope you enjoyed this tutorial on how to Affinity Photo image processing.

Our online buy steroids store specializes in delivering steroids across the US.